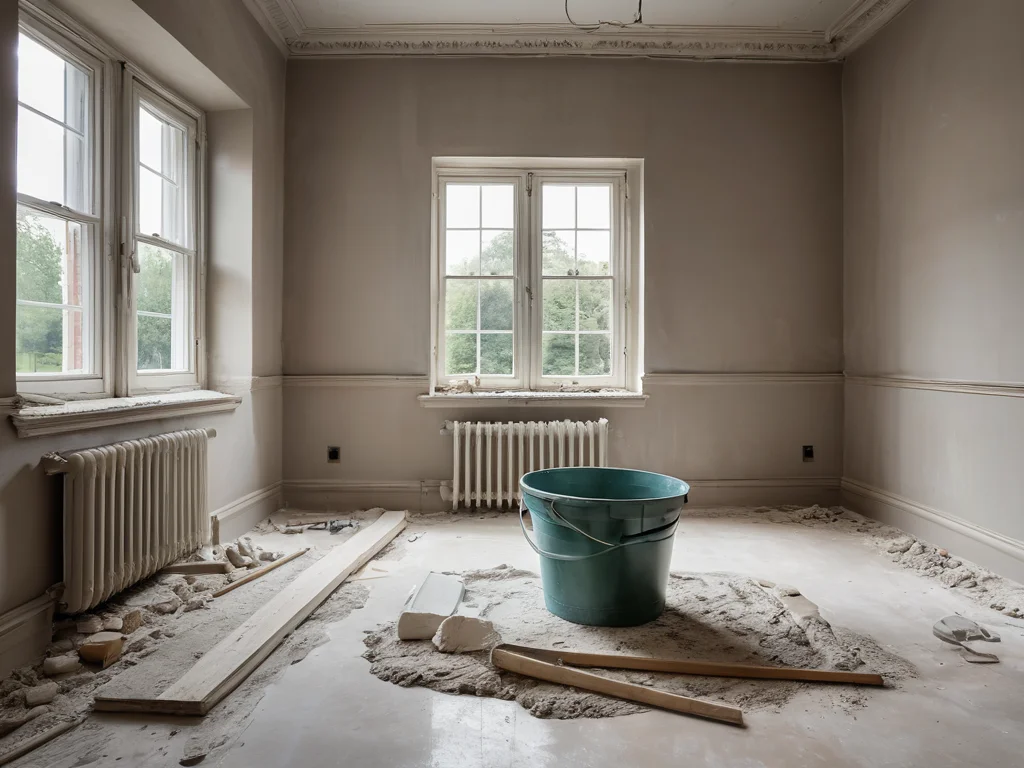
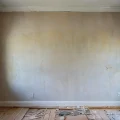
Greetings, dear readers of design-foto.ru! Today we will discuss a seemingly simple, yet very important stage of any renovation – preparing plaster mix. The quality of the final finish, the durability of the coating, and, of course, your own comfort during the work directly depend on how correctly you mix this compound. After all, you must agree, it is much more pleasant to work with a plastic, manageable plaster than with a lumpy, separating mass that tends to fall off the trowel.
Many beginners mistakenly believe that mixing plaster is a trivial task that even a child can handle. However, as in any endeavor, there are nuances and secrets here. Today, as a professional designer and your guide to creating a cozy home, I will share all the intricacies of this process with you. We will cover everything from choosing the right mix to achieving the ideal consistency. Get ready, because after reading this article, you will become true masters of your craft!
Why is it important to know how to properly prepare plaster mix? The foundation for your renovation success.
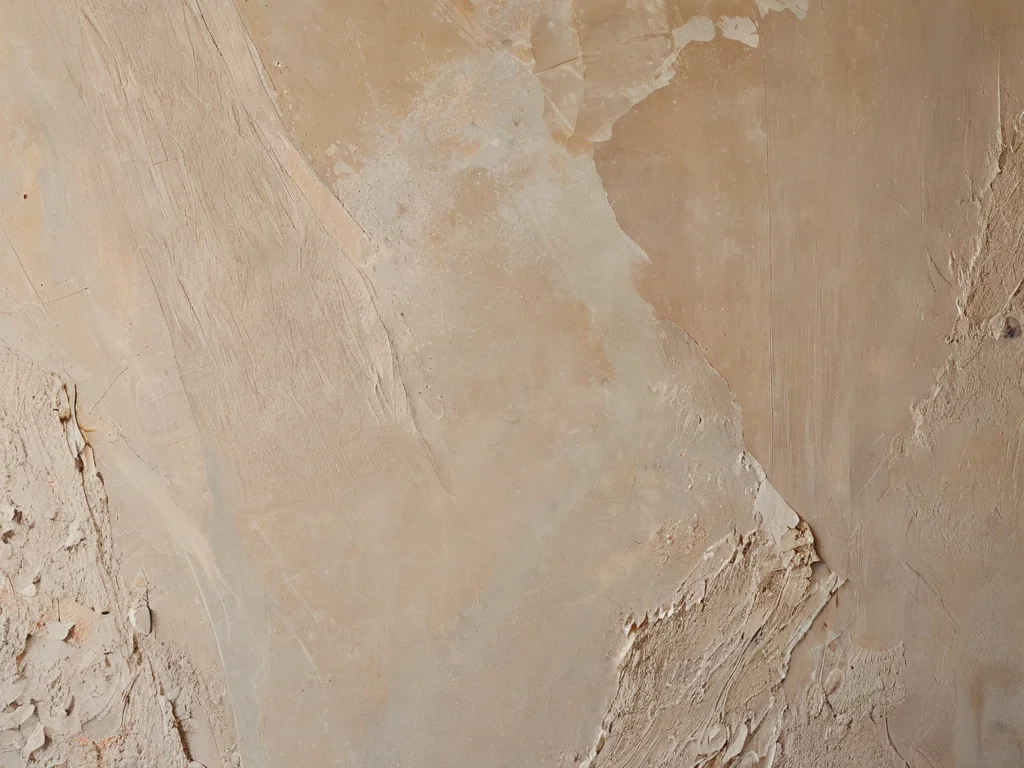
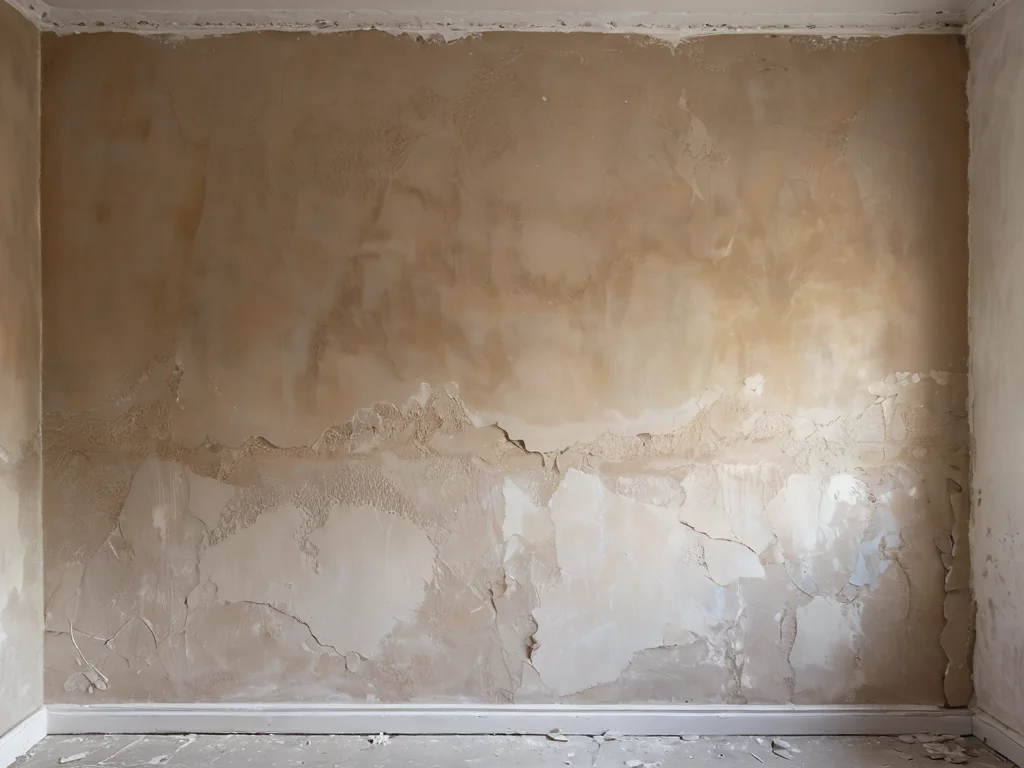
It might seem like mixing dry mix with water is the simplest thing. But it is precisely at this stage that hidden pitfalls lie, which can lead to serious problems. Improperly prepared plaster mix means not only wasted material and time but also potential wall defects: cracks, delamination, unevenness, which will have to be corrected, and sometimes completely redone.
Let’s break down why it’s so important to pay attention to this stage:
- Strength and Durability: Properly mixed plaster has optimal water-cement (or water-gypsum) ratio, ensuring maximum strength and adhesion to the substrate. This guarantees that your plaster will not crack or peel over time.
- Ease of Application: Plastic, uniform plaster is easily applied to the wall, spreads well with a trowel, does not crumble, and does not drag the tool. This significantly speeds up the process and makes it less labor-intensive.
- Aesthetics of the Final Finish: The quality of surface preparation is 80% of the success of the final finish. A smooth, even layer of plaster is the key to a perfect result, whether for painting, wallpapering, or decorative finishing.
- Material Economy: Properly mixed plaster is easier to work with, results in less waste, saving not only time but also money.
- Defect Prevention: Mixing errors can lead to uneven setting, shrinkage cracks, and delamination, requiring additional effort and cost for correction.
Therefore, before you start applying plaster, make sure you fully understand how to prepare the mix correctly. This is the foundation upon which the entire further success of your renovation is built.
Types of Plaster Mixes: Which Mix to Choose for Different Tasks?
The modern construction materials market offers a huge selection of plaster mixes. To make the right choice and, consequently, prepare the mix correctly, it’s important to understand what each of them is intended for. A universal approach cannot be applied to different materials. Let’s look at the main types of plaster mixes:
1. Cement Plasters:
- Composition: Main components are cement, sand, and various additives (plasticizers, air-entraining agents, etc.).
- Purpose: Ideal for exterior work, damp rooms (bathrooms, kitchens, toilets), and for leveling rough surfaces, brickwork, and concrete. They are very strong, moisture-resistant, and frost-resistant.
- Preparation Features: Require more thorough and prolonged mixing. The water-cement ratio is crucial for strength.
- Pros: High strength, durability, moisture resistance, frost resistance, low cost.
- Cons: Dry slowly, can shrink and crack if applied incorrectly, more labor-intensive to work with than gypsum plasters.
2. Gypsum Plasters:
- Composition: Base is gypsum, filler (sand or limestone), polymer additives to improve plasticity and adhesion.
- Purpose: Excellent for interior work in dry rooms (living rooms, bedrooms, hallways). They create a smooth, even surface ready for painting or wallpapering, often without needing additional putty.
- Preparation Features: Mix faster than cement plasters. Require precise adherence to water proportions, as gypsum loses its properties with excess water.
- Pros: Dry quickly, easy to apply, plastic, create a smooth surface, regulate humidity in the room (breathable material), environmentally friendly.
- Cons: Sensitive to moisture (unsuitable for wet areas), less durable than cement plasters, more expensive.
3. Lime Plasters:
- Composition: Base is slaked lime, sand, sometimes with added cement for increased strength.
- Purpose: A traditional material used for both interior and exterior work. They are highly vapor-permeable and have antiseptic properties.
- Preparation Features: Preparation may take time (if unslaked lime is used).
- Pros: High vapor permeability, antiseptic properties, plasticity, durability (with proper preparation).
- Cons: More labor-intensive to prepare and apply than gypsum plasters.
4. Polymer (Acrylic, Silicone) Plasters:
- Composition: Ready-to-use pastes with polymer binders.
- Purpose: Often used as decorative finishing coatings, as well as for final leveling.
- Preparation Features: No preparation required – just open the can and use.
- Pros: High elasticity, abrasion resistance, moisture resistance, variety of textures and colors.
- Cons: High cost, low vapor permeability (can create a greenhouse effect).
Which mix to choose?
Your choice should be based on:
- Room Purpose: Damp areas – cement or special moisture-resistant mixes. Dry living rooms – gypsum.
- Substrate Type: For concrete, brick, blocks – cement or cement-lime. For drywall, GVL, foam blocks – gypsum.
- Finishing Requirements: If perfect smoothness for painting is needed – gypsum plaster is often the best option. If maximum strength and moisture resistance are important – cement.
- Budget: Cement mixes are generally cheaper than gypsum ones.
Important! Always carefully read the manufacturer’s instructions on the packaging. They indicate the recommended proportions, application temperature, and specific working features of the mix.
Ideal Proportions: How to Calculate Component Ratios for a Strong Mix

Proportions are perhaps the most critical aspect of preparing any mix. An incorrect ratio of dry mix to water is a direct path to defects. There is no room for guesswork or approximation here. The manufacturer indicates the recommended amount of water for a specific volume or weight of dry mix on the packaging. This recommendation should be followed first and foremost.
Why is an exact ratio so important?
- Cement Mixes: The rule here is: the less water, the stronger the mix. However, too little water will make the mix unusable, dry and crumbly. Excess water, on the other hand, reduces strength, increases shrinkage, and the likelihood of cracks.
- Gypsum Mixes: Gypsum is a material that enters into a chemical reaction (crystallization) when interacting with water. This reaction occurs only at a specific ratio of gypsum to water. Excess water leads to some gypsum remaining unbound, which reduces strength, increases setting time, and can cause deformation. Insufficient water will lead to too rapid setting and inability to work properly.
How to calculate?
1. Read the label: Always look for information on the recommended water amount on the packaging first. It is usually indicated as “per 1 kg of dry mix” or “per 1 bag (25 kg)”. For example: “3.5-4.0 liters of water per 10 kg of dry mix”.
2. Use measuring containers: Do not try to measure water by eye or with cups. Use a construction bucket with a measuring scale or a regular measuring cup. Accuracy is your best ally.
3. Add water gradually: Do not pour all the water at once into the dry mix. It’s better to first pour the dry mix into the container with water (or vice versa, depending on the instructions), and then gradually add water until you reach the desired consistency. When preparing large volumes, when you add dry mix to pre-measured water, be careful not to exceed the recommended water volume indicated by the manufacturer.
4. Consider mix humidity: If you are using an already prepared, previously mixed batch (e.g., if you mixed too much), remember that it has already absorbed some moisture from the air. Be especially careful when adding water to such a mix.
5. Proportions for different types of mixes:
- Cement-sand mixes (for rough work): Classic proportion – 1 part cement to 3-4 parts sand. Water is added as needed to achieve a plastic but not fluid consistency.
- Ready-made dry mixes: Always follow the manufacturer’s instructions. For gypsum mixes, about 0.4-0.5 liters of water per 1 kg of dry mix is often required. For cement mixes – a bit more, about 0.5-0.7 liters of water per 1 kg.
Important to remember: Adding more water than indicated in the instructions will not make the mix “more fluid” in a good way, but will only weaken its structure. If you have added too much water, it is better to add a little dry mix to achieve the desired consistency, but this is not always possible and can disrupt the factory proportions of additives.
Preparation and Mixing: Step-by-Step Guide to Preparing Plaster Mix
Now that we’ve covered the types of mixes and proportions, let’s move on to the preparation process itself. This is a simple but attention-requiring stage. By following this step-by-step guide, you can prepare an ideal plaster mix.
Step 1: Prepare the workspace and tools
- Clean container: Prepare a clean container for mixing. This can be a plastic bucket, basin, or a special concrete mixer. The container should be large enough to hold the entire volume of the mix with some extra space.
- Clean water: Use clean, cold water. Water with impurities, dirt, or salt cannot be used.
- Tools: Prepare the necessary tools (we will discuss them in more detail later) – trowel, spatula, corner trowel, construction mixer with a whisk attachment.
Step 2: Measure the water
- Follow proportions: Using a measuring bucket or cup, measure the exact amount of water indicated on the dry mix packaging. It’s better to pour slightly less water than indicated initially, so you can add more if needed later.
- Water temperature: It is advisable to use room temperature water. Too cold water will slow down setting, while too hot water will speed it up.
Step 3: Add the dry mix
- Water first, then mix (recommended): Carefully pour the dry mix into the container with water. Try to distribute it evenly over the entire surface of the water to avoid dry clumps.
- Or vice versa: Some craftsmen prefer to first pour the dry mix into the container and then gradually add water while constantly mixing. This method can be convenient for small volumes.
- Don’t mix too much: Mix only as much plaster as you can use within the time indicated by the manufacturer for the mix’s workability. This is usually 30-60 minutes.
Step 4: Initial mixing
- Don’t overdo it: First, lightly mix the dry mix with water to slightly moisten the entire dry mass.
- Let it rest (for gypsum mixes): For gypsum mixes, it is often recommended to let them “rest” for a few minutes (usually 2-5 minutes) after the initial mixing. This allows the gypsum to absorb water evenly and begin the hydration process.
Step 5: Thorough mixing
- Until uniform: Now, proceed with thorough mixing. The goal is to achieve complete uniformity, without dry clumps or separation.
- Use a mixer: For best results (especially for gypsum plasters), use a construction mixer with a whisk attachment. It will ensure more even mixing and aeration of the mix (which is important for plasticity).
- Mix to the desired consistency: Add water or dry mix little by little to achieve the desired consistency (more on this in the next section).
Step 6: Re-mixing (if necessary)
- Remove lumps: If there are still lumps after the first mix, mix the plaster thoroughly again.
- Add water: If the mix is too thick, carefully add a little water. If it’s too thin, add a little dry mix. Important: always add water or mix in very small portions and mix well after each addition.
Step 7: Check consistency
- Visual inspection: The mix should be uniform, smooth, and free of lumps.
- Trowel test: Scoop some plaster onto a trowel. It should not slide off too quickly, but it should not be too thick to easily slide off the tool.
Step 8: Clean tools
- Immediately after use: It is very important to thoroughly rinse all tools with water immediately after finishing mixing. Dried plaster is very difficult to remove and can damage your tools.
By following these simple steps, you can prepare a high-quality plaster mix that will serve as an excellent base for your finishing work.
Mixing Tools: From Trowel to Construction Mixer – What’s Best?
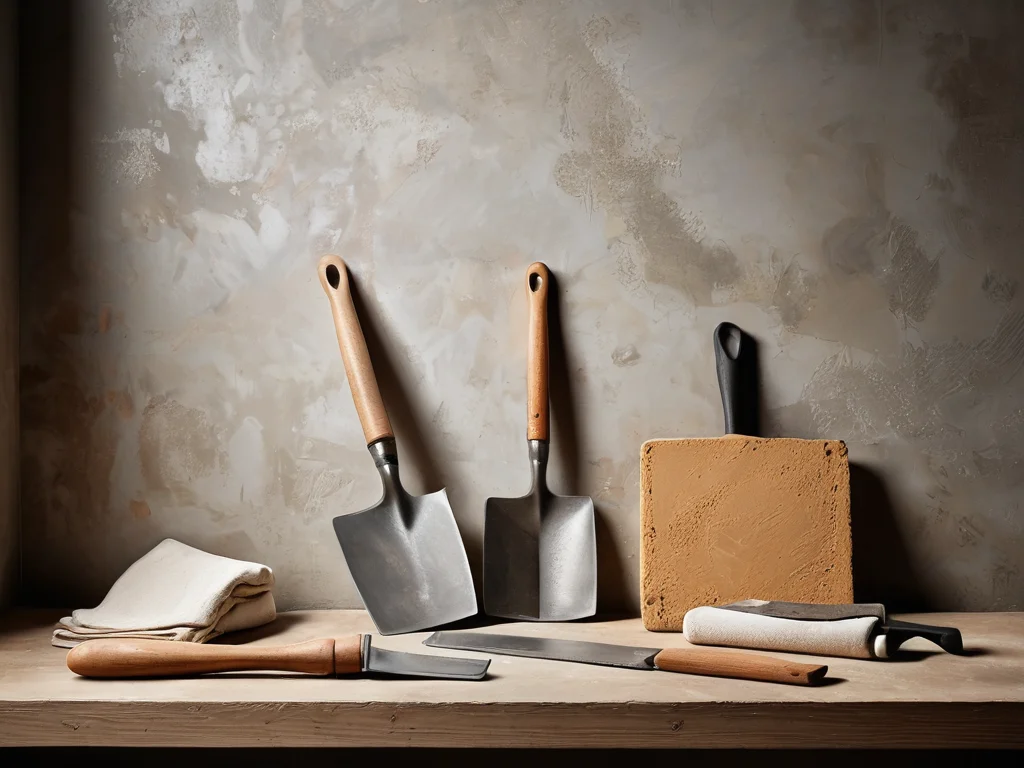
Choosing the right tools is half the battle in preparing plaster mix. The speed of the process, as well as the quality of the mix itself, depends on what you use for mixing. Let’s look at the available tools and what tasks they are best suited for.
1. Manual Mixing (Trowel, Spatula, Corner Trowel):
- Description: This is the simplest and most accessible method, suitable for small amounts of work, such as filling joints, small holes, or for working with ready-made putty mixes.
- Application: You can use a trowel or spatula to mix a small amount of dry mix with water in a bucket or basin.
- Pros: No special equipment required, minimal cost.
- Cons: Very labor-intensive for large volumes, difficult to achieve a uniform consistency, high risk of lumps, long mixing time. This method is not recommended for plastering large surfaces.
2. Construction Mixer with Whisk Attachment:
- Description: This is perhaps the most popular and effective tool for mixing plaster mixes in domestic settings. It is a drill or hammer drill with adjustable speed and a special whisk attachment (spiral or paddle).
- Application: Ideal for mixing both gypsum and cement mixes in volumes from a few kilograms to tens of kilograms. The whisk attachment effectively mixes dry mix with water, aerating the mix and making it plastic and uniform.
- Pros: Fast and high-quality mixing, uniform consistency without lumps, significantly eases work, suitable for most types of mixes, relatively affordable.
- Cons: Requires a power tool, can splash the mix if used incorrectly.
- Tip: When mixing, start at a low speed to moisten the mix, then increase the RPMs to achieve uniformity. Keep the mixer in the container, trying not to lift it too high to avoid excessive splashing.
3. Concrete Mixer (Construction Mixer):
- Description: This is professional equipment designed for mixing large volumes of construction mixes. It consists of a container with rotating blades.
- Application: Used for mixing mortar for masonry, floor screeds, plastering on large sites or during extensive renovations.
- Pros: High productivity, ability to mix large volumes at once, uniform and high-quality mixing.
- Cons: High cost, bulky, requires mains power, not suitable for small jobs.
What to choose?
- For small jobs and grouting: A trowel or spatula is sufficient.
- For most renovation work in an apartment (leveling walls, ceilings): A construction mixer is your best friend. It will ensure ideal mix quality at a reasonable cost.
- For house construction or large-scale work: You cannot do without a concrete mixer.
General advice: Regardless of the tool chosen, always strive for the mix to be as uniform as possible. This is the key to successful plastering!
Mix Consistency: How to Achieve the Right Plasticity and Avoid Mistakes

Consistency is what distinguishes an ideal plaster mix from an unusable mass. The right consistency makes plaster plastic, manageable, easy to apply, and ensures an even finish. The wrong consistency turns the work into torment, and the result into a defect.
What consistency are we looking for?
An ideal plaster mix should be:
- Plastic: Easily spreadable on the surface with a trowel without leaving deep grooves.
- Uniform: Free of lumps, grit, or separation.
- Not too thick: So it doesn’t require excessive effort to apply.
- Not too thin: So it doesn’t run off the trowel or wall, maintaining its shape.
Visual and tactile cues:
Manufacturers often indicate on the packaging what the consistency of the mix should be. It is usually described as:
- “Sour cream” or “thick sour cream”: A mix that slowly slides off the trowel, forming a small mound but not spreading out.
- “Kefir” or “yogurt”: A thinner consistency used for final leveling or for applying a thin coat.
- “Dough”: A dense but plastic mass that holds its shape well.
How to achieve the desired consistency?
1. Strictly follow instructions: This is the golden rule. The manufacturer has tested their mix and knows exactly how much water is needed for the optimal result.
2. Add water in stages: Do not pour all the water at once. Start with the recommended minimum, and then gradually add water, mixing thoroughly after each addition, until you reach the desired consistency.
3. If the mix is too thick: Carefully add a little water (literally a tablespoon at a time) and mix thoroughly again. Too much water can ruin the mix.
4. If the mix is too thin: Add a little dry mix and mix thoroughly again. This is a more preferable option than adding water to a thick mix, as it disrupts the proportions less.
5. “Stickiness” test: Take a small amount of the mix on a spatula or trowel. Lift the tool. The mix should slide off smoothly, leaving an even mark on the tool, without sticking too much or running off.
6. “Mound” test: Scoop a small amount of the mix onto a trowel and turn it upside down. The mix should form an even mound that slowly begins to spread but does not turn into a puddle.
7. Consider the mix’s pot life: Gypsum plasters set faster than cement ones. Do not try to “rework” a setting mix by adding water – this will lead to loss of strength. If the mix has started to thicken, it’s better to discard it and mix a new batch.
Typical consistency mistakes:
- Too thick mix: Difficult to apply, requires great effort, can lead to an uneven layer and scratches from the trowel.
- Too thin mix: Runs off walls, holds its shape poorly, leads to drips, increases drying time, and reduces strength.
- Non-uniform mix (with lumps): Lumps of plaster can cause delamination, cracks, and unevenness on the surface.
Remember that achieving the ideal consistency is a skill that comes with practice. Don’t be afraid to experiment with small batches to get a feel for the material.
Common Mistakes When Mixing Plaster and How to Avoid Them
Even when following instructions, beginners often make mistakes when preparing plaster mix. These mistakes can nullify all your efforts and lead to unfortunate consequences. Let’s review the most common ones and learn how to avoid them.
Mistake 1: Incorrect water-to-dry mix ratio
- Problem: This is the most frequent and critical mistake. Excess water reduces strength, increases shrinkage, and the risk of cracks. Insufficient water makes the mix dry, lumpy, and difficult to apply.
- How to avoid: Strictly follow the manufacturer’s instructions. Use measuring containers for water. If you’ve added too much water, it’s better to add a little dry mix, but don’t overdo it.
Mistake 2: Insufficient mixing
- Problem: Remaining lumps of dry mix or uneven water distribution lead to non-uniform plaster. Such plaster will set unevenly, and cracks or delamination may appear on the surface.
- How to avoid: Mix the plaster thoroughly until completely uniform, using a construction mixer. Check for lumps, especially at the bottom and edges of the container.
Mistake 3: Using dirty water or container
- Problem: Impurities in the water or residues of old plaster in the container can react with the components of the fresh mix, degrading its properties, reducing adhesion and strength.
- How to avoid: Always use clean water and thoroughly wash the mixing container before each use.
Mistake 4: Over-mixing or adding water to setting plaster
- Problem: Gypsum plasters have a limited pot life (usually 30-60 minutes). Attempting to “revive” setting plaster by adding water disrupts chemical processes, reduces strength, and increases drying time.
- How to avoid: Mix only the amount of plaster that you can use within the time specified by the manufacturer. If the plaster has started to thicken, do not add water to it; prepare a new batch.
Mistake 5: Mixing a large batch that cannot be used quickly
- Problem: As mentioned, plaster has a pot life. If you mix too much, it will start to set before you can use it, leading to wasted material.
- How to avoid: Calculate the required amount of plaster based on your work speed and the mix’s pot life. It’s better to mix several small batches than one large one that might spoil.
Mistake 6: Using low-quality dry mix
- Problem: Low-quality mixes may contain large lumps, foreign impurities, or have an incorrect composition, which will affect the final result.
- How to avoid: Purchase dry mixes from trusted manufacturers. Carefully inspect packaging for damage.
Mistake 7: Violating the mixing procedure (e.g., adding water to the mix after the dry components are fully added)
- Problem: Some mixes (especially gypsum ones) require a specific order of adding components or a “resting” period. Violating this procedure can lead to clumping or uneven setting.
- How to avoid: Always read the manufacturer’s instructions. They indicate not only the amount of water but also the mixing procedure itself (e.g., “pour the mix into water,” “let it stand for 5 minutes”).
By avoiding these common mistakes, you can achieve excellent results and obtain a high-quality, plastic, and strong plaster mix.
Expert Tips: Tricks from Experienced Craftsmen for Ideal Plaster Mix

Professionals know that even in such a seemingly simple task as mixing plaster, there are secrets. These little tricks will help you achieve perfect results and make the work easier. I’m sharing my experience with you!
1. Test Batch:
- Tip: Before tackling a large batch, make a small test batch. This will allow you to check the proportions, consistency, and setting time of a specific mix. You will be able to get used to the tool faster and understand how the material behaves.
- Why: Especially relevant if you are using a new brand or type of plaster.
2. Correct order of adding water:
- Tip: For gypsum mixes, it’s often better to first pour the measured amount of water into the container and then evenly pour in the dry mix. This helps prevent dry clumps and ensures more even water absorption.
- Why: Gypsum absorbs water faster, and with this sequence, it “opens up” better.
3. Don’t over-mix:
- Tip: Thorough mixing is good, but excessive mixing, especially with a powerful mixer at high speeds, can lead to excessive air being incorporated into the mix. This can affect its density and, consequently, its strength.
- Why: Find a balance – achieve uniformity, but don’t “whip” the mix into a foam.
4. Add plasticizers (with caution!):
- Tip: There are special plasticizer additives that make the mix more fluid and manageable. They are typically used with cement mixes or to impart specific properties.
- Why: They improve workability but require precise dosage. Incorrect use can lead to separation or loss of strength.
- Important: Always follow the plasticizer manufacturer’s instructions and test the mix.
5. Using “accelerators” or “retarders” for setting:
- Tip: For cement mixes, special additives are sometimes used to accelerate or retard setting. For example, a little more cement can be added to accelerate (but this will reduce plasticity), and some organic substances (like PVA glue in small doses) can be used to retard setting (but this can also affect strength).
- Why: Allows adapting the mix to working conditions (e.g., retarding setting in hot weather).
- Important: These are more “advanced” methods requiring deep knowledge. For most DIYers, it’s better to use ready-made mixes with an optimal pot life.
6. Storing the mix:
- Tip: If you need to store the mix for some time (e.g., during a break), cover it with a damp cloth or plastic wrap. This will slow down moisture evaporation and prevent a crust from forming on the surface.
- Why: Allows extending the working time with the mix if it hasn’t started to set yet.
7. The “better less, but better” rule:
- Tip: If you are unsure about the consistency, it’s better to make the mix slightly thicker than necessary. A thick mix can be thinned, but a thin one is much harder to correct without loss of quality.
- Why: Minimizing the risk of spoiling the entire batch.
8. Learn to feel the material:
- Tip: Over time, you will intuitively understand what the ideal consistency should be, how the mix applies to the wall, and how it reacts to the trowel. This comes with experience.
- Why: Experience is the best teacher. Start with small batches, experiment, and you will surely achieve mastery!
May your walls be straight and your renovation be a joy! I hope this article has helped you understand all the intricacies of preparing plaster mix. Good luck with your endeavors!
Рекомендуем:
 Gypsum or Cement Plaster: What and Where to Use?
 How to Properly Plaster Walls for Painting: Perfect Smoothness
 Bark Beetle Decorative Plaster: Application Technology
 DIY Decorative Stone Wall Installation: Your Guide to Home Transformation
 DIY Venetian Plaster: Is It Possible?
 Joint filler for tiles: how to choose the color and apply it correctly
Grout for tiles: how to choose the color and apply it correctly
Joint filler for tiles: how to choose the color and apply it correctly
Grout for tiles: how to choose the color and apply it correctly
 How to Seal Drywall Seams to Prevent Cracks
 How to Repair Cracks and Holes in Walls Before Finishing: A Complete Guide
 Wall Putty for Wallpaper: How Many Coats Are Needed and How to Apply?
 Starting and Finishing Putty: What’s the Difference and How to Use It
 Liquid Wallpaper: Pros, Cons, and Application Technology
 How to Tile Walls in a Bathroom: A Detailed Guide
 Betonokontakt: A Comprehensive Guide to Application for Perfect Renovation
 How to Update Old Tiles Without Removing Them: 99 Ways to Transform Your Bathroom and Kitchen
 Washable wallpaper for the kitchen: why it’s the best idea for your renovation?
 How to Make a Brick Wall in an Interior (Imitation)
 Priming Walls Before Wallpapering and Painting: The Ideal Foundation for Renovation
 What to do if mold or mildew appears on the walls?
 Wall Cladding with Wood Paneling: A Step-by-Step Guide