Greetings, dear connoisseurs of beautiful and functional interiors! Today we will dive into the world of a seemingly insignificant detail, which, nevertheless, plays a huge role in the final appearance of your renovation. We are talking about tile grout. It is often chosen in a hurry, focusing on the first available solution, but it is the color and quality of the grout that determine how harmonious and complete your floor or wall covering will look. Let’s figure out together how to make the right choice and bring your dream interior to life!
Tile grout: why is it needed and how does it affect the interior?
Many underestimate the importance of grout, considering it just a filler for gaps between tiles. In fact, this is not the case. Grout is not just a functional material, but also an important decorative element that can radically change the perception of the tiled surface.
Functional role of grout:
- Protection from moisture and dirt: The seams between tiles are potential « gateways » for moisture, dirt, mold, and bacteria. High-quality grout seals these seams, preventing the destruction of the substrate and the development of microorganisms. This is especially important for wet areas such as bathrooms and kitchens.
- Compensation for thermal expansion: Tiles, like any material, can expand or contract slightly under the influence of temperature changes. Grout helps compensate for these movements, preventing cracks on the tile itself or its delamination.
- Structural reinforcement: Grout-filled seams contribute to a more even distribution of load on the tiles, making the coating more durable and long-lasting.
Decorative role of grout:
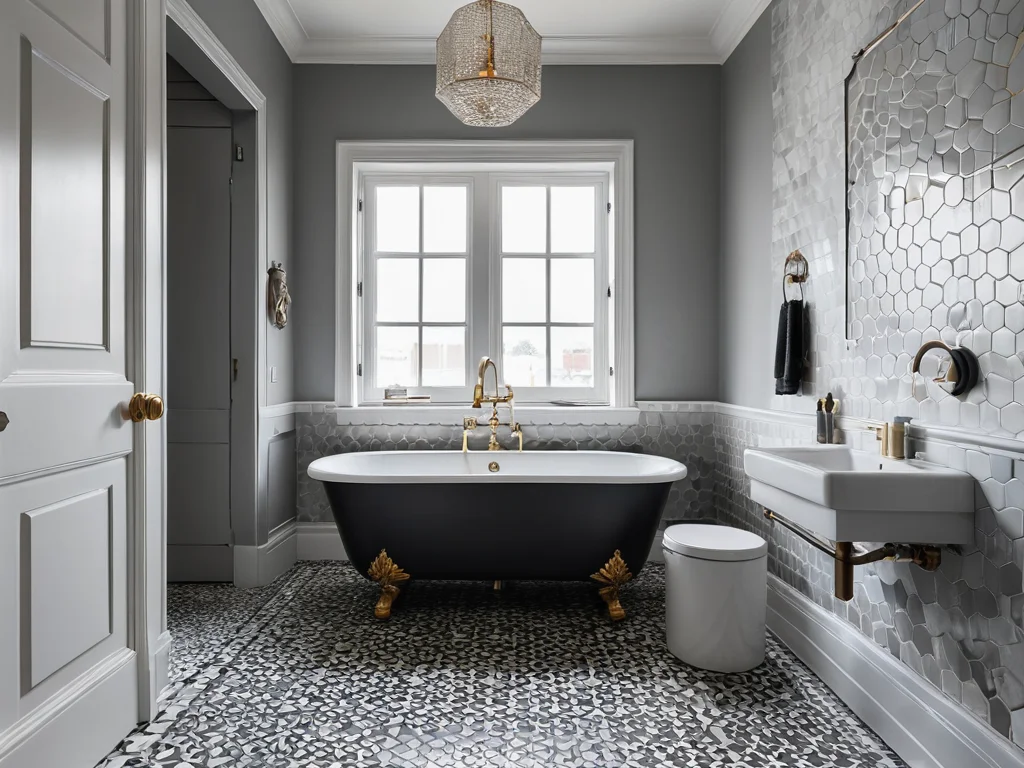
- Creating a unified canvas: Light-colored grout, matched to the tile, creates the effect of a monolithic surface, visually expanding the space and making it more airy.
- Highlighting the pattern: Contrasting grout, on the other hand, emphasizes the geometry of the tile layout, highlighting each tile and creating a striking pattern. This is an excellent technique for zoning or adding graphic quality to the interior.
- Impact on visual perception: The color and width of the seams can change the perception of the color and texture of the tile itself. For example, wide dark seams can make light tiles visually darker, and narrow light seams vice versa.
Understanding these aspects will help you approach the choice of grout consciously, turning this stage of renovation from a routine into a creative process.
What kind of grout to choose for a bathroom and kitchen: analyzing types and their features

The choice of grout for « wet » areas is a separate story. Here, not only aesthetic but also operational characteristics come to the forefront. The modern market offers several main types of grouting mixtures, each with its own advantages and disadvantages.
1. Cementitious grouts:
This is the most common and budget-friendly option. The basis of such grouts is cement with various additives (plasticizers, pigments, antifungal components). Cementitious grouts come in two types:
- Ordinary (dry mixes): Require dilution with water before use. It is important to strictly follow the proportions indicated by the manufacturer, otherwise, you can spoil the mixture.
- Ready to use: More expensive, but convenient to use. Do not require dilution, ready to work immediately out of the package.
Advantages of cementitious grouts:
- Affordable price: An optimal option for most renovations.
- Ease of use: Easy to apply and clean.
- Good adhesion: Reliably adhere to the tile surface and substrate.
- Wide color palette: You can choose a shade for any tile.
Disadvantages of cementitious grouts:
- Porosity: Untreated cement seams can absorb moisture and dirt, darkening over time and losing their appearance. Special impregnations (sealants) are used for protection.
- Tendency to crack: With improper mixing or drying, small cracks can form, especially on wide seams.
- Require protection: To increase moisture resistance and stain resistance, it is recommended to use water-repellent compounds.
2. Epoxy grouts:
This is a more modern and high-tech material. It is based on epoxy resin, a hardener, and special fillers. Epoxy grouts are usually two-component and require thorough mixing before use.
Advantages of epoxy grouts:
- Highest strength and wear resistance: Practically not subject to abrasion and mechanical damage.
- Complete waterproofing: Do not absorb moisture, which makes them ideal for bathrooms, shower cabins, and swimming pools.
- Resistance to chemicals: Do not react to household chemicals, acids, alkalis.
- UV resistance: Do not fade under sunlight.
- Hygienic: Do not promote the growth of mold and mildew, easy to clean.
- Wide range of colors: Including metallic and pearlescent shades.
Disadvantages of epoxy grouts:
- High cost: Significantly more expensive than cement analogues.
- Difficulty of application: Require neatness and speed in work, as the composition polymerizes quickly. Mistakes are harder to correct.
- Need for special tools: Professional tools are often required for working with epoxy grout.
- Difficulty of cleaning: If the grout dries on the tile surface, it will be very difficult to remove.
3. Polymer grouts (based on latex, acrylic):
These grouts are more elastic and ready to use. They contain polymer additives that give them a number of useful properties.
Advantages of polymer grouts:
- Elasticity: Compensate well for vibrations and thermal expansion.
- Water resistance: Have better moisture resistance compared to ordinary cementitious grouts.
- Ease of application: Easy to apply and clean.
- UV resistance: Retain color well.
Disadvantages of polymer grouts:
- Cost: More expensive than cementitious, but cheaper than epoxy.
- Resistance to aggressive environments: Inferior to epoxy in chemical resistance.
- Shrinkage: Some formulations may shrink slightly upon drying.
Which type to choose?
For most domestic needs, especially in bathrooms and kitchens, where moisture resistance and resistance to detergents are important, epoxy grout will be the best choice, despite its cost and difficulty of application. It will ensure durability and a flawless look of the seams for many years. If the budget is limited, then high-quality cementitious grout with subsequent treatment with a water repellent will also be a good solution.
How to choose the perfect grout color: 10 foolproof combinations with tiles
The color of the grout is a powerful tool in the hands of a designer. It can either emphasize the beauty of the tile or spoil the overall impression of the interior. Let’s consider foolproof combination options that will suit most styles and situations.
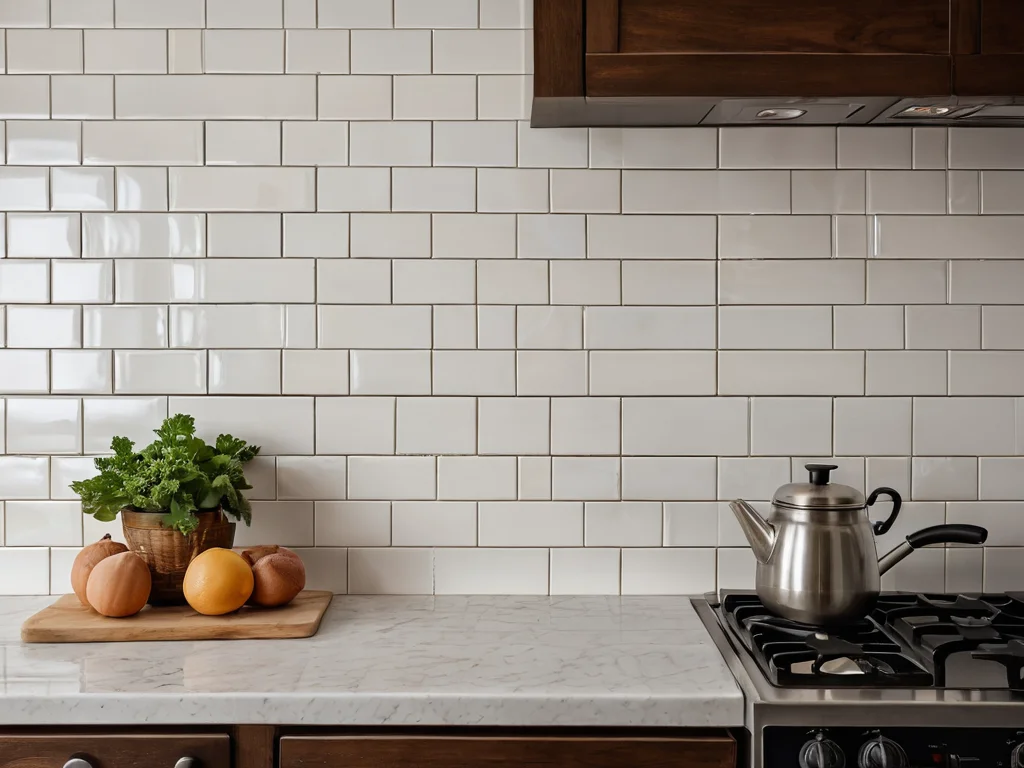
1. Matching the tile color (neutral combinations):
Principle: Choose grout as close in shade to the tile as possible. This creates the effect of a single canvas, visually expands the space, and gives the interior calmness and elegance. It works especially well with small-format tiles or tiles with a complex pattern.
Examples:
- White tiles + white or light gray grout
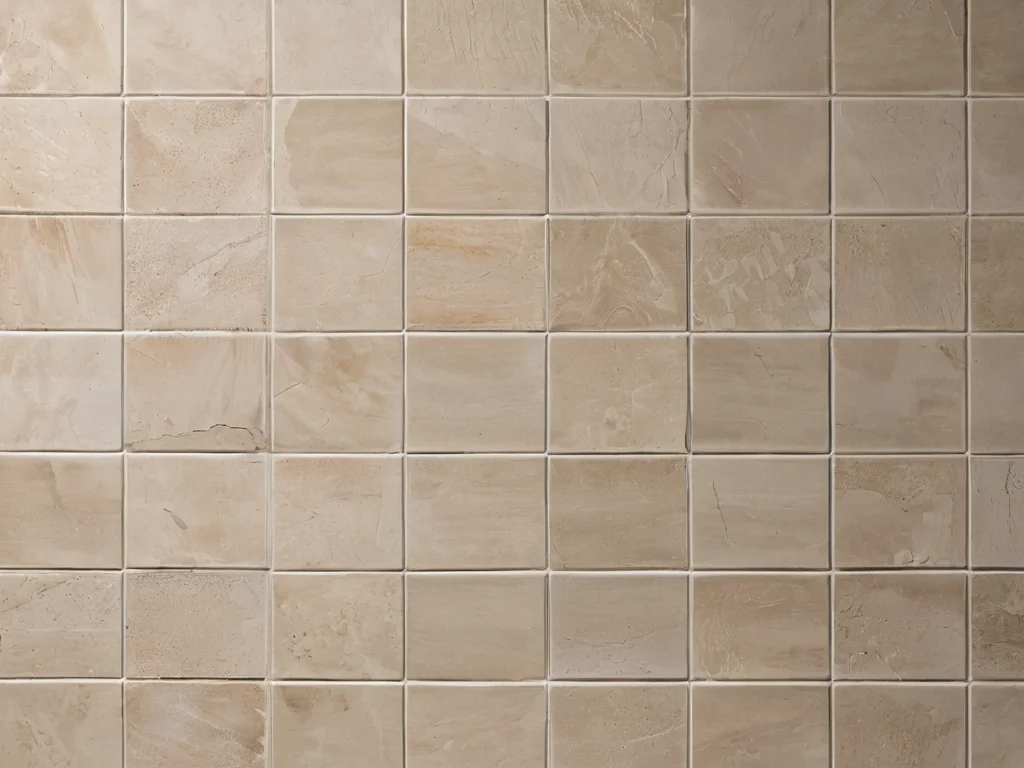
- Beige tiles + beige or cream grout
- Gray tiles + gray grout (matching or one shade darker/lighter)
- Brown tiles + brown grout
2. Contrasting combinations:
Principle: This technique allows you to highlight the geometry of the tile, emphasize its shape and texture. Use contrasting colors to create an accent or add dynamism to the interior. It is important not to overdo it, to avoid a « rippling » effect.
Examples:
- White tiles + black or dark gray grout (classic, very effective!)
- Black tiles + white or light gray grout (graphic, stylish look)
- Gray tiles + white or black grout (for a modern interior)
- Blue tiles + white or light gray grout
- Terracotta tiles + cream or light beige grout
3. « Concrete » or « stone » effect grout:
Principle: If you are using tiles that imitate concrete, stone, or marble, choose grout that best matches the natural color and texture of the material. This will achieve maximum realism.
Examples:
- Concrete-look tiles + light gray or medium gray grout
- Marble-look tiles with gray veins + light gray grout
- Travertine-look tiles + beige or sand grout
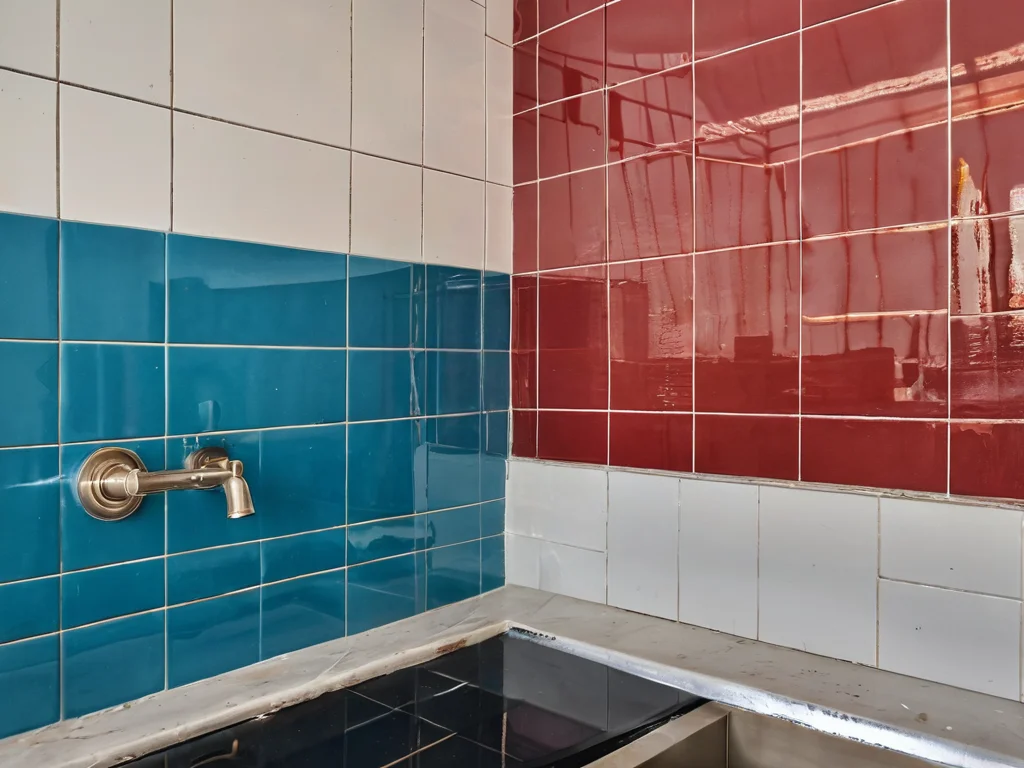
4. Colored grout for accent:
Principle: If you want to add a bright accent to the interior, use colored grout. This is a bold but effective technique that can transform even the simplest interior. It works best with tiles in neutral shades.
Examples:
- White or gray tiles + bright grout (e.g., blue, green, yellow) – to create an accent wall or zone.
- Monochromatic tiles + contrasting color grout (e.g., black and white tiles + red grout).
5. Metallic grout:
Principle: To add luxury and originality to the interior, you can use grouts with a metallic sheen (gold, silver, bronze). They combine well with tiles that imitate precious metals, or simply with tiles in neutral shades, adding sophistication.
Examples:
- Marble-look tiles + gold grout
- Black tiles + silver grout
- White tiles + bronze grout
Important to remember:
- Samples: Always look at tile and grout samples together, preferably in the lighting that will be in the room. The color on the monitor screen may differ from the actual color.
- Seam width: The grout color will look different on thin and wide seams. Consider this when choosing.
- Maintenance: Light-colored grout requires more careful maintenance, especially in « dirty » areas.
- Testing: If you are unsure, buy a small amount of grout and test it on a small tile area or on a scrap piece.
Epoxy or cement grout: what is better for your renovation?
This is perhaps the most frequent question that arises when choosing grout. The answer depends on many factors: the type of room, its intensity of use, budget, and your expectations for durability and appearance.
Cementitious grout: affordable classic
When to choose:
- Budget renovation: This is the most economical option, which allows significant savings on materials.
- Dry rooms: For living rooms, bedrooms, hallways, where there is no direct contact with water and aggressive environments, cementitious grout is quite suitable.
- Low traffic: In places with low traffic (e.g., bedroom walls), it will also be appropriate.
- Desire to save time on application: Cementitious grout is easier for beginners to work with.
What to consider:
- Moisture resistance: For bathrooms, kitchen backsplashes, and hallway floors, it is imperative to use special impregnations (water repellents) to protect against moisture and dirt. Without them, the seams will quickly lose their appearance.
- Aggressive environments: Cementitious seams can be destroyed by acids and alkalis, so it is not recommended to use them where contact with aggressive household chemicals is possible.
- Aesthetics: Over time, cementitious seams can become dirty and darken, which degrades the appearance of the coating.
Epoxy grout: the choice of professionals
When to choose:
- Wet rooms: Bathrooms, shower cabins, swimming pools, kitchen backsplashes – ideal places for epoxy grout. It guarantees complete protection from moisture and mold.
- High-traffic rooms: Hallway floors, kitchens, public spaces where maximum wear resistance is required.
- Chemical resistance: If you frequently use aggressive cleaning agents or work with chemicals, epoxy grout is your choice.
- Desire for a perfect result: Epoxy seams look flawless, do not absorb dirt, and retain their original color for many years.
- Color solutions: If you want to use bright or metallic grout, epoxy formulations offer many more possibilities.
What to consider:
- Price: Epoxy grout is 2-4 times more expensive than cementitious.
- Difficulty of application: Requires neatness, accuracy in mixing component proportions, and quick work. If you are a beginner, it is better to entrust this stage to professionals or study the instructions very carefully and practice.
- Tools: Special spatulas and sponges may be needed.
Comparative table:
| Parameter | Cementitious grout | Epoxy grout |
| Price | Low | High |
| Moisture resistance | Low (requires impregnation) | Very high |
| Chemical resistance | Low | High |
| Wear resistance | Medium | Very high |
| Ease of application | Easy | Difficult |
| Tendency to get dirty | High (without impregnation) | Low |
| Color fastness | Medium | Very high |
Conclusion: If your budget allows, and you want maximum durability, protection, and a perfect look, especially in wet areas – choose epoxy grout. If you are limited in funds or are renovating a dry room, and are willing to periodically update the protective coating of the seams – cementitious grout with a water repellent will be a good compromise.
Step-by-step guide: how to properly apply tile grout yourself
Applying grout is a responsible stage that requires neatness and adherence to technology. By following this step-by-step guide, you can handle this task yourself.
Preparation:
- Cleaning seams: Before starting work, make sure the seams between the tiles are clean, dry, and free of adhesive residue or dust. If necessary, clean them with a sharp object or a vacuum cleaner. If the tile has a textured surface, clean the seams particularly thoroughly.
- Removing crosses: Don’t forget to remove the plastic crosses from the seams.
- Moistening seams (for cementitious grouts): Some craftsmen recommend slightly moistening the seams with a sponge before applying cementitious grout. This helps prevent the grout from drying too quickly and improves its adhesion to the tile. Do not overdo it, so that water does not accumulate in the seams.
- Surface protection: Tape the edges of the tiles with masking tape to protect them from accidental grout spills and to simplify subsequent cleaning.
Mixing the mixture (for dry cementitious grouts):
- Follow the proportions: Pour the measured amount of clean water into a clean container (according to the instructions on the package).
- Gradually add dry mix: Slowly pour the grout into the water, stirring constantly.
- Mix thoroughly: Use a construction mixer or a drill with a low-speed attachment to obtain a homogeneous mass without lumps.
- Let it stand: Let the prepared mixture stand for 5-10 minutes to « mature, » and then stir again.
- Use within time: Remember that the cement mixture has a limited pot life (usually 30-60 minutes), so prepare only as much as you can use during this time.
Applying the grout:
- Tool: Use a rubber spatula or a special rubber trowel for applying grout.
- Application technique: Scoop a small amount of grout onto the spatula and apply it to the seam at an angle of approximately 45 degrees to the tile surface.
- Pressing: Thoroughly press the grout into the seam, filling it completely. Move in different directions to ensure even filling and avoid air pockets.
- Removing excess: After filling the seam, run the spatula over the tile surface at a sharp angle (almost perpendicular) to remove excess grout. Try not to pull the grout out of the seams.
- Work in sections: Grout small sections at a time so that the mixture does not have time to dry before you can remove the excess.
Applying epoxy grout (features):
- Mixing components: Strictly follow the manufacturer’s instructions for mixing components A and B. The quality and polymerization time depend on the accuracy of the proportions.
- Speed of work: Epoxy grout hardens quickly. Work quickly and carefully, filling the seams and immediately removing excess.
- Special tools: Special spatulas, dipped in soapy water, are often used to facilitate sliding and cleaning.
Initial cleaning:
- Waiting time: Let the grout set a little (usually 15-30 minutes, depending on the type and temperature). It should not run, but remain plastic.
- Wet sponge: Use a clean, well-wrung sponge dipped in water.
- Movements: Gently, with barely touching movements, wipe the surface of the tiles with a damp sponge, removing excess grout and forming the final smoothness of the seams. Try not to press on the seams so as not to damage them.
- Rinsing the sponge: After each pass, rinse the sponge thoroughly in clean water, changing the water as it gets dirty.
- Forming the seam: You can lightly go over the seam with a damp sponge to give it a smooth and neat shape.
Following these steps will help you achieve smooth, clean seams and a neat look for your tiled surface.
Master class: finishing grout seams and cleaning tiles after grouting
After the main excess grout has been removed, the tile surface may remain slightly cloudy or with minor streaks. Finishing will help achieve perfect cleanliness and shine.
1. Second cleaning stage (after 1-2 hours):
- Time: Wait for the grout to fully harden (usually 1-2 hours, but it’s best to follow the manufacturer’s instructions and the degree of drying).
- Tool: You will need a clean, soft sponge and a bucket of clean water.
- Process: With light, barely touching movements, wipe the entire tile surface with a damp sponge, removing grout residue and forming the final smoothness of the seams. Try not to press on the seams so as not to damage them.
- Changing water: It is very important to change the water in the bucket frequently so as not to spread dirt over the new surface.
2. Final cleaning (after 12-24 hours):
- Time: When the grout is completely dry and has gained strength (usually after a day, but the time may vary), you can proceed to the final cleaning.
- Products: Use special tile cleaners after grouting or simply a clean dry soft cloth (microfiber).
- Dry cleaning: For most cases, it is enough to wipe the tiles with a dry clean microfiber cloth. This will remove any remaining dust and streaks, giving the surface a shine.
- Special cleaners: If stubborn stains or residue remain after drying, use special products. It is important to choose a cleaner suitable for your type of tile (ceramic, porcelain stoneware, natural stone) and grout. Apply the product according to the instructions, let it sit for the required time, and rinse thoroughly with water, then wipe dry.
3. Hydrophobic treatment (for cementitious grouts):
- Purpose: To protect seams from moisture, dirt, grease, and prevent mold.
- When to apply: 24-72 hours after grouting (the exact time is indicated by the grout and hydrophobic agent manufacturer).
- Application: Apply the hydrophobic agent to the seams with a brush or sponge, distributing it evenly over the entire surface of the seam. Immediately remove any excess that gets on the tiles with a dry cloth.
- Reapplication: For greater reliability, you can apply a second coat after a few hours.
- Frequency: It is recommended to repeat the hydrophobic treatment every 1-2 years, depending on the intensity of room use.
4. Protection of epoxy seams:
Epoxy seams themselves have excellent protective properties. Additional hydrophobic treatment is generally not required for them. The main thing is to ensure the cleanliness of the surface and not to use aggressive abrasive cleaning agents that can damage the gloss.
A few tips:
- Clean tools: Use only clean tools and water. Dirty water or spatulas will lead to stains and streaks.
- Don’t rush: Allow the grout time to dry before final cleaning.
- Test products: If you use special cleaners, test them on an inconspicuous area first.
Proper finishing is the key to the durability and beauty of your tile seams!
5 common mistakes when working with grout and how to avoid them
Even the most beautiful material can be ruined by improper work with it. Working with grout is no exception. Here are 5 common mistakes made during DIY grout application, and how to avoid them.
- Mistake: Incorrect mixture consistency.Consequences: Too liquid a mixture will flow out of the seams, hold poorly, and may shrink. Too thick a mixture will not fill the seams well, be difficult to apply, and may crack when drying.
How to avoid: Strictly follow the manufacturer’s instructions on the packaging! Carefully measure water and dry mix. Use a construction mixer to obtain a homogeneous mass without lumps. It’s better to add dry mix to liquid than vice versa if you’ve overdone the water.
- Mistake: Insufficient seam filling.Consequences: Seams remain incomplete, with voids. This is not only unaesthetic but also reduces the protective properties of the grout, allowing moisture and dirt to penetrate.
How to avoid: Thoroughly press the grout into the seam with a rubber spatula at a 45-degree angle. Work the seam in different directions. Make sure the seam is completely filled, with no air pockets.
- Mistake: Too early or too late cleaning.Consequences: Too early cleaning (while the grout has not set) leads to washing out the material from the seam, formation of streaks and smudges. Too late cleaning (when the grout has already hardened significantly) leads to difficulties in cleaning, scratches on the tiles, and leaving a persistent residue.
How to avoid: Follow the manufacturer’s recommended time. Typically, initial cleaning is done 15-30 minutes after application, when the grout has slightly hardened. Use a well-wrung sponge and clean water. Final cleaning is done after a few hours or the next day.
- Mistake: Using dirty water or tools.Consequences: Dirty water smears grout residue on the tiles, forming a hard-to-remove coating. Dirty tools can leave scratches or colored streaks.
How to avoid: Always use clean water and thoroughly rinse the sponge or cloth after each pass. Change the water as often as possible. Before starting work, make sure all tools are clean.
- Mistake: Incorrect selection or application of hydrophobic agent (for cementitious grouts).Consequences: The hydrophobic agent is not applied or is applied unevenly, which does not provide adequate protection of the seams from moisture and dirt. Or the hydrophobic agent is applied to insufficiently dried grout, which reduces its effectiveness.
How to avoid: Choose a high-quality hydrophobic agent suitable for your grout type. Apply it only to completely dry seams (24-72 hours after grouting). Distribute the product evenly over the seam surface with a brush or sponge, immediately removing excess from the tiles.
Be attentive and careful at every stage, and the result will surely please you!
Designer tips: how to properly care for grout so that it lasts a long time

Even the best grout can lose its original appearance over time if not cared for properly. But by following simple tips, you can extend its service life and maintain the aesthetic appearance of your seams for many years.
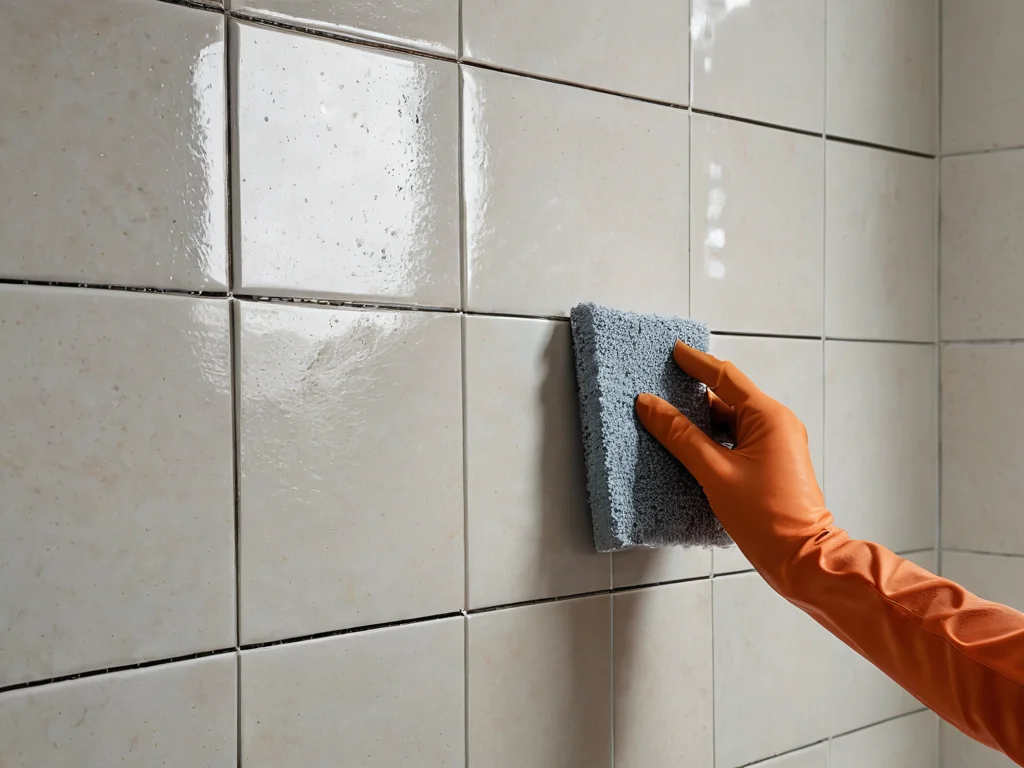
1. Regular wet cleaning:
- Frequency: Try to do wet cleaning as often as possible, especially in the bathroom and kitchen.
- Products: Use mild cleaning agents that do not contain abrasive particles, acids, or alkalis. pH-neutral cleaners or special tile and grout cleaners are ideal.
- Tools: It is best to use a soft sponge, microfiber cloth, or a soft brush. Avoid metal brushes and harsh abrasive sponges that can damage the surface of the seams.
2. Avoid aggressive chemicals:
- Hazardous substances: Cementitious seams are particularly sensitive to aggressive chemicals (acids, alkalis, solvents) that can destroy their structure and lead to discoloration.
- What to use: Always read the composition of cleaning products. Prefer safe, neutral formulations.
3. Timely stain removal:
- Immediately: If you spill something on the tile (wine, coffee, oil, paint), try to remove the stain as quickly as possible with a damp cloth. The longer the stain remains on the seams, the deeper it penetrates, especially into porous cementitious grout.
4. Hydrophobic treatment (for cementitious grouts):
- Prevention: As we have already said, regular renewal of the protective layer of hydrophobic agent is the key to the durability of cementitious seams.
- Frequency: Perform treatment every 1-2 years, or more often if you notice that water no longer beads on the surface of the seams but begins to soak in.
5. Restoration if necessary:
- Minor defects: If the seams are heavily soiled and cannot be cleaned, or if small cracks appear, local restoration can be carried out.
- Renewal: In particularly neglected cases, when the seams have lost their appearance, it may be necessary to completely remove the old grout and apply new grout. This is a labor-intensive process, but it will restore the tile to its original appearance.
6. Care for epoxy seams:
- Simplicity: Epoxy seams require almost no special care due to their non-porous structure.
- Cleanliness: It is enough to wipe them with a damp cloth with a mild detergent.
- Avoid abrasives: Do not use stiff brushes and abrasive cleaning agents to avoid damaging the gloss.
Proper and timely care will allow you to enjoy the impeccable look of tiles and seams for many years, avoiding premature repairs.
Рекомендуем:
 Grout for tiles: how to choose the color and apply it correctly
 How to Tile Walls in a Bathroom: A Detailed Guide
 How to Update Old Tiles Without Removing Them: 99 Ways to Transform Your Bathroom and Kitchen
 DIY Decorative Stone Wall Installation: Your Guide to Home Transformation
 Bathroom: Tile or Paint. What Will Everyone Face?
 Washable wallpaper for the kitchen: why it’s the best idea for your renovation?
 How to Make a Brick Wall in an Interior (Imitation)
 Wall Cladding with Wood Paneling: A Step-by-Step Guide
 What to do if mold or mildew appears on the walls?
 MDF Panel Wall Finishing: Installation Guide
 Internal Wall Insulation: Materials and Technology
 PVC Wall Panels: Cheap and Cheerful. Installation Guide
Comment rénover du vieux carrelage sans le retirer : 99 façons de transformer votre salle de bain et votre cuisine
Comment poser du carrelage mural dans la salle de bain : guide détaillé
Revêtement mural en lambris : guide étape par étape
Revêtement mural en panneaux MDF : guide d’installation
Pose de pierre décorative sur le mur par vous-même : votre guide pour transformer votre maison
Salle de bain : carrelage ou peinture. À quoi chacun sera-t-il confronté ?
Papier peint lavable pour la cuisine : pourquoi est-ce la meilleure idée pour votre rénovation ?
Comment réaliser un mur en briques dans un intérieur (imitation)
PVC Wall Panels: Cheap and Cheerful. Installation Guide
Comment rénover du vieux carrelage sans le retirer : 99 façons de transformer votre salle de bain et votre cuisine
Comment poser du carrelage mural dans la salle de bain : guide détaillé
Revêtement mural en lambris : guide étape par étape
Revêtement mural en panneaux MDF : guide d’installation
Pose de pierre décorative sur le mur par vous-même : votre guide pour transformer votre maison
Salle de bain : carrelage ou peinture. À quoi chacun sera-t-il confronté ?
Papier peint lavable pour la cuisine : pourquoi est-ce la meilleure idée pour votre rénovation ?
Comment réaliser un mur en briques dans un intérieur (imitation)