Greetings, dear friends and lovers of home transformation! Today, we will dive into one of the most, let’s say, “sharp” topics in the world of wallpapering – working with corners. It is precisely here, at the junctions of walls, that the main difficulties often lie, capable of turning the joy of interior renovation into a real ordeal. But do not worry! I am here to share with you all the secrets that will help you cope with this task “excellently,” as if you were a true master of your craft. Ready to learn how to make the corners of your home not just neat, but truly perfect?
Why are Corners the Main Headache When Wallpapering? Analyzing the Main Difficulties
Corners are not just a line where two walls meet. They are a volumetric area that requires a special approach. Imagine trying to wrap a gift in a square sheet of paper. If the edges of the paper do not align perfectly, you get creases, folds, and the whole picture is ruined. It’s the same with wallpaper, only on a slightly different scale, and the cost of error is ruined expensive wallpaper and a spoiled mood.
The main difficulties of working with corners lie in several aspects:
- Imperfect Wall Geometry: Rarely do walls meet at a perfect 90 degrees. Even a slight deviation turns a straight joint into a complex task.
- Wallpaper Properties: Different types of wallpaper behave differently. Paper ones are more pliable but tear easily. Vinyl and non-woven ones are denser but can form bubbles and creases if stretched incorrectly.
- Overlap and Seam Technique: How to correctly join the sheets in a corner so that the seam is invisible? Too much overlap is visible, too little can lead to separation.
- Tools: Incorrectly chosen tools can exacerbate the problem, creating unnecessary pressure and stretching.
- Patience and Precision: Working in corners requires jeweler-like precision and calmness, which are sometimes lacking in the midst of renovation.
All these factors combine into one big problem, which many try to solve by simply trimming the wallpaper and leaving a gap. But we want a perfect result, right? So let’s figure out how to achieve it.
Internal Corners: How to Create a Perfect Seam Without Creases or Tears
Internal corners are like the “hugging” parts of a room. It is here that unpleasant creases that spoil the entire look most often occur. Masters know a few secrets on how to make this seam as neat as possible.
Rule #1: Do not bring the sheet strictly to the corner.
This is perhaps the main secret. Instead of pulling the edge of the wallpaper precisely to the corner line, bring it to the nearest convex point of the wall. Usually, this is about 2-3 centimeters from the corner itself. Why? So that the next sheet lies flat, without tension and the formation of wrinkles.
Step-by-step:
- First Sheet: Start pasting the first sheet so that it slightly (2-3 cm) overlaps onto the adjacent wall.
- Alignment: Use a spirit level or plumb bob to paste the sheet strictly vertically. This is critically important!
- Pressing: Carefully press the sheet to the wall with a wallpaper spatula or roller, smoothing it from the center to the edges, especially in the area of the future corner.
- Second Sheet: Start pasting the next sheet on the adjacent wall, also maintaining verticality.
- Working in the Corner: Now for the interesting part. The sheet that overlaps onto the adjacent wall needs to be carefully trimmed. Use a sharp knife and a ruler. Cut the sheet vertically along the corner line.
- Neat Seam: Remove the upper cut piece. The remaining sheet, which overlaps onto the adjacent wall, can now be carefully trimmed along the edge so that it butts up against the new sheet.
- Smoothing: Thoroughly smooth the seam area to ensure there are no air bubbles or creases.
Important: If the walls are very uneven, a slight overlap (1-2 cm) of the second sheet onto the first in the corner is allowed. But this overlap should be as tight and even as possible. After the glue dries, it can be carefully trimmed with a sharp knife if it is very noticeable.
Technique Comparison:
- Butt Joint: The ideal option for straight walls and wallpaper that holds its shape well. Requires maximum precision.
- With a Slight Overlap: Often saves the situation with uneven walls. The main thing is to make the overlap minimal and tight.
Remember, the main thing is not to be afraid to use a sharp knife and ruler. They are your best friends when working with corners.
External Corners: Secrets of Neat Wallpapering Known Only to Masters
External corners are the protruding parts of our rooms, which also require special attention. Here the task is slightly different: we need not to hide the seam, but to beautifully “round” the corner so that the wallpaper lies flat and does not peel off.
Secret #1: Wrapping the Sheet.
The most common and reliable method is to “wrap” the corner with a sheet of wallpaper. That is, one sheet is pasted in such a way that it overlaps onto the adjacent wall.
Step-by-step instructions:
- Verticality First! Start pasting the sheet, carefully aligning it vertically with a level.
- Overlap at the Corner: Bring the sheet to the corner and continue pasting it onto the adjacent wall, covering approximately 1-2 centimeters.
- Neat Adhesion: Use a spatula or roller to firmly press the wallpaper to the wall, smoothing it from the corner towards the edge.
- Cutting Only as a Last Resort: If the wall is straight, try to avoid cuts.
- If the Wall is Uneven: In areas of protruding irregularities or if the wallpaper is dense and does not lie flat, a small cut may be necessary. Make it vertically, carefully, so that the edge can be pressed down later.
- Next Sheet: On the adjacent wall, start pasting the next sheet with a slight overlap (1-2 cm) onto the previous one.
- Smoothing the Seam: Carefully press the seam between the sheets so that it is as flat as possible.
Secret #2: The “Split” Technique.
This method is used when you want to achieve the most invisible seam, especially with patterned wallpaper. It requires greater precision.
- First Sheet: Paste the first sheet, bringing it to the corner and overlapping onto the adjacent wall by 2-3 cm.
- Second Sheet: The next sheet is pasted similarly, overlapping onto the adjacent wall.
- Cut Along the Corner: Now, using a sharp knife and a ruler, make a vertical cut exactly in the center of the corner, cutting through both sheets.
- Removing Trimmings: Carefully remove the top and bottom pieces of wallpaper formed after the cut.
- Tight Adhesion: You should have two edges that butt up against each other almost perfectly. Press them firmly to the wall.
When to Use Which Technique:
- Wrapping: A great option for most cases, especially if you are a beginner. It forgives minor wall imperfections.
- “Split” Technique: Ideal for smooth walls and wallpaper without a prominent pattern or with a small, unobtrusive design. It provides the neatest seam.
The main thing is to always have a sharp knife and a metal ruler at hand. They will help you make clean cuts and avoid torn edges.
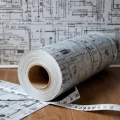
Preparing the Perfect Corner: Tools and Materials You Will Need
As in any task, success in wallpapering corners directly depends on proper preparation and having the right tools. It’s not enough to just have a roll of wallpaper and a bucket of glue. You will need real “helpers” that will make the process easier and the result – better.
List of Necessary Tools and Materials:
- Sharp utility knife or cutter: Don’t skimp on knives! A dull blade guarantees torn edges and unsightly creases. It’s better to have spare blades.
- Metal ruler or spirit level: For cutting wallpaper neatly in corners. A long ruler (from 50 cm) will be more convenient.
- Wallpaper spatula (plastic or rubber): For smoothing wallpaper, expelling air and glue from under the sheet, especially in corners.
- Wallpaper roller (for seams): A special narrow roller with soft nap that helps to firmly press wallpaper seams without damaging them.
- Bucket for glue and mixer (or stirring stick): For preparing glue according to package instructions.
- Brush or roller for glue: For applying glue to the wallpaper sheet or wall.
- Clean damp cloth or sponge: For removing excess glue that may ooze out at the seams.
- Stool or stepladder: For comfortable work at height.
- Pencil: For marking.
- Tape measure: For accurate measurements.
- Spirit level or plumb bob: For checking the verticality of the sheet.
Important Preparation Points:
- Wall Cleaning: Ensure walls are clean, dry, and smooth. Remove old wallpaper, paint, and dirt.
- Priming: Be sure to prime the walls. This will improve glue adhesion and prevent the glue’s moisture from being absorbed too quickly, which is especially important for paper wallpaper.
- Corner Check: Before starting work, check the corners for straightness with a level. If a corner is significantly off, be prepared for a more complex approach.
The better you prepare the walls and the more correctly you choose your tools, the easier and more pleasant the corner wallpapering process will be.
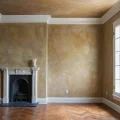
Crooked Walls Are Not a Sentence: Step-by-Step Instructions for Wallpapering Difficult Corners
Not all of us are lucky enough to live in houses with perfectly straight walls. What to do if the corners are far from ideal 90 degrees, or the walls have significant curves? Don’t despair! With a few tricks, you can handle even the most difficult corners.
Step 1: Assessment and Preparation
- Assess the Curvature: Place a level against the corner. How much does it deviate? This will help you understand how much overlap or what type of trimming will be needed.
- Internal Corner: If the corner is “convex” (less than 90 degrees), the wallpaper will lie with some tension. If the corner is “concave” (more than 90 degrees), there will be free space.
- External Corner: Here, the smoothness of the curve is important.
Step 2: Working with an Internal Crooked Corner
- First Sheet: Start pasting the first sheet, achieving perfect verticality. Let it overlap onto the adjacent wall by 2-3 cm.
- Cut and Redirect: At the corner itself, where the wall starts to deviate, carefully cut the sheet vertically.
- Adhesion to the Wall: If the corner is “concave,” this sheet should lie as flat as possible against the wall.
- Next Sheet: Start pasting the next sheet on the adjacent wall. If the corner is “concave,” try to have this sheet overlap the edge of the first sheet by 1-2 cm.
- Sheet “Bias”: If the wall is very crooked, you may have to slightly “bias” the second sheet so that it lies flat along the corner line. Don’t be afraid to overlap the first sheet a bit in the process.
- Removing Excess: Carefully trim the protruding edges so they lie as tightly as possible.
Step 3: Working with an External Crooked Corner
- Wrapping: Try to wrap the sheet onto the adjacent wall as carefully as possible, smoothing it out.
- Cuts if Necessary: If creases form on the curve, make several vertical cuts in the sheet so it lies flat. Then firmly press the edges.
- Next Sheet: The next sheet is pasted with a slight overlap onto the first to conceal the seam as much as possible.
- Special Approach: For very complex curves, it is sometimes necessary to cut the wallpaper into strips 5-10 cm wide and paste them like a mosaic, carefully bypassing all irregularities. This method is labor-intensive but yields excellent results.
Important Tip: For crooked corners, it is better to use non-woven or vinyl wallpaper. They are denser, stretch better, and are more resistant to creasing.
Typical Mistakes When Working with Corners: How to Avoid Them and What to Do If They Have Already Appeared

Even the most experienced masters sometimes make mistakes, especially when it comes to corners. But by knowing about them in advance, you can avoid them, or at least fix them if they have already occurred.
The Most Common Mistakes:
- Using a Dull Knife: As we’ve already said, this leads to torn edges that cannot be neatly finished.
- Stretching Wallpaper: Trying to “stretch” wallpaper over a corner to avoid a crease most often leads to tearing or pattern distortion.
- Too Much Overlap: If one sheet significantly overlaps another, this overlap will be visible, especially under certain lighting angles.
- Incorrect Trimming: Uneven, “crooked” cuts of wallpaper in corners look very untidy.
- Not Overlapping onto the Adjacent Wall: If you bring the wallpaper precisely to the corner, it will likely peel off due to insufficient adhesion area.
- Ignoring Verticality: Unevenly pasted wallpaper in a corner will spoil the look of the entire wall.
- Too Much Glue: Excess glue that is not removed can seep through the wallpaper and leave unsightly stains, especially on thin wallpaper.
What to Do If a Mistake Has Already Occurred?
- Torn Edge: If you notice a small tear, try to carefully glue it back, moistening it with glue, and press it down. If the tear is large, you may have to cut out a piece of the correct shape and size and carefully glue it in, overlapping or trimming in the corners.
- Visible Overlap: If the overlap is too noticeable, try to carefully trim it with a sharp knife to make the seam thinner.
- Crease: If the crease is not very large, you can try to carefully smooth it out, perhaps even moistening the area with water (only if it’s wallpaper that allows such a procedure, like vinyl). If the crease is large, it will likely have to be peeled off and the sheet re-pasted.
- Peeling Edge: If the edge has peeled off, carefully lift it with a spatula, apply a little glue, and press firmly.
The main thing is not to panic. Most mistakes can be corrected; the main thing is to act carefully and use the right tools.
Professional Life Hacks: Tricks for a Perfect Result in Corners
Professional masters, in addition to basic techniques, also possess some “secret” tricks that help them achieve perfect results, even when working with complex surfaces. Want to know how to make your corners flawless?
Life Hack #1: “Allowance” on the Adjacent Wall.
We’ve already discussed that the sheet needs to overlap onto the adjacent wall. But how exactly? If you overlap the sheet by 2-3 cm and then cut along the corner, the next sheet should start exactly where the previous one ends. This seam should be as neat as possible.
Life Hack #2: The “Turn” Technique for Straight Corners.
This method is ideal for internal corners if the walls are relatively straight. Instead of cutting along the corner, one sheet is pasted with a slight overlap onto the adjacent wall (2-3 cm). Then, using a level, you draw a perfectly vertical line across this overlap. You cut the wallpaper along this line with a sharp knife. This results in a clean seam, without a visible overlap.
Life Hack #3: Using a Stencil or Paper Tape.
For internal corners, especially if the walls are not very straight, you can use paper tape or even a strip of wallpaper. Stick it precisely along the corner line, so it slightly overlaps onto both walls. This will create a straight guide along which it is convenient to paste and trim the wallpaper.
Life Hack #4: “Laying” with Overlap and Trimming.
If the walls are very crooked and the “split” technique is not possible, you can use this method: one sheet is pasted with a slight overlap onto the adjacent wall. Then the second sheet is pasted with an overlap onto the first (1-2 cm). After the glue has dried slightly, you can carefully trim the upper sheet along the corner line, using a spatula as a support for the knife. This allows for a tighter seam.
Life Hack #5: Working with Textured Wallpaper.
For wallpaper with a pronounced texture or relief, the main thing is pattern matching. This can be difficult in corners. Here, it’s better to use the “turn” or “split” technique, trying to match the pattern at the seam as precisely as possible. Sometimes you have to cut sheets with extra length to then carefully adjust the pattern.
Life Hack #6: Consistency is the Key to Success.
Don’t try to wallpaper all corners at once. Work sequentially: one sheet, the second, finishing the corner. Then move on to the next corner. This will help avoid confusion and mistakes.
These life hacks require a bit of practice, but the result is worth it. They will help you achieve a truly professional look for your walls.
Secrets of Durability: How to Ensure Wallpaper in Corners Doesn’t Peel Off

You’ve successfully wallpapered the corners, and they look perfect. But how to ensure this beauty lasts for many years, and the edges don’t start peeling off in a couple of months? There are secrets here too, related to glue, conditions, and care.
Secret #1: Correct Glue and Its Application.
- Glue Choice: Always use the glue recommended by the wallpaper manufacturer. For non-woven wallpaper – special non-woven glue, for paper wallpaper – the corresponding type.
- Consistency: The glue should have the correct consistency – not too liquid to avoid dripping, and not too thick to properly saturate the wallpaper.
- Application to Corners: Pay special attention to the edges of the sheet that will be pasted in the corner. Apply glue evenly, without gaps. If glue is applied to the wall (for non-woven wallpaper), ensure the entire surface in the corner area is covered with glue.
- Soaking (for paper wallpaper): If you are pasting paper wallpaper, give them time to soak in glue according to the instructions. But don’t overdo it, so they don’t get too wet.
Secret #2: Room Conditions.
- Temperature: Avoid drafts and sudden temperature changes during and immediately after wallpapering. This can lead to peeling.
- Humidity: Excessive humidity is also undesirable, especially for paper wallpaper.
- Drying Time: Allow the wallpaper to dry completely. This usually takes 24-48 hours. During this time, try not to open windows or turn on the air conditioner at full power.
Secret #3: Mechanical Impact.
- Tight Adhesion: Carefully press the wallpaper edges in the corners with a spatula or roller. This ensures maximum contact with the surface.
- Avoid Stretching: As we’ve already said, stretched wallpaper will tend to return to its original position, peeling off from the corners.
- Careful Cleaning: When cleaning, try not to hit the corners with brushes or stiff cloths.
Secret #4: Additional Fixation (in rare cases).
In particularly difficult cases, for example, if the walls are very uneven or you are using heavy vinyl wallpaper, some masters use a small amount of wallpaper seam sealant, which provides stronger fixation. But this should only be done in extreme cases and very carefully, so as not to spoil the appearance.
By following these simple but important rules, you can be sure that your corners will delight you with their perfect wallpapering for years to come. The main thing is not to rush, to pay attention to details, and to use quality materials.
I hope this detailed guide will help you confidently tackle wallpapering corners. Remember that practice is the best teacher, and with each subsequent corner, you will feel more and more confident!
Рекомендуем:
 What to do if wallpaper is peeling at the seams?
 How to Hang Wallpaper Without Seams: The Technique for Perfect Joints
 How to Hang Vinyl Wallpaper on a Paper Backing?
 New wallpaper over old: is it possible and when should you try it?
 Washable wallpaper for the kitchen: why it’s the best idea for your renovation?
 How to Wallpaper Behind a Radiator
 How many rolls of wallpaper do you need for a room? A simple way to know in advance
 MDF Panel Wall Finishing: Installation Guide
 Wall Cladding with Wood Paneling: A Step-by-Step Guide
 Liquid Wallpaper: Pros, Cons, and Application Technology
 PVC Wall Panels: Cheap and Cheerful. Installation Guide
 How to Make a Brick Wall in an Interior (Imitation)
 DIY Decorative Stone Wall Installation: Your Guide to Home Transformation
 Bark Beetle Decorative Plaster: Application Technology
 Internal Wall Insulation: Materials and Technology
 How to Tile Walls in a Bathroom: A Detailed Guide
 Joint filler for tiles: how to choose the color and apply it correctly
Grout for tiles: how to choose the color and apply it correctly
Joint filler for tiles: how to choose the color and apply it correctly
Grout for tiles: how to choose the color and apply it correctly
 DIY Venetian Plaster: Is It Possible?
 What to do if mold or mildew appears on the walls?