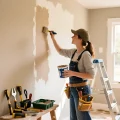
Greetings, friends! Today we will talk about what seems like a simple, but very important stage of any renovation – puttying walls for wallpaper. Many believe that this is a routine task that can be done “anyhow,” since there will be wallpaper on top anyway. But believe me, as a designer with many years of experience, it is the quality of the putty that determines how even, smooth, and beautiful your walls will be after wallpapering. A perfectly even surface is not just aesthetics; it is a guarantee that the wallpaper will lie without bubbles, wrinkles, or peeling, and the pattern at the seams will match perfectly. I think you will agree that disappointment from ruined expensive wallpaper and spoiled mood is something that anyone who invests time and money in their home wants to avoid. Therefore, today we will analyze all the nuances of puttying walls for wallpaper, from choosing the material to the final sanding, so that your renovation goes smoothly and the result pleases for many years to come.
Wall Putty for Wallpaper: Why It’s Not Just a Stage, But the Foundation of a Perfect Renovation?
Many mistakenly believe that puttying walls before wallpapering is a formality. After all, wallpaper, especially dense and patterned ones, can hide minor defects. However, this is a profound delusion. Let’s figure out why this particular stage is so important:
- Perfect Geometry: Wallpaper, especially thin vinyl or non-woven, has a tendency to emphasize any unevenness. Even small height differences or pits will be noticeable under them, creating an unpleasant visual effect. Quality putty evens out the surface, making the walls perfectly smooth and even.
- Adhesion: Putty creates an even base to which the wallpaper paste will adhere uniformly and reliably. On an uneven or poorly prepared surface, wallpaper may start to peel at the edges or form bubbles.
- Savings on Wallpaper and Paste: If the walls are perfectly even, you will need less paste, as it will be applied in a thin, even layer. Moreover, you won’t have to buy denser or textured wallpaper to hide defects, which can save your budget.
- Durability of the Finish: Properly puttied and prepared walls provide better adhesion and, consequently, a more durable finish. Wallpaper will not peel due to humidity or temperature fluctuations if the base underneath is reliable.
- Ease of Application: Working with even walls is much more pleasant and easier. You won’t have to fight bubbles or match patterns at uneven spots, wasting extra time and nerves.
Imagine you are building a house – the foundation must be perfectly even and strong, right? It’s the same story with puttying walls. It’s the foundation for your finishing coat. Neglecting this stage is a direct path to disappointment and the need to redo the renovation.
What Types of Putty Are There? Choosing the Ideal Compound for Your Walls
There is a huge variety of putty compounds on the construction market. For puttying walls for wallpaper, two main types are most commonly used:
1. Dry Mixes
These are powdered compounds sold in bags. They need to be mixed with water just before use. They are divided into:
- Cement Putties: They have high strength, moisture resistance, and resistance to temperature fluctuations. They are ideal for rough work, leveling significant irregularities, and for rooms with high humidity (e.g., bathrooms). However, they shrink when drying and can crack if the layer is too thick. For final leveling under wallpaper, they often require more thorough sanding.
- Gypsum Putties: They are characterized by plasticity, ease of application, and fast drying time. They form a smooth, even surface, ideal for subsequent painting or wallpapering. Gypsum putties “breathe,” regulating the microclimate in the room. However, they are less moisture-resistant than cement putties, so they are not recommended for very humid rooms without additional waterproofing. They can also shrink slightly.
When to Choose a Dry Mix:
- You have the time and desire to mix the solution yourself.
- You need to level significant irregularities, use a starting putty.
- Budget is important – dry mixes are generally cheaper than ready-made ones.
2. Ready-Made Putties
These are plastic pastes sold in buckets or tubes. They are ready to use and do not require mixing. They are most often made on an acrylic, latex, or PVA base.
- Acrylic Putties: The most popular option for final leveling under wallpaper. They are elastic, do not shrink, have excellent adhesion, and do not crack. They create a perfectly smooth surface and are easy to sand. They are ideal for all types of wallpaper.
- Latex Putties: Similar in properties to acrylics, but have even greater elasticity and moisture resistance. An excellent choice for vinyl and textile wallpapers.
When to Choose Ready-Made Putty:
- You want to save time and avoid mistakes during mixing.
- You need perfect smoothness and plasticity for the finishing layer.
- You are working with expensive, delicate wallpapers where every defect will be visible.
- The renovation is being done for the first time, and you want to minimize risks.
Important: The choice of putty depends on the condition of the walls and your tasks. For leveling large unevenness, it is better to use a starting putty (most often on a cement or gypsum base), and for the finishing layer under wallpaper, use a fine-grained finishing putty (gypsum or acrylic). Pay attention to the manufacturer’s labeling: for final leveling under wallpaper, mixtures labeled “finish,” “for thin coats,” or “for painting” are suitable.
Wall Putty for Wallpaper: How Many Coats Are Really Needed? Understanding the Nuances
This is one of the most frequent questions, and the answer is not as simple as it seems. The number of putty coats depends on the initial condition of your walls and the type of putty used.
1. Assessing Wall Condition
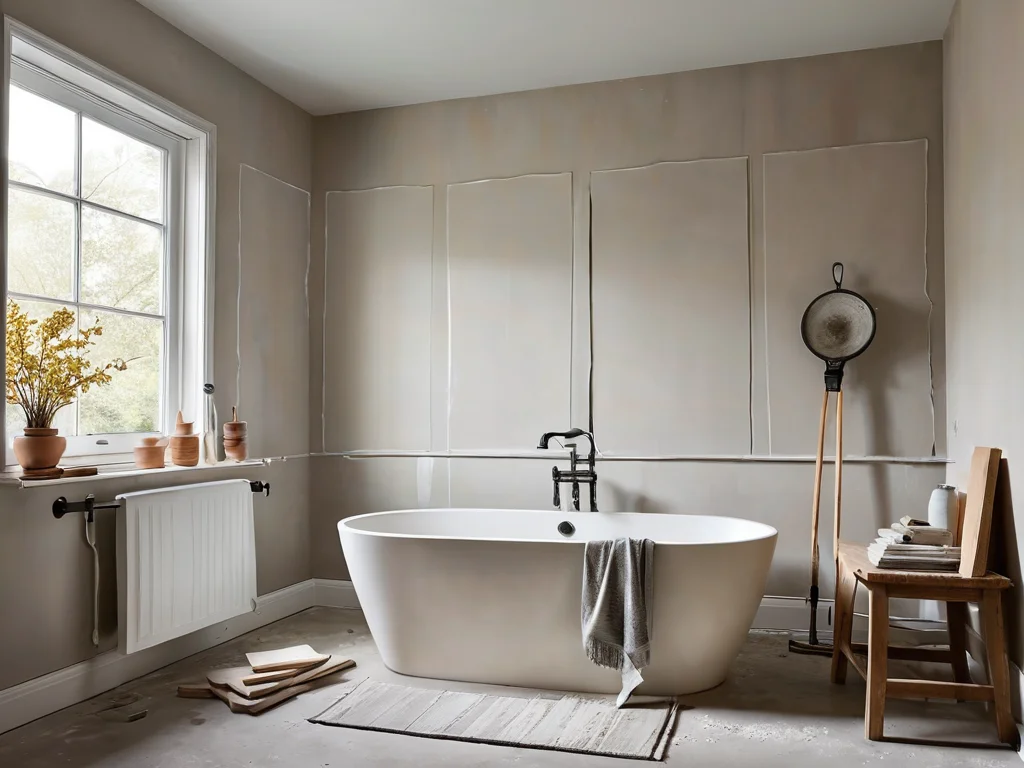
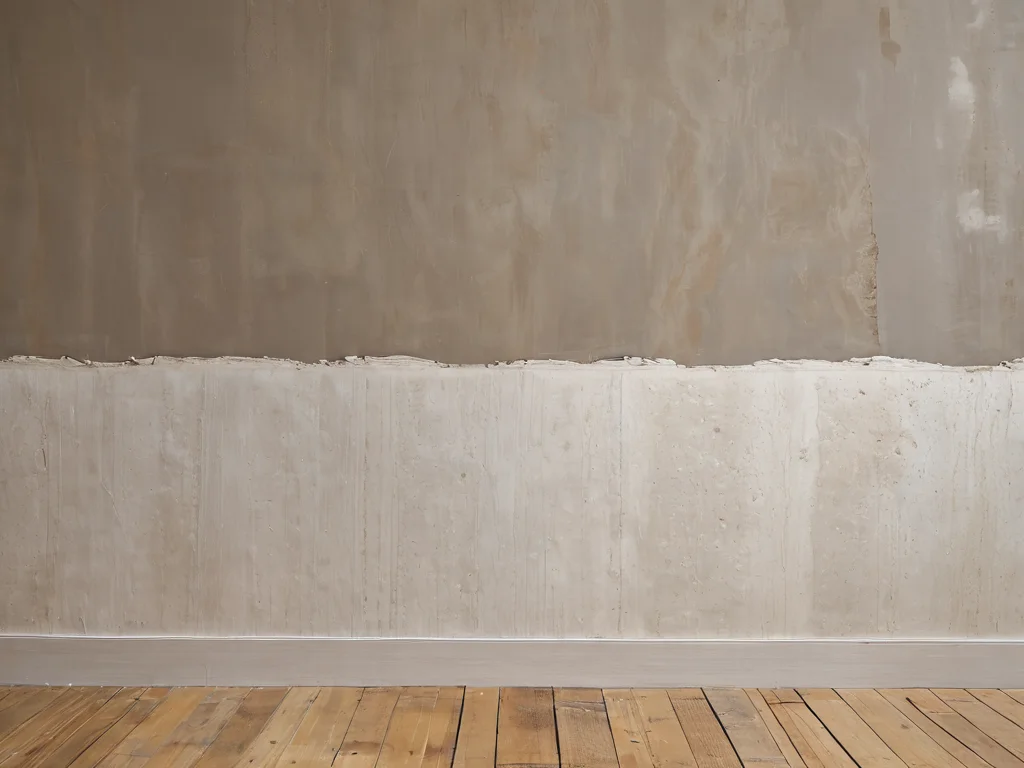
- New Concrete Wall or Plaster: Usually has unevenness, pits, and small cracks. At least two coats will be needed here: a starting coat and a finishing coat.
- Old Painted Walls: If the paint is holding well, with no peeling, one to two coats of finishing putty will be sufficient to smooth out minor defects.
- Walls with Wallpaper: Old wallpaper must be removed. After that, assess the condition of the surface underneath.
- Drywall: The seams between sheets and screw holes require filling with putty. This is usually done in 2-3 stages: first, filling the seams, then a coat of finishing putty over the entire surface.
2. Starting and Finishing Coats
Most cases will require the use of at least two types of putty:
- Starting Putty: This is a coarser but strong material designed for leveling significant irregularities, filling cracks, and pits. The thickness of the starting putty layer can reach several millimeters (depending on the type of mixture and manufacturer’s recommendations). Usually, one coat is applied. After drying, starting putty may require light sanding to remove bumps and create a smoother surface for the finishing coat.
- Finishing Putty: This is a fine-grained, plastic compound used to create a perfectly smooth surface. Finishing putty is applied in a thin layer (usually up to 1-2 mm) over the starting coat or directly onto a smooth surface. To achieve the best result, two thin coats of finishing putty are often required.
3. How Many Coats of Finishing Putty?
To achieve the best results under wallpaper, especially thin or light-colored ones, it is recommended to apply two thin coats of finishing putty:
- First Coat of Finishing Putty: Applied in a thin, even layer. Its task is to remove minor scratches left after the starting coat or surface preparation, and to create a uniform base.
- Second Coat of Finishing Putty: Applied after the first coat has completely dried and been lightly sanded. This coat “smooths out” the surface, removes the smallest defects, and provides that mirror-like smoothness that is so necessary under wallpaper.
When One Coat of Finishing Putty Might Be Enough:
- If the walls were initially almost perfectly even, and you only used quality plaster.
- If you are using very dense wallpaper with a texture that can hide minor imperfections.
When More Than Two Coats Might Be Needed:
- If visible defects or scratches remain after the first coat of finishing putty.
- If the walls are very large and there is a risk that moisture from the first coat will cause the base to deform.
Important Tip: Always follow the manufacturer’s instructions on the putty packaging. They indicate the maximum thickness of one layer and the drying time. Do not try to apply putty too thickly in one go – this can lead to cracks and long drying times.
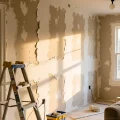
Preparing Walls for Puttying: Proper Cleaning and Priming Are Key to Success
No putty, however good, will yield perfect results if the walls are not properly prepared. This stage is often underestimated, but it determines how well the putty will adhere and how long the finish coat will last.
1. Wall Cleaning
Before starting work, the walls must be thoroughly cleaned of all excess:
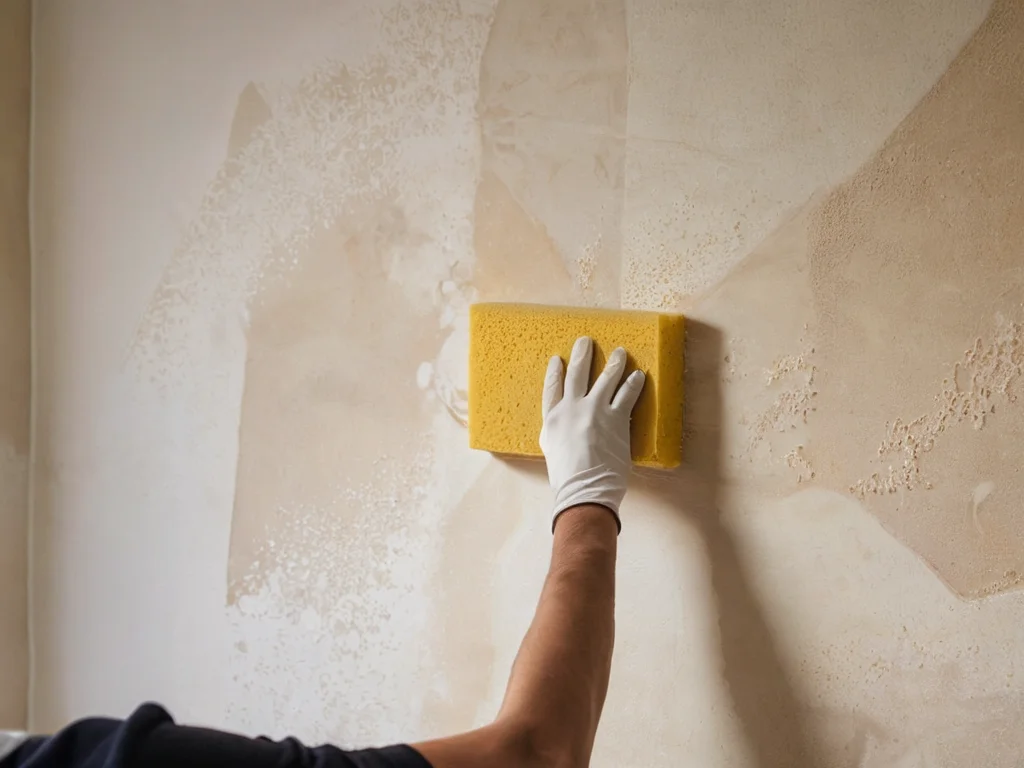
- Removing Old Coatings: Old wallpaper, paint, and peeling plaster must be completely removed. Wallpaper is best softened with a special agent or soapy water and removed with a spatula. Loose paint should also be removed with a spatula or wire brush.
- Removing Dust and Dirt: After removing old coatings, wipe the walls with a damp cloth and let them dry completely. Dust is the main enemy of adhesion.
- Removing Grease Stains: If there are grease stains on the walls (e.g., in the kitchen), they must be degreased with soapy water or a special cleaner.
- Mold Treatment: If there are signs of mold or mildew on the walls, they must be treated with an antiseptic agent according to the instructions.
- Removing Protrusions: All protruding nails, screws, and remnants of glue or old putty must be carefully hammered down or scraped off.
2. Leveling Rough Defects (If Necessary)
If there are large holes, deep cracks, or chips on the walls, they should be pre-filled with starting putty or a repair compound. Let this layer dry and, if necessary, lightly sand it.
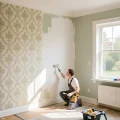
3. Priming – Why Is It Needed?
Primer is a binding agent that penetrates the pores of the wall material, strengthens it, improves adhesion (bonding) of subsequent layers, and reduces the absorbency of the surface. This is a very important step!
- Strengthening the Base: Primer impregnates and binds small dust particles and weak areas on the surface, making it stronger.
- Improving Adhesion: Putty and paste adhere better to a primed surface, which prevents them from peeling off.
- Reducing Absorbency: Unprimed walls, especially drywall or old plaster, can absorb a lot of moisture from the putty or paste. This leads to uneven drying, staining, and reduced strength. Primer makes the surface more uniform in absorbency.
- Preventing Mold: Some primers contain antiseptic additives that protect walls from mildew.
- Facilitating Sanding: A smooth, strengthened surface is easier to sand.
4. How and When to Prime
- When to Prime: Primer is applied after cleaning the walls and before the first coat of putty. It is also recommended to prime walls after each coat of putty (after sanding) to ensure good adhesion between layers and prepare the surface for the next stage.
- Type of Primer: For most wallpapering jobs, an acrylic deep-penetrating primer is suitable. Choose primers from trusted manufacturers.
- Application Method: Primer is conveniently applied with a long-nap roller, brush, or spray gun. It is important to distribute the compound evenly over the entire surface, without leaving dry spots or drips.
- Drying Time: Allow the primer to dry completely before applying the next coat of putty. Drying time is usually indicated on the packaging (from 2 to 24 hours, depending on the type of primer and room conditions).
Remember: Saving on primer is one of the most common and costly mistakes in renovation. Proper priming is your investment in the durability and beauty of the future finish.
Wall Putty Technology for Wallpaper: A Step-by-Step Guide for Beginners
So, the walls are prepared, the primer is dry. Now it’s time to start the actual puttying. Don’t be intimidated if you’re doing it for the first time – by following this guide, you’ll succeed!
Step 1: Preparing the Putty Mixture
- For Dry Mixes: Pour the required amount of powder into a clean container. Gradually add clean room-temperature water, constantly mixing with a construction mixer or a drill with a paddle attachment at low speed. Observe the proportions indicated by the manufacturer on the packaging. The mixture should be homogeneous, plastic, without lumps, and have a consistency similar to thick sour cream.
- Let the Mixture “Mature”: After preparation, let the solution stand for 5-10 minutes (according to instructions), then mix again. This will improve the plasticity and working properties of the mixture.
- Ready-Made Mixes: Simply open the bucket and stir the putty if it has separated.
- Important: Prepare the solution in portions that you can use within the time specified by the manufacturer (pot life). Do not try to “revive” hardened putty by adding water – this will significantly degrade its properties.
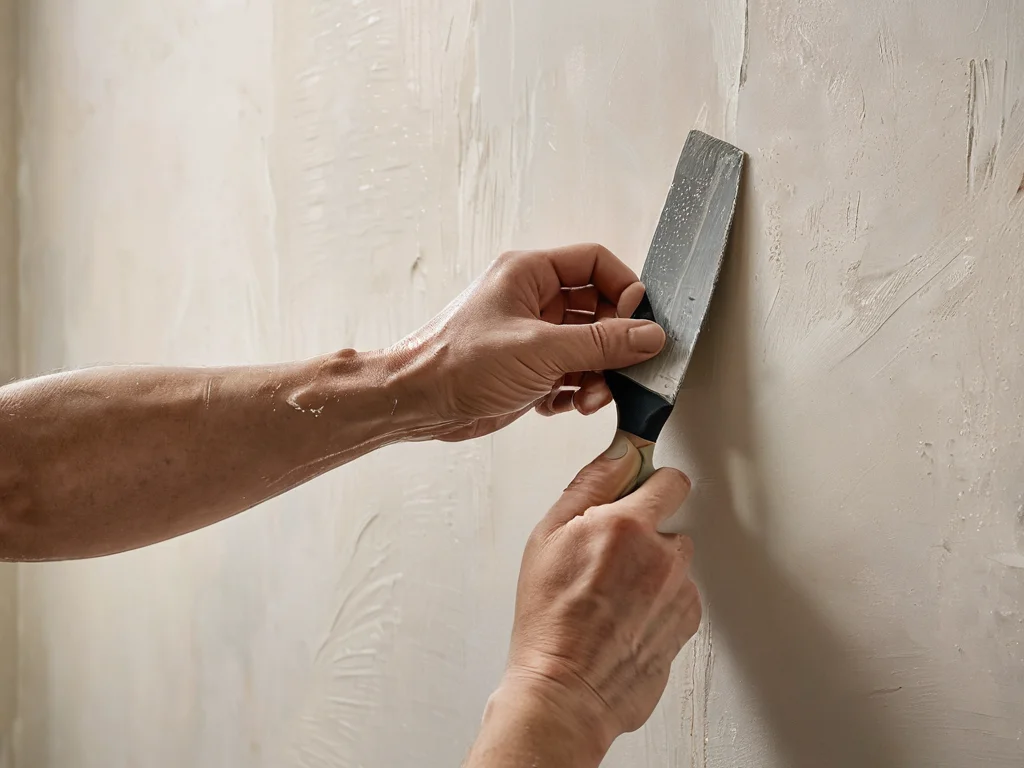
Step 2: Applying Starting Putty (If Necessary)
- Tools: You will need two spatulas – a wide one (40-60 cm) and a narrow one (8-12 cm).
- Process: Using the narrow spatula, scoop a small amount of putty onto the wide spatula. Press the spatula against the wall at a slight angle (about 20-30 degrees) and evenly spread the mixture over the surface, moving from bottom to top or top to bottom. Try to apply the layer as evenly as possible, overlapping the previous pass of the spatula by 2-3 cm.
- Leveling: After application, go over the surface with the wide spatula, removing excess putty and filling small pits.
- Filling Seams and Cracks: Pay special attention to seams and cracks. They can be pre-filled by embedding reinforcing tape (serpyanka or paper tape) into the putty, and then applying the main layer.
- Drying: Let the starting coat dry completely. Drying time depends on the thickness of the layer and room conditions (usually from 12 to 24 hours).
Step 3: Applying Finishing Putty
- First Coat: Apply the first thin (1-2 mm) coat of finishing putty as described in step 2, striving for maximum smoothness.
- Drying and Sanding: After the first coat has completely dried (usually 6-12 hours), perform light sanding. Use a sanding screen or fine-grit sandpaper (P120-P180) attached to a sanding float. Carefully go over the entire surface, removing minor unevenness, bumps, and scratches.
- Dust Removal: After sanding, thoroughly remove dust with a dry brush or vacuum cleaner.
- Priming: Apply a coat of primer and let it dry.
- Second Coat: Apply a second thin coat of finishing putty, just like the first, but now onto a perfectly prepared base. Try to move the spatula as smoothly as possible to avoid leaving marks.
- Drying: Let the second coat dry completely (6-12 hours).
Tip: Work with good lighting. Place a light source nearby (e.g., a spotlight) to see the slightest unevenness and glare on the wall.
How to Achieve Perfect Smoothness? Secrets of Finishing Putty and Sanding
Finishing putty and subsequent sanding are precisely the stages that distinguish professional work from amateur work. They create that “mirror-like” surface that is ideal for wallpaper.
Secrets of Applying Finishing Putty
- Thinness of the Layer is Everything: The main rule is to apply finishing putty in the thinnest possible layer, literally “rubbing” it into the wall. It’s better to apply two thin coats than one thick one. This will prevent cracks and make sanding easier.
- Spatula Movement: Use the correct technique. Hold the spatula at a slight angle to the wall (15-20 degrees). Movements should be smooth, without abrupt stops. Cover the area with overlapping strokes to avoid visible seams.
- Tool Cleanliness: Regularly clean spatulas of putty residue. Dried particles can scratch the fresh layer.
- Working with Corners: For internal corners, use an angle spatula or a special corner trowel. For external corners, use a plastic or metal corner bead, which is then covered with putty.
- Fresh Areas: Try to work continuously so that the seams between fresh and already setting areas are minimal. If you have to take a break, try to finish the work at a natural corner or line (e.g., near a window or door).
- Type of Putty: For the finishing layer, use only fine-grained putties intended for these purposes. They provide the smoothest surface.
Secrets of Perfect Sanding
Sanding is the process of removing the smallest unevenness and roughness left after puttying. The quality of sanding directly affects how the wallpaper will look.
- Correct Tool: Use a sanding float (plastic or aluminum) with a sanding screen or sandpaper attached. For the finishing layer under wallpaper, it is optimal to use a screen or paper with a grit of P120-P180. Coarser grit can leave scratches that will be visible under the wallpaper.
- Sanding Technique: Move over the surface with circular or cross-hatching motions, applying even pressure to the float. Do not linger in one spot to avoid creating depressions.
- Quality Control: After each pass, remove dust from the surface and inspect the wall from different angles, preferably under side lighting. This will help you spot the slightest defects.
- Using a “Straight Edge” (Long Spatula): Some craftsmen use a long spatula (1-2 meters) moved across the wall at different angles to check for smoothness. This helps identify even the most minor unevenness.
- “Wet Putty” (for Experienced Users): This is an advanced technique where the second coat of finishing putty is applied over the first coat, which is not yet completely dry, and both coats are sanded simultaneously. It requires great skill and perfect application technique but allows for exceptional smoothness. Beginners are better off sticking to the classic method of sanding a dry layer.
- Dust Removal: This is critically important! After sanding, the entire surface must be very thoroughly cleaned of dust. It is best to use a shop vacuum and then wipe the wall with a slightly damp, well-wrung-out cloth. Dust remaining on the wall will hinder the adhesion of the primer and the next layer.
Don’t be afraid of sanding! Yes, it’s a dusty job, but it’s what guarantees you that perfect result when the wallpaper lies flawlessly, and the wall looks like a single smooth canvas.
Common Mistakes in Wall Puttying: How to Avoid Them and What to Do If They’ve Already Happened
Even with the most thorough approach, mistakes can happen. The main thing is to know about them in advance and be able to correct them. Let’s look at the most common blunders:
Preparation Mistakes
- Insufficient Wall Cleaning: Remnants of old wallpaper, dust, grease, paint – all of this reduces putty adhesion.
- Skipping the Priming Stage: This is the most common and critical mistake. Primer ensures adhesion and even absorption. Without it, the putty may peel off, and the wallpaper may “run.”
- Using the Wrong Primer: For finishing putty, it’s better to use fine-grained compounds, and for deep penetration, use special primers.
- What to Do: If you realize you haven’t primed the walls, it’s best to stop, thoroughly dust the surface, and apply primer.
Mixing and Application Mistakes
- Incorrect Consistency: Putty that is too thick is difficult to apply and scratches the wall; too thin putty runs and doesn’t hold well.
- Lumps in the Mixture: The result of poor mixing. Lumps create unevenness and can fall off.
- Too Thick Layer: Starting putty can crack when drying; finishing putty will dry slowly and be difficult to sand.
- Application on an Unprepared Surface: If the previous layer of putty is not dry or has not been sanded, the new layer will not lie evenly.
- “Torn” Edges: If the edges of the putty strokes remain “torn” during application, it indicates an incorrect angle or excessive pressure.
- What to Do: If lumps appear, it’s better to discard the putty and mix a new batch. If the layer is too thick, let it dry and level it by sanding, or carefully remove the excess. If you have “torn edges,” simply go over them with a spatula, removing the excess.
Sanding Mistakes
- Using Too Coarse Sandpaper: Leaves deep scratches that will be visible under the wallpaper.
- Insufficient Dust Removal: Dust interferes with the adhesion of subsequent layers.
- “Burning Through” the Putty: Excessive pressure in one spot can wear through the putty to the base or create a depression.
- Insufficient Sanding: Leftover bumps and unevenness will be noticeable under the wallpaper.
- What to Do: If scratches from coarse sandpaper remain, you will have to apply another thin coat of finishing putty and sand again, but with fine grit. If dust remains, clean the surface again. If depressions have formed, fill them with finishing putty and carefully sand after drying.
When Nothing Helps
If the walls turn out very uneven after puttying, with bumps and deep scratches that cannot be corrected by sanding, you will have to:
- Remove the putty down to a level surface.
- If putty was applied to drywall, you may need to replace the sheet.
- Apply new coats of putty, following all the rules.
Main Advice: Don’t rush, work carefully and attentively. It’s better to spend a little more time on each stage than to redo the entire job later.
Expert Tips: A Checklist for Perfect Puttying Before Wallpapering
To ensure your renovation goes smoothly and your walls under the wallpaper are perfect, here is my expert checklist. Go through each point – it will help you not to miss anything:
Surface Preparation
- [ ] Are the walls completely cleaned of old coatings (wallpaper, paint, dust)?
- [ ] Are all protrusions, nails, and old glue removed?
- [ ] Are grease stains and mold traces removed, and surfaces treated with antiseptic (if necessary)?
- [ ] Are large defects (pits, cracks) filled with starting putty and dried?
- [ ] Is the wall primed with a deep-penetrating compound?
- [ ] Has the primer dried completely?
Puttying
- [ ] Is the putty mixture prepared correctly (no lumps, correct consistency)?
- [ ] Is starting putty used for leveling (if necessary)?
- [ ] Has the first coat of finishing putty been applied (thin, even)?
- [ ] Has the first coat of finishing putty dried completely?
- [ ] Has the surface of the first coat been lightly sanded (grit P120-P180)?
- [ ] Has dust after sanding been thoroughly removed?
- [ ] Has the surface been re-primed?
- [ ] Has the primer dried?
- [ ] Has the second coat of finishing putty been applied (thin, even)?
- [ ] Has the second coat dried completely?
Final Sanding and Inspection
- [ ] Has final sanding been performed (grit P150-P180, or finer)?
- [ ] Was the sanding done evenly, without skips or “burn-throughs”?
- [ ] Has dust after final sanding been removed with a vacuum cleaner and a damp cloth?
- [ ] Has the surface been inspected under side lighting for unevenness?
- [ ] If defects were found, have they been corrected (additional puttying, sanding)?
- [ ] Has final dust removal been done?
Additional Tips from the Designer:
- Lighting: Always work with the brightest light possible, which allows you to detect the slightest defects.
- Patience: Don’t rush. Each stage requires its own drying time.
- Material Quality: Don’t skimp on putty and primer. Quality materials are the key to your peace of mind and a perfect result.
- Practice: If you are a beginner, practice on an inconspicuous section of the wall or on a piece of drywall.
By following these recommendations, you can achieve perfectly smooth walls yourself, preparing them for wallpapering. Remember that the beauty of your home begins with correctly executed renovation stages!

Рекомендуем:
 Starting and Finishing Putty: What’s the Difference and How to Use It
 How to Repair Cracks and Holes in Walls Before Finishing: A Complete Guide
 Sanding Walls After Puttying: A Perfect Surface with Your Own Hands
 Priming Walls Before Wallpapering and Painting: The Ideal Foundation for Renovation
 How to Seal Drywall Seams to Prevent Cracks
 New wallpaper over old: is it possible and when should you try it?
 DIY Venetian Plaster: Is It Possible?
 Liquid Wallpaper: Pros, Cons, and Application Technology
 Betonokontakt: A Comprehensive Guide to Application for Perfect Renovation
 How to Hang Vinyl Wallpaper on a Paper Backing?
 Wall Cladding with Wood Paneling: A Step-by-Step Guide
 What to do if wallpaper is peeling at the seams?
 Washable wallpaper for the kitchen: why it’s the best idea for your renovation?
 How to Update Old Tiles Without Removing Them: 99 Ways to Transform Your Bathroom and Kitchen
 Bark Beetle Decorative Plaster: Application Technology
 How to Hang Wallpaper Without Seams: The Technique for Perfect Joints
 Gypsum or Cement Plaster: What and Where to Use?
 DIY Decorative Stone Wall Installation: Your Guide to Home Transformation
 How to Wallpaper Behind a Radiator
 What to do if mold or mildew appears on the walls?