Greetings, dear readers of design-foto.ru! Today we will talk about a material that has earned a reputation as a “workhorse” in the world of finishing – PVC panels. They are often called a “budget” solution, and this is indeed true. But are they as simple and “cheerful” as they seem at first glance? Let’s figure out how to transform your home with their help, avoid common mistakes, and do it stylishly and inexpensively. As a designer, I often face tasks where I need to find a compromise between beauty, practicality, and budget. PVC panels in such cases are one of the most interesting tools in my arsenal. They can be both a temporary and a quite durable solution if approached with intelligence in selection and installation.
PVC Panel Walls: A Trendy Budget Option or a Temporary Solution?
When it comes to renovations, many of us immediately think of painting, wallpaper, or tiles. But what if the budget is limited, and you want a quick and noticeable result? PVC panels come to the rescue. Initially, they gained popularity due to their affordability and ease of installation, especially in utility rooms, bathrooms, and kitchens. However, modern technologies have come a long way. Today, manufacturers offer panels with an incredible variety of textures and colors that can imitate wood, stone, leather, and even textiles. This is no longer just “cheap and cheerful”; it’s an opportunity to create a quite stylish and modern interior without colossal expenses.
So, is it a trend or a temporary solution?
I would say it’s more of a universal solution that can be both trendy and, conversely, outdated, depending on how you use it. If you choose cheap, plain panels without any frills and try to finish the entire apartment with them, the result might look budget and uncomfortable. But if you approach it wisely, choose high-quality panels with interesting textures, combine them competently, and use them in appropriate areas – it can be a real lifesaver for your wallet and an excellent decorative element.
Why are PVC panels still relevant?
- Affordability: This is perhaps the main advantage. The cost of PVC panels is significantly lower than most other finishing materials.
- Ease of installation: Even without special skills, you can manage the installation, especially if using a frame.
- Moisture resistance: PVC is not afraid of water, making it ideal for bathrooms, kitchens, and hallways.
- Easy care: Such walls are easy to clean, which is especially valuable for families with children and pets.
- Concealment: PVC panels allow you to hide wall imperfections, old coatings, and even utilities installed on the frame.
- Variety: Today’s assortment is amazing – from wood and stone imitations to photo printing and 3D effects.
However, it’s important to understand that PVC panels are plastic. With strong heating or direct contact with fire, they can melt and release harmful substances. Therefore, it is not recommended to use them near open flames (e.g., near a fireplace) or powerful heating appliances. You should also be careful with sharp objects – panels can be scratched.
Where PVC Panels Look Advantageous: 7 Best Ideas for Your Home
Despite their versatility, PVC panels perform best in certain areas and with a specific approach. It’s important to understand where exactly they will look appropriate and stylish, and where they might spoil the overall impression of the interior.
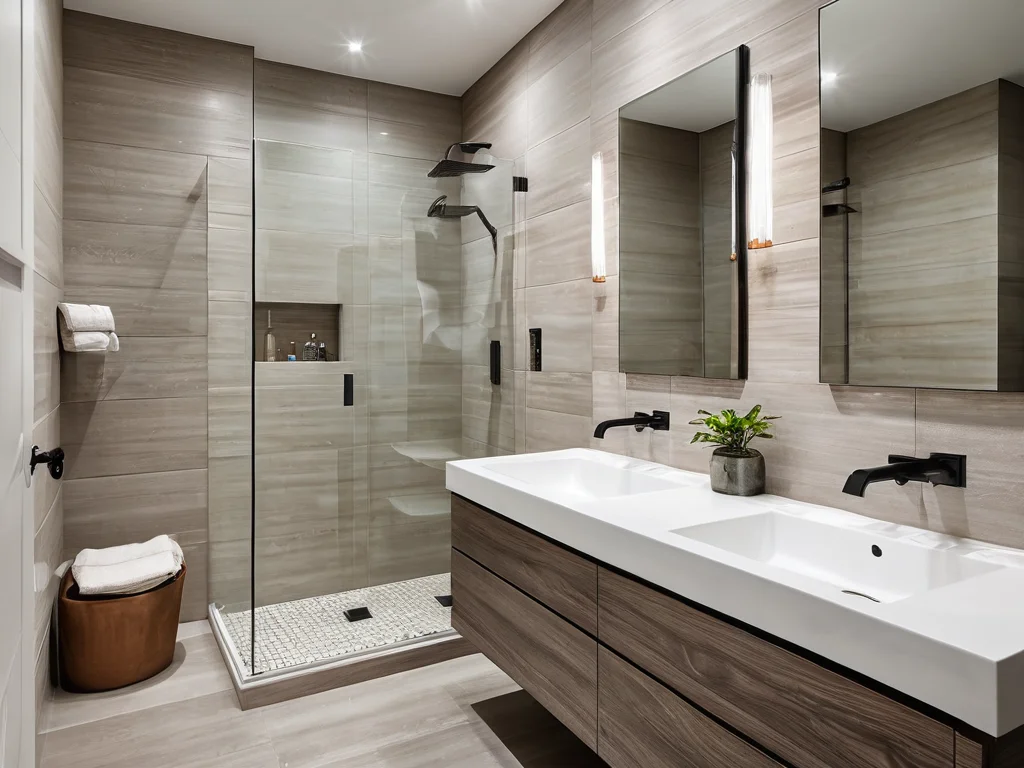
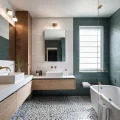
1. Bathroom
This is perhaps a classic. High moisture resistance and ease of care make PVC panels an ideal choice for wall finishing in the bathroom. Choose panels with a texture imitating tiles or marble – it looks modern and neat. You can even combine panels of different colors to create interesting accents.
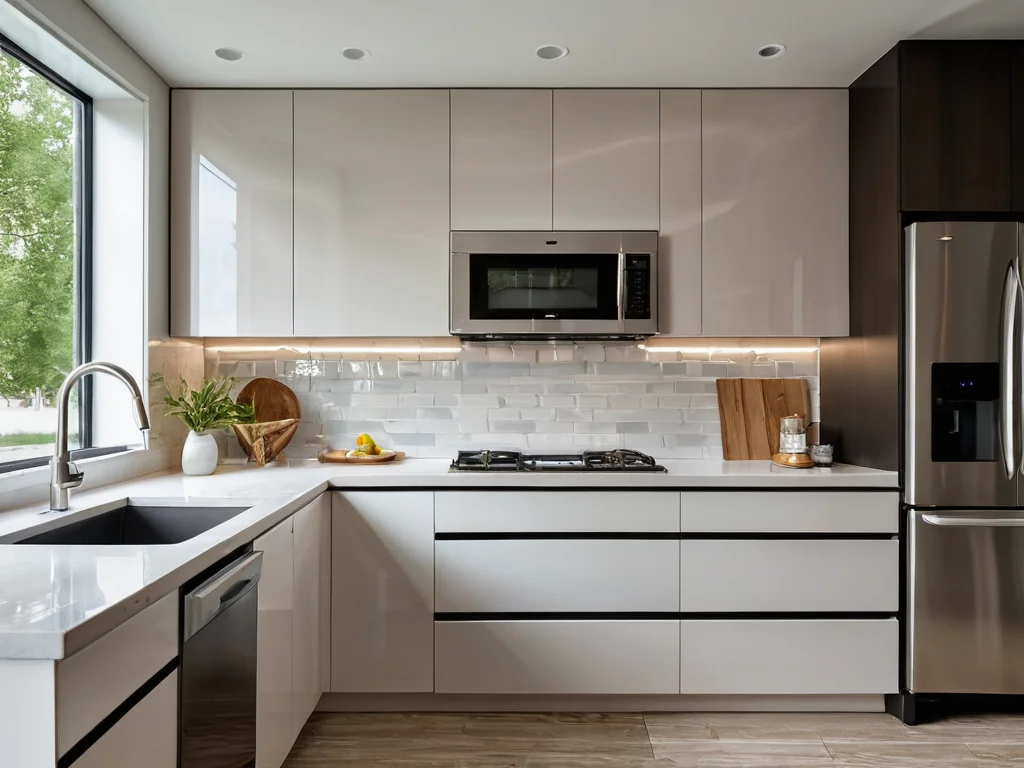
2. Kitchen (Backsplash and Work Area)
The kitchen backsplash is a place exposed to temperature changes, moisture, and dirt. PVC panels handle these tasks well. Imitation “subway” tiles or smooth panels matching the kitchen cabinets are excellent options. The main thing is to avoid overly cheap and thin panels that can deform from the heat of the stove.
3. Hallway
The hallway is an area where walls often get dirty. Easy-to-clean PVC panels are an excellent solution. You can choose wood-look panels to create a cozy atmosphere, or stone imitation to add texture to the interior. Pay special attention to the entrance area – here, the panels are subjected to the greatest loads.
4. Loggia or Balcony
If you plan to furnish a balcony or loggia, PVC panels will be an excellent budget option. They are resistant to temperature fluctuations (within reasonable limits) and moisture, are easy to care for, and will help create a cozy relaxation space.
5. Utility Rooms
Pantries, walk-in closets, boiler rooms – where appearance is not paramount, but practicality and affordability are important, PVC panels are indispensable. They allow for quick and inexpensive wall updates.
6. Children’s Room (Accent Wall)
Here you need to be more careful. You shouldn’t finish the entire children’s room with PVC panels. But as an accent wall – why not? Choose panels with children’s drawings, bright colors, or wood imitation. The main thing is to ensure the material is safe and has no strong odor.
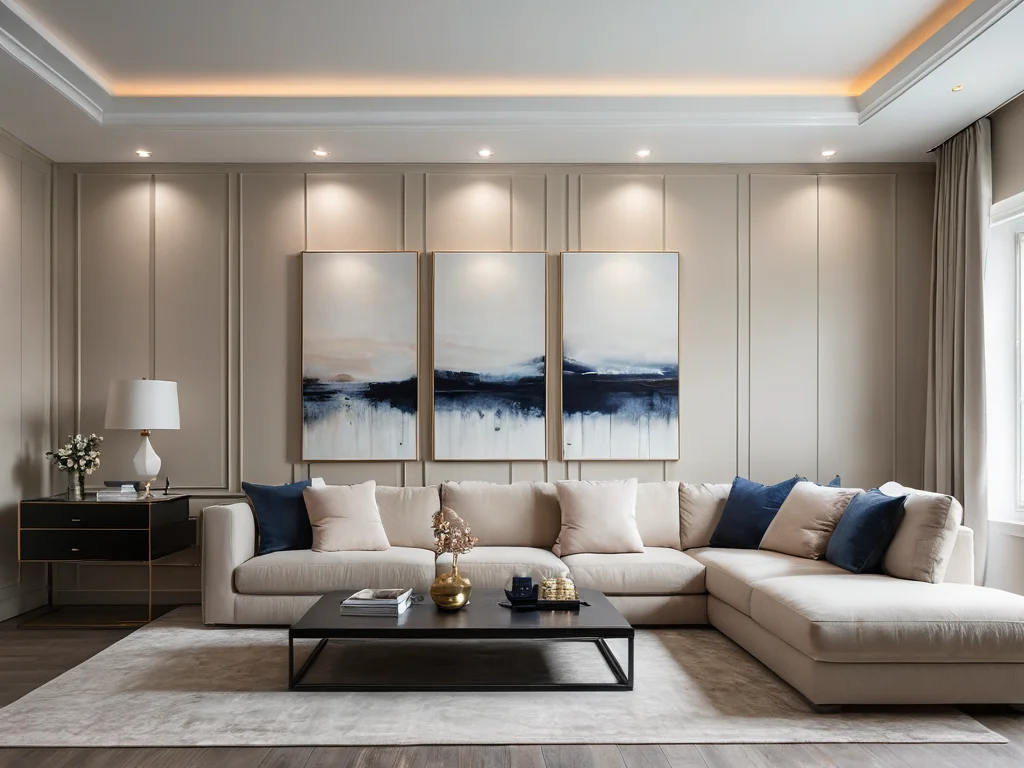
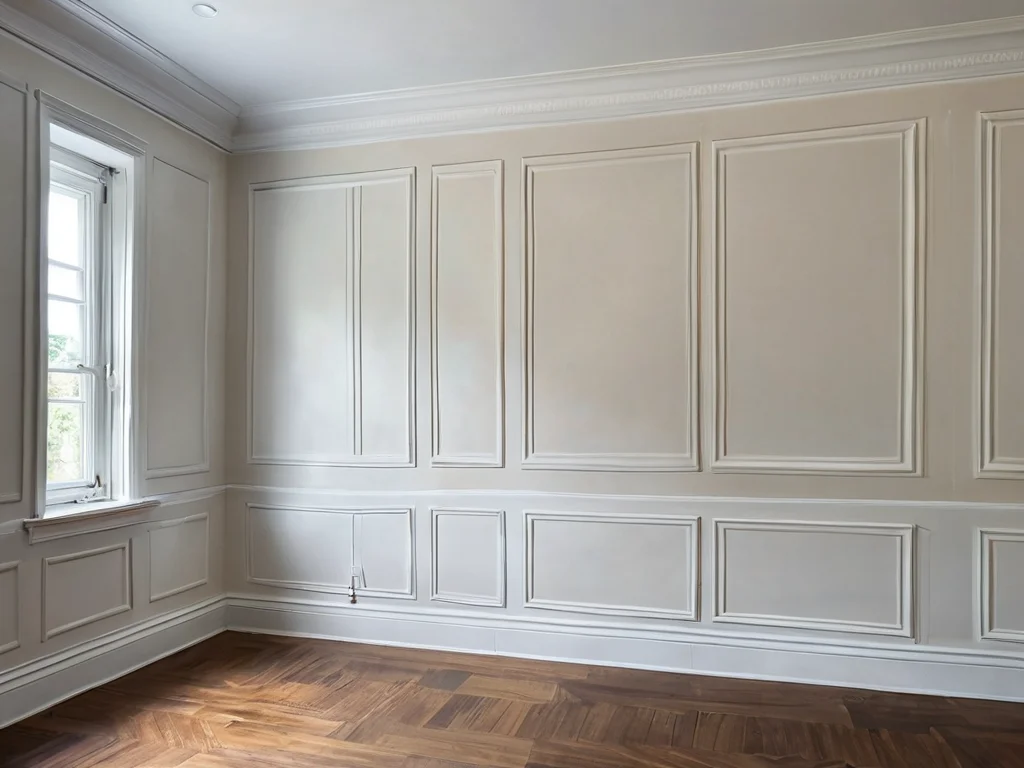
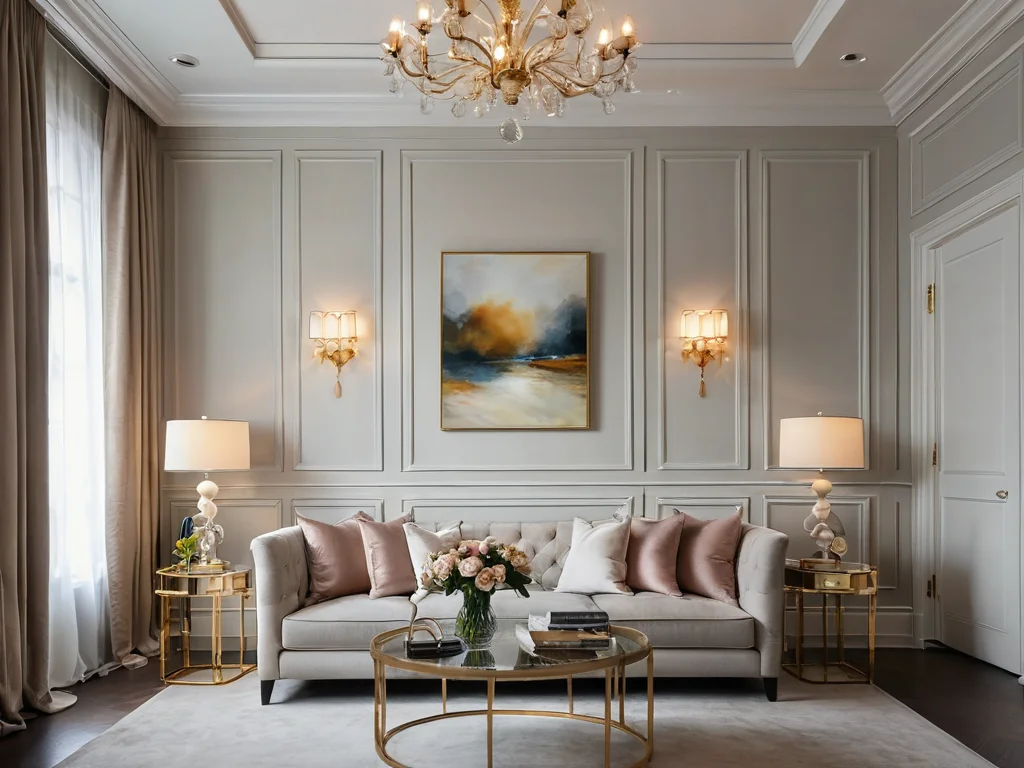
7. Accent Walls in the Living Room or Bedroom
Sometimes, to refresh an interior, one accent wall is enough. PVC panels with wood, brick, or stone textures can be an effective solution, especially in loft, Scandinavian, or minimalist styles. It’s important that such a wall is well-lit and matches the rest of the finishes.
What to Avoid?
- Full finishing of living rooms: Especially in the living room or bedroom, where a cozy atmosphere and natural materials are important, a continuous coating of PVC panels can look cheap and tasteless.
- Imitation of expensive materials: If the budget allows, it’s better to choose real stone, wood, or high-quality wallpaper than a cheap imitation that will immediately give itself away.
- Overly bright and flashy patterns: They quickly become tiresome and can make the interior tasteless.
Choosing PVC Panels: A Guide to Types, Colors, and Manufacturers
The PVC panel market is huge today, and it can be difficult to navigate through the variety. Let’s break it down so you can make an informed choice.
Main types of PVC panels by surface type:
- Seamless panels: This is the most popular option. Thanks to a special fastening system, the joints between panels are almost invisible, creating the effect of a solid surface. This is an ideal choice for creating a neat and modern look.
- Panels with an open seam: Visible joints remain between such panels, which can resemble clapboard. This option is more budget-friendly but looks less aesthetically pleasing in most interiors.
- PVC clapboard: Essentially, these are the same panels with an open seam, but narrower and often used for finishing balconies, ceilings, or small rooms.
Surface types and textures:
- Glossy: Reflect light, visually expand space, but dust, scratches, and fingerprints are more noticeable on them.
- Matte: Look more noble and cozy, hide minor defects, but can visually slightly narrow the space.
- Textured: Imitate various materials – wood, stone, brick, fabric. It’s important to choose a quality imitation so that it looks natural.
- With photo printing: Allows you to apply any image, but it’s important to ensure the print quality and colorfastness.
What to look for when choosing?
1. Thickness and rigidity
High-quality PVC panels should be sufficiently rigid and elastic. Try bending a panel: it should not break or crack easily. The thicker and more rigid the panel, the stronger and more durable it is. The optimal thickness is from 0.5 mm and above. Thinner panels (0.3-0.4 mm) are more suitable for ceilings or places without mechanical loads.
2. Print and coating quality
If you are choosing panels with a pattern or texture, inspect them carefully. The imitation should be clear, without blurring or distortion. Ensure the coating is even, without bubbles or roughness. Run your hand over it – the surface should be smooth.
3. Absence of odor
High-quality PVC has almost no odor. If the panels emit a sharp chemical smell, it’s best to refuse the purchase. This may indicate low material quality or the use of harmful additives.
4. Geometry
Make sure the edges of the panels are even, and the locks (if any) are without defects. This is important for a tight and neat connection.
5. Manufacturers
Both domestic and foreign manufacturers are represented on the market. Among the well-established brands, you can highlight:
- Russia: Doshir, Plastolit, Vi-Plast. These manufacturers offer a good price-quality ratio.
- Europe: FineFloor (Belgium), Vinilam (Belgium). These brands are often positioned as more premium, with high quality and a wide range.
Designer’s tip: Don’t be afraid to experiment with textures! Light wood-look panels in Scandinavian style, imitation of aged brick for loft, or smooth white panels for minimalism – the choice is huge. The main thing is that the material harmonizes with the overall style of the room.
How to Calculate and Order PVC Panels: A Step-by-Step Plan Without Mistakes
Correct calculation is the key to not having to buy more material at the last moment or, conversely, being left with leftovers. Let’s go through the steps.
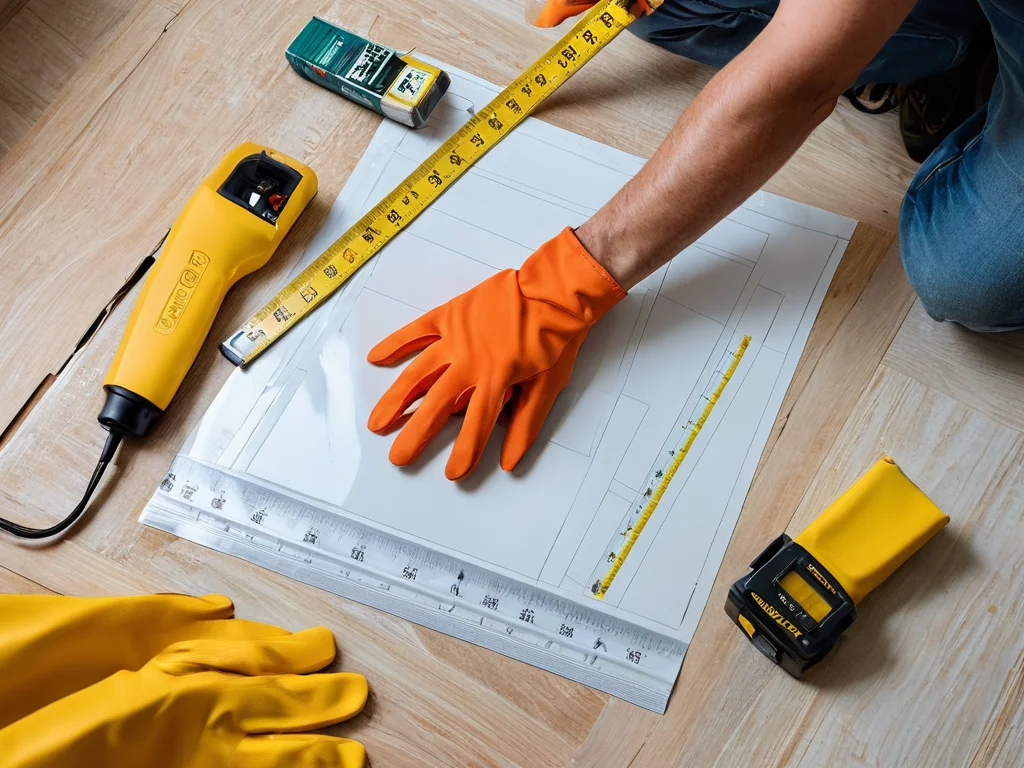
Step 1: Measure the room
You need to know:
- The perimeter of the room (the sum of the lengths of all walls).
- The ceiling height.
Step 2: Calculate the number of panels
PVC panels usually have a standard length (e.g., 2.6 meters, 2.7 meters, 3 meters) and width (e.g., 25 cm, 37.5 cm, 50 cm). The most common option is panels with a width of 25 cm.
Example calculation for walls with a width of 25 cm (0.25 m):
Suppose you have a wall 4 meters long and 2.5 meters high. You plan to lay the panels vertically.
- Row length: 4 meters.
- Number of panels in one row: 4 m / 0.25 m = 16 panels.
- Number of rows by height: 2.5 m (wall height) / 0.25 m (panel width, if it’s square, or the smaller side) – no, we don’t calculate it like that. It’s more correct this way: 2.5 m (wall height) / (e.g., 0.25 m, if the panel is 25cm by 2.7m, then calculate by width if laying vertically).
Correct calculation:
Let’s take a standard panel with a length of 2.7 meters and a width of 0.25 meters.
Option 1: Vertical installation
- Number of panels by perimeter: Room perimeter / Panel width. If the perimeter is, say, 16 meters, then 16 m / 0.25 m = 64 panels.
- Number of panels by height: Wall height / Panel length. If the wall height is 2.5 m, and the panel length is 2.7 m, then we need 1 panel for each row by height.
- Total number of panels: Number of panels by perimeter * Number of panels by height. If the wall height is 2.5 m, then one panel with a length of 2.7 m is suitable. If we have a perimeter of 16 m, and panels are 0.25 m wide, then we need 16 / 0.25 = 64 panels.
Option 2: Horizontal installation
- Number of panels by height: Wall height / Panel width. If the wall height is 2.5 m, and the panel width is 0.25 m, then 2.5 m / 0.25 m = 10 panels.
- Number of panels by perimeter: Room perimeter / Panel length. If the perimeter is 16 m, and the panel length is 2.7 m, then 16 m / 2.7 m = 5.92. Round up to 6 panels.
- Total number of panels: Number of panels by height * Number of panels by perimeter. 10 panels * 6 panels = 60 panels.
General advice: Vertical installation usually uses more panels but looks more advantageous. Horizontal installation uses fewer but can visually “press down” the ceiling.
Step 3: Account for cutting and waste
Always add 10-15% to the calculated quantity for cutting, possible errors, and defects. It’s better to have a small surplus than to run to the store later for missing panels.
Step 4: Calculate accessories
In addition to the panels themselves, you will need:
- Starting profile: Attached around the perimeter of the room.
- Connecting profile: For joining panels together (if they are not seamless).
- External and internal corners: For finishing corners.
- Finishing profile: For finishing joints with doorways, windows, floor, and ceiling.
- Screws or clips: For attaching panels to the frame.
- Wooden battens or metal profiles: For creating a frame (if walls are uneven or utilities need to be hidden).
- Screwdriver, level, tape measure, knife, pencil: Tools.
The quantity of profiles is calculated by the room perimeter, plus a reserve for corners and joints. For example, for a straight wall, you will need 2 starting profiles (top and bottom) if the installation is horizontal, or one starting and one finishing profile if it’s vertical.
Where to order?
Contact hardware stores, specialized finishing material stores, or order online. Before ordering, be sure to check availability, delivery times, and the possibility of returning unused material.
DIY PVC Panel Installation: A Detailed Guide for Beginners
Installing PVC panels is a task that is quite achievable even for those who have never done renovations. The main thing is to act sequentially and carefully.
Method 1: Installation on a frame
This is the most common and reliable method, especially for uneven walls.
Step 1: Wall preparation
Remove old wallpaper, paint, plaster if it’s peeling. Prime the walls with an antiseptic to prevent mold.
Step 2: Frame installation
A frame is assembled from battens (20×40 mm or 30×40 mm cross-section) or metal profiles (like for drywall). The frame spacing is usually 40-60 cm. It’s important to level the frame. Vertical battens are installed vertically (if panels will be attached horizontally) or horizontally (if panels will be attached vertically). For bathrooms and kitchens, it’s better to use moisture-resistant battens or metal profiles.
Step 3: Install the starting profile
A starting profile (or corner) is attached around the perimeter of the room at the desired level. Make sure it is installed strictly horizontally.
Step 4: Panel installation
- Start from a corner. Insert the first panel into the starting profile.
- Fastening: The tongue of the next panel is inserted into the groove of the first. Then the panel is attached to the frame with screws through the groove (if it’s seamless panels) or with clips.
- Adjustment: Use a level to ensure the panel is installed straight.
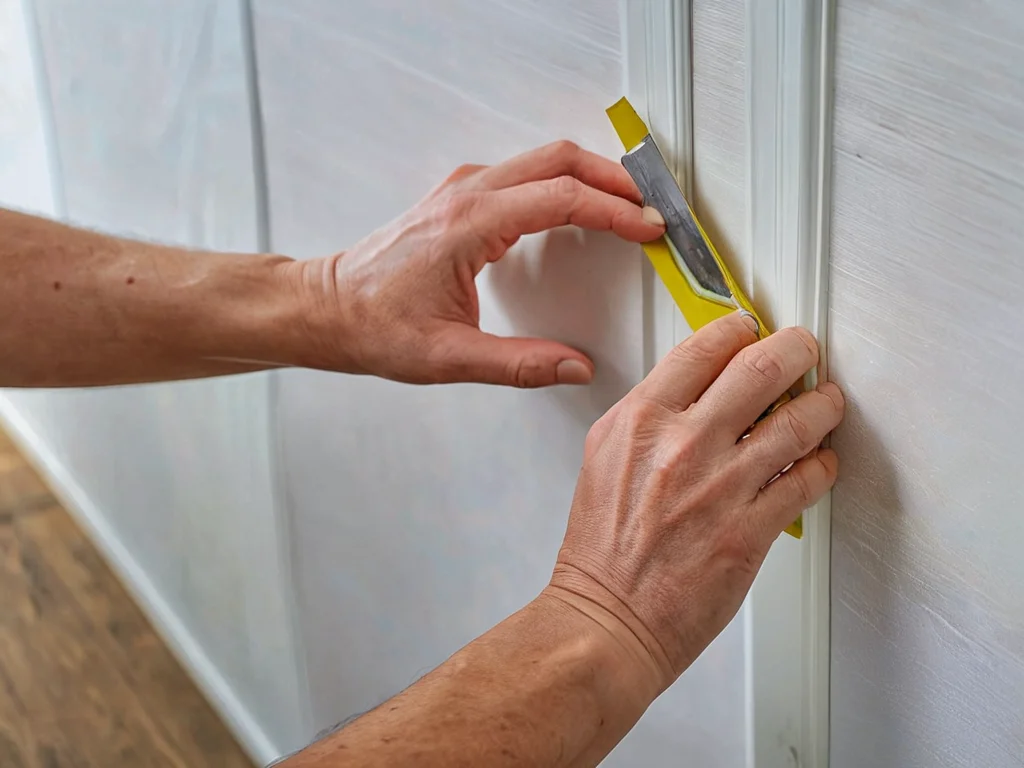
- Cutting: If you need to cut a panel to length, use a utility knife or a jigsaw. For a clean cut, it’s better to use special plastic scissors.
- Completion: Continue installation by inserting each subsequent panel into the previous one and securing it.
Step 5: Install the last panels and finishing
The last panel will likely need to be trimmed in width. Carefully insert it into the previous panel and into the finishing profile. Install corner and connecting profiles.
Method 2: Installation on even walls (glue or liquid nails)
This method is only suitable for perfectly even walls.
Step 1: Wall preparation
Walls must be clean, dry, and even. If necessary, level them with putty.
Step 2: Apply glue
Apply special PVC glue or “liquid nails” to the back of the panel in a serpentine pattern or dots.
Step 3: Glue the panel
Apply the panel to the wall, press firmly, and level with a level. For added security, you can temporarily fix the panel with masking tape until the glue sets.
Step 4: Continue installation
Subsequent panels are inserted into the grooves of the previous ones and also glued. It’s important to work quickly and carefully, as the glue sets quite fast.
Designer’s tip: Before starting installation, read the manufacturer’s instructions. Some panels have specific fastening features. Also, before installation, let the panels “rest” in the room where the finishing will be done so they can adapt to the temperature and humidity.
Common Mistakes in PVC Panel Installation: How Not to Ruin Your Renovation
Even with the most detailed instructions, you can make mistakes during renovation that will negate all your efforts. Let’s review the most common ones so you can avoid them.
1. Incorrect calculation of material quantity
Mistake: Buying exactly the number of panels needed according to the calculation, without adding a reserve for cutting, defects, or unforeseen situations. As a result, during cutting or accidental damage to a panel, you have to rush to the store, losing time and risking not finding the same batch (the shade might differ).
How to avoid: Always add 10-15% to the total material quantity. It’s better to have a small surplus than a shortage.
2. Ignoring the level
Mistake: Installing panels “by eye,” without using a level. Even a slight deviation from vertical or horizontal on one panel will lead to the next one being crooked, and the entire row will wave. This is especially noticeable on glossy surfaces.
How to avoid: Constantly check the straightness of each panel installation using a spirit level. This applies to both the panel itself and the frame, if used.
3. Frame spacing too close or too far apart
Mistake: If the frame is too widely spaced (more than 60 cm), panels can sag under their own weight or with light pressure, especially if they are thin. If the frame is too close together, it increases material consumption and installation time without much necessity.
How to avoid: Maintain the recommended frame spacing (40-60 cm). For heavier or textured panels, it’s better to make the frame closer.
4. Using inappropriate fasteners
Mistake: Fastening panels to the frame with regular screws that go all the way through. This spoils the appearance, especially on glossy panels, and can lead to plastic cracking if the screw is overtightened.
How to avoid: Use special clips (fastening brackets) or screws with wide heads that are screwed into the panel’s groove, remaining hidden. When installing on a frame, screws should be slightly shorter than the batten thickness so as not to go through.
5. Lack of gaps during installation
Mistake: Panels are fitted too tightly against each other or against profiles, without accounting for the thermal expansion of plastic. In hot weather or when heated by the sun, plastic can expand, leading to panel deformation and waviness.
How to avoid: Leave small (2-3 mm) expansion gaps between panels and frame elements, as well as between adjoining panels, especially if installation occurs in cold weather.
6. Incorrect cutting
Mistake: Cutting panels with a regular knife or hacksaw, which leads to chips, nicks, and an uneven cut. This is especially critical for seamless panels, where every joint must be perfect.
How to avoid: Use a sharp utility knife for precise cutting, special plastic scissors, or a jigsaw with a fine-tooth blade. Cut from the side where the clean edge should be.
7. Neglecting ventilation
Mistake: Complete sealing of the room with PVC panels without considering ventilation. This can lead to condensation and mold, especially in bathrooms and kitchens.
How to avoid: Ensure adequate room ventilation. When installing panels, leave small gaps in the corners or use ventilation grilles.
PVC Panels in Interiors: 5 Secrets of Stylish Transformation from Designers
PVC panels are not just a practical material but also an excellent canvas for creativity. To make your interior look stylish and modern, not cheap, follow these designer tips.
1. Combine textures and colors
Don’t be afraid to combine different types of panels. For example, smooth white panels combined with light wood-look panels on the same wall can create a very interesting and cozy effect. Or, brick imitation on one wall and a smooth surface on another – a classic loft style. It’s important that the color scheme is harmonious, and the combination of textures is justified.
2. Use panels as an accent
Instead of finishing all the walls, create one or two accent walls. This could be the wall behind the headboard in the bedroom, the TV wall in the living room, or the kitchen backsplash. This technique allows you to incorporate PVC panels into any interior without overloading it.
3. Create a “wow effect” with photo printing
Modern technologies allow you to apply almost any image to PVC panels. This could be a picturesque landscape, an abstract pattern, or even your favorite photograph. Such a wall will become a true work of art and a focal point in the room. The main thing is to choose high-quality printing and an image that will please you for years to come.
4. Pay attention to joints and hardware
Neat, invisible joints are the key to a beautiful appearance. Use seamless panels and high-quality connecting profiles that harmonize with the panel color. Corners and joints with doorways should be finished as cleanly and neatly as possible. Cheap, poorly fitted hardware can spoil the impression even of the most expensive panels.
5. Play with the laying direction
Standard laying is vertical. But try horizontal installation, especially in small rooms or hallways. This can visually expand the space. Diagonal laying is a more complex option but creates a dynamic and unusual effect. Experiment, but remember practicality and ease of installation.
Example of a stylish solution:
In a small bathroom, you can use a combination:
- The walls near the bathtub and sink can be finished with white matte PVC panels imitating tiles.
- One of the side walls, where there is no direct contact with water, can be decorated with light wood-look panels.
- The ceiling can also be finished with white panels.
- Add an accent with a mirror in a wooden frame and bright accessories.
This solution looks modern, fresh, and cozy, while remaining budget-friendly and practical.
PVC Wall Care: How to Preserve Their Appearance for Years to Come

Caring for PVC panel walls is a simple task that won’t take much of your time and effort. But for the material to last long and retain its original appearance, it’s worth following a few recommendations.
1. Regular wet cleaning
PVC panels are not afraid of moisture, so they can be safely wiped with a damp cloth. For removing dust and minor dirt, plain water or a weak soapy solution is suitable.
- Use a soft sponge or microfiber cloth.
- Avoid abrasive materials that can scratch the surface.
- After wet cleaning, wipe the walls with a dry cloth to avoid streaks, especially on glossy surfaces.
2. Dealing with stubborn stains
If there are stains from grease, food, or ink on the walls, you can use special plastic cleaners or universal household cleaners. It’s important that the cleaner does not contain aggressive solvents (acetone, gasoline).
- Before using any cleaning product, test it on a small, inconspicuous area of the panel.
- Gently wipe the stained area, trying not to rub too hard.
- Thoroughly rinse off any cleaning product residue with a clean damp cloth.
3. What to avoid?
- Abrasive cleaning agents and brushes: Metal scouring pads, stiff brushes, powdered cleaning agents can leave scratches and damage the outer layer of the panel.
- Solvents: Acetone, alcohol, gasoline, paint thinners can dissolve plastic, cause it to become cloudy, or deform.
- High temperatures and open flames: Do not place PVC panels in direct proximity to strong heat sources (stoves, heaters, fireplaces). Under high temperatures, plastic can melt, deform, and release harmful substances.
- Sharp objects: Avoid impacts with sharp objects, as they can leave deep scratches or puncture the panel.
4. Prevention
The best way to keep panels in excellent condition is prevention. For example, in the kitchen, near the stove, you can install additional protection made of tempered glass or metal, which is easy to clean and will protect the panels from grease and high temperatures.
5. Repairing minor damage
Minor scratches that do not penetrate deeply can sometimes be masked with special plastic polishes or even a colored wax pencil of a matching color. However, in case of serious damage, it is easier and more reliable to replace the damaged panel entirely.
By following these simple rules, you can significantly extend the lifespan of your PVC panels and maintain their attractive appearance for years to come. This is truly a practical and cost-effective solution for your home!
Рекомендуем:
 MDF Panel Wall Finishing: Installation Guide
 Wall Cladding with Wood Paneling: A Step-by-Step Guide
 Internal Wall Insulation: Materials and Technology
 Paneles de PVC para paredes: baratos y efectivos. Guía de instalación
 DIY Decorative Stone Wall Installation: Your Guide to Home Transformation
 Washable wallpaper for the kitchen: why it’s the best idea for your renovation?
Panneaux PVC pour murs : bon marché et efficace. Guide d’installation
Washable wallpaper for the kitchen: why it’s the best idea for your renovation?
Panneaux PVC pour murs : bon marché et efficace. Guide d’installation
 Grout for tiles: how to choose the color and apply it correctly
Joint filler for tiles: how to choose the color and apply it correctly
Grout for tiles: how to choose the color and apply it correctly
Joint filler for tiles: how to choose the color and apply it correctly
 How to Make a Brick Wall in an Interior (Imitation)
 How to Update Old Tiles Without Removing Them: 99 Ways to Transform Your Bathroom and Kitchen
 What to do if mold or mildew appears on the walls?
PVC-Paneele für Wände: Günstig und Gut. Montageanleitung
What to do if mold or mildew appears on the walls?
PVC-Paneele für Wände: Günstig und Gut. Montageanleitung
 Bathroom: Tile or Paint. What Will Everyone Face?
ألواح PVC للجدران: رخيصة وفعالة. دليل التركيب
Bathroom: Tile or Paint. What Will Everyone Face?
ألواح PVC للجدران: رخيصة وفعالة. دليل التركيب
 How to Tile Walls in a Bathroom: A Detailed Guide
Revêtement mural en panneaux MDF : guide d’installation
Revestimiento de paredes con paneles de MDF: guía de instalación
Aislamiento de paredes interiores: materiales y tecnología
Revêtement mural en lambris : guide étape par étape
How to Tile Walls in a Bathroom: A Detailed Guide
Revêtement mural en panneaux MDF : guide d’installation
Revestimiento de paredes con paneles de MDF: guía de instalación
Aislamiento de paredes interiores: materiales y tecnología
Revêtement mural en lambris : guide étape par étape