
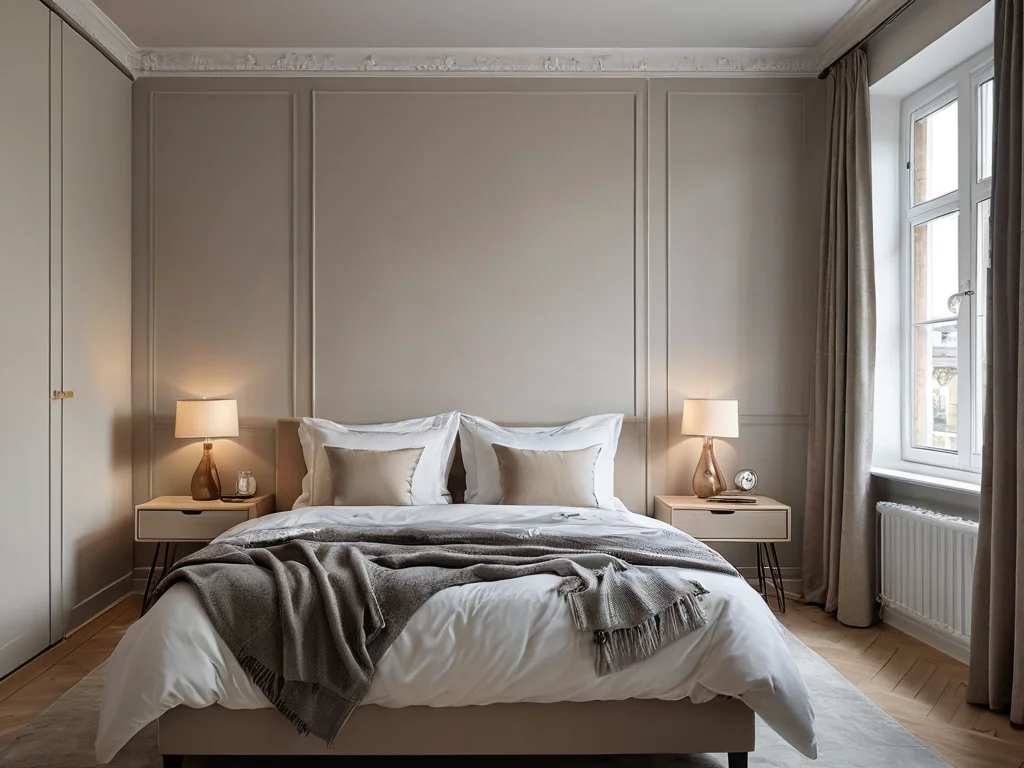
Greetings, dear readers of design-foto.ru! Today we will delve into a topic that concerns many homeowners and apartment dwellers – internal wall insulation. It often happens that external insulation is impossible or undesirable for some reason, but the coolness and drafts from the walls still make themselves known. In such cases, internal insulation becomes a real salvation. As a practicing designer, I often encounter this issue and am ready to share all my secrets with you so that your home becomes truly warm, cozy, and comfortable.
Why Insulate Walls from the Inside: The Main Pros and Cons of the Method
Before diving headfirst and choosing materials, let’s figure out if it’s worth the effort. Internal wall insulation is a method that has its undeniable advantages, but it also has its drawbacks. It’s important to honestly weigh all the pros and cons to make the right decision.
Key Advantages of Internal Insulation:
- Independence from Weather Conditions and Neighbors: This is perhaps the biggest trump card. You don’t need to get permission from neighbors above or below, coordinate work with the management company, or wait for favorable weather. You can insulate your walls at any time of the year, either yourself or with a crew.
- Reduced Heat Loss: Quality internal insulation can significantly reduce heat leakage through the walls, which directly affects your budget. You will spend less on heating in winter and can use the air conditioner less often in summer.
- Improved Sound Insulation: Many insulation materials, especially mineral wool, have excellent sound-absorbing properties. This is a pleasant bonus that will make your home quieter and more comfortable.
- Possibility of DIY Installation: With certain skills and tools, many stages of the work can be done by yourself, which will significantly save your budget.
- Aesthetic Appeal: After insulation, the walls can be finished with any materials you like, creating the desired atmosphere in the room.
However, like any coin, there’s a flip side:
- Reduction in Usable Area: Any internal insulation “eats up” part of the room’s space. The thickness of the insulation plus the battens or frame – all this reduces the area of your room. The better the insulation, the less its thickness, but even the thinnest options will still take up a few centimeters.
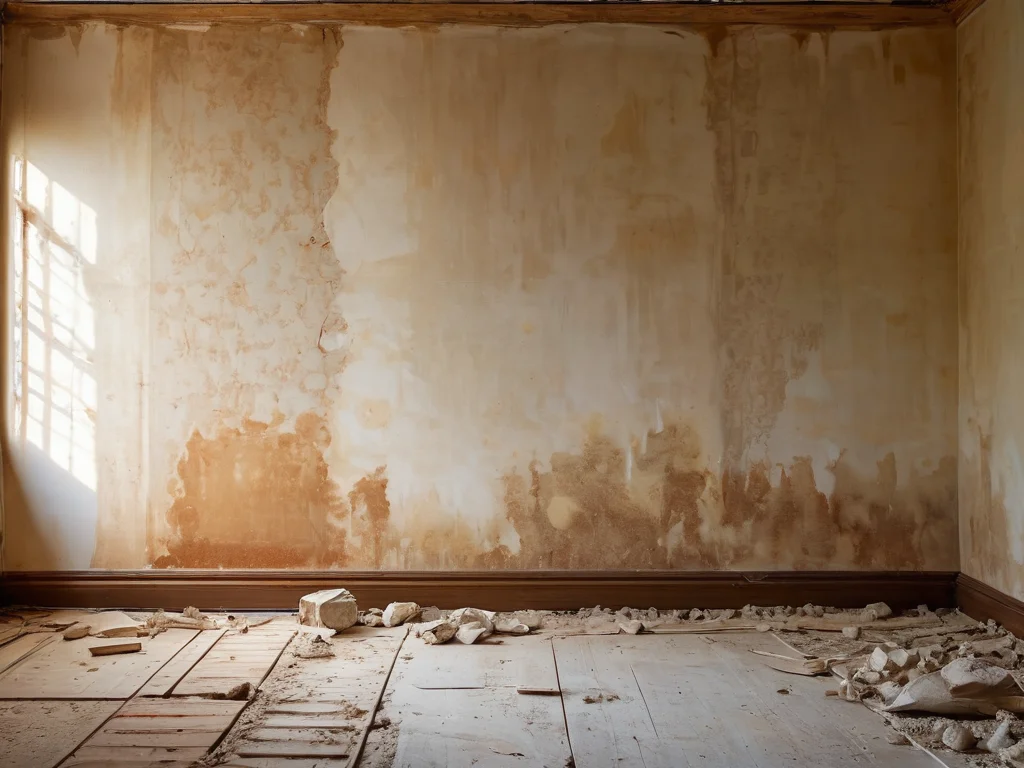
- Risk of Condensation and Mold: This is the most serious drawback that requires special attention. With improper installation and lack of vapor barrier, the dew point can shift inside the wall, causing it to become damp, freeze, and consequently, lead to mold. This can damage both the insulation and the wall itself.
- Change in Microclimate: Internal insulation can lead to the load-bearing structures ceasing to “breathe.” In old houses, this can be critical. The humidity regime can also change.
- Need for Redecoration: Insulating walls from the inside almost always means you’ll have to remove old finishes (wallpaper, plaster), and after installing the insulation, redecorate.
- Difficulties with Outlets and Utilities: You’ll have to figure out how to bring out outlets, switches, lights, and radiators so they don’t end up “sunken” into the wall.
As you can see, internal insulation has both significant advantages and serious disadvantages. The main thing is to understand these nuances and take measures to neutralize them, especially regarding moisture issues.
When to Insulate Walls from the Inside: 5 Situations When It’s the Best Choice
In which cases does internal wall insulation become not just an alternative, but an optimal, and sometimes the only possible solution? Let’s consider the most common scenarios where this method is truly justified.
- Impossibility or Undesirability of External Insulation: This is the most frequent reason. If you live in an apartment building where the facade is common property, or if your house is an architectural monument where any facade alterations are prohibited, then internal insulation is your only option. This also includes situations where you rent an apartment and do not have the right to carry out work on the exterior.
- Insulating Individual Rooms: Sometimes it’s necessary to insulate only one or two adjacent rooms, for example, a bedroom facing north, or a child’s room where a comfortable microclimate is particularly important. External insulation of the entire building in such a case would be excessive and economically impractical.
- Insulating Balconies and Loggias: Transforming a cold balcony into a full-fledged living space is a popular task. Here, internal insulation of walls, floor, and ceiling is standard, as there is no possibility to carry out work from the outside.
- Improving Sound and Thermal Insulation Simultaneously: If you want not only to get rid of drafts but also to make the room quieter, then a combination of insulation and drywall (or other sheathing materials) will cope well with both tasks.
- Seasonal Living in a House: For dachas or country houses where you don’t stay year-round, internal insulation can help warm up the room faster after your arrival and retain heat longer. This is especially relevant if the house poorly retains heat.
Understanding these situations will help you make an informed decision. If your case is one of the listed ones, then internal insulation is a quite feasible and effective way to improve the comfort of your home.
What Insulation Materials to Choose for Interior Walls: Comparing Mineral Wool, Foam Board, XPS, and Others

The choice of insulation is perhaps the most critical stage. The effectiveness of the insulation, the durability of the structure, and, importantly, your budget depend on its properties. There are many materials on the market, but the following are most commonly used for internal wall insulation:
Mineral Wool (Minvata)
Description: Mineral wool is a fibrous material made from molten rocks (stone wool) or glass (glass wool). It comes in the form of boards or rolls.
Pros:
- Excellent Thermal Insulation: Has low thermal conductivity.
- Good Sound Insulation: The fiber structure effectively absorbs sound waves.
- Fire Safety: Most types of mineral wool are non-combustible (NG).
- Vapor Permeability: A “breathable” material, it effectively wicks away moisture.
- Environmental Friendliness: When produced and installed correctly, it is considered a safe material.
Cons:
- Requires Mandatory Vapor Barrier: Due to its vapor permeability, mineral wool needs reliable protection from moisture from the room side.
- Can Cause Irritation: During installation, small fibers can get on the skin and mucous membranes, so personal protective equipment (gloves, respirator, goggles) is necessary.
- Sensitive to Compression: When compressed or squeezed, it loses its thermal insulation properties.
When to Choose: Ideal for creating a “sandwich” with drywall, where both thermal and sound insulation, as well as structural vapor permeability, are important.
Polystyrene Foam (Penoplast, EPS)
Description: A lightweight, porous material consisting of many expanded polystyrene granules. Produced in board form.
Pros:
- Low Thermal Conductivity: Excellent insulator.
- Easy Installation: Easily cut and laid.
- Low Cost: One of the most affordable insulation materials.
- Moisture Resistant: Practically does not absorb water.
Cons:
- Combustibility: Most brands of polystyrene foam are combustible (G1-G4) and release toxic substances when burning.
- Low Vapor Permeability: Does not “breathe,” which can lead to moisture stagnation in the structure if ventilation is not provided.
- Brittleness: Can crumble under mechanical impact.
- Attractiveness to Rodents: Rodents can gnaw on it.
When to Choose: For rooms with normal humidity, where there are no strict fire safety requirements and it’s important to minimize costs. Good ventilation is mandatory.
Extruded Polystyrene Foam (XPS)
Description: A denser and stronger analogue of polystyrene foam, produced by extrusion. Also produced in board form.
Pros:
- Very Low Thermal Conductivity: One of the best indicators.
- High Strength and Durability: Does not crumble, withstands loads.
- Low Water Absorption: Practically does not absorb moisture.
- Easy Installation: Easily cut, does not require a vapor barrier from the room side (but this is debatable).
Cons:
- Combustibility: Most brands are combustible (G3-G4), but some manufacturers produce self-extinguishing ones (G1).
- Low Vapor Permeability: Does not “breathe,” can contribute to moisture accumulation.
- Cost: More expensive than regular polystyrene foam.
- Unpleasant Odor: For a while after installation, a chemical odor may be present.
When to Choose: For rooms with high humidity (e.g., bathrooms, kitchens), as floor insulation, or when maximum structural strength is important. Requires ventilation.
Polyurethane Foam (PPU)
Description: A modern insulation material applied by spraying. Forms a seamless layer that adheres tightly to the surface.
Pros:
- Highest Thermal Insulation: One of the most effective insulators.
- Complete Absence of Cold Bridges: Seamless coating.
- Excellent Adhesion: Bonds well to most surfaces.
- Does not absorb moisture.
Cons:
- Requires Professional Equipment: Applying PPU is a job for specialists.
- High Cost: One of the most expensive insulation materials.
- Combustibility: Most types are combustible.
- Low Vapor Permeability.
When to Choose: When the budget allows, maximum insulation efficiency is important, and other materials cannot be used (e.g., on curved surfaces).
Foam Glass
Description: A unique material made from glass raw materials. It is a cellular material entirely composed of sealed glass cells.
Pros:
- Complete Absence of Water Absorption: Absolutely does not absorb moisture.
- Zero Vapor Permeability: Excellent vapor barrier.
- High Strength and Durability.
- Fire Safety (NG).
- Environmental Friendliness.
- Does not attract rodents.
Cons:
- High Cost: One of the most expensive insulation materials.
- Brittleness: Can crack under point loads or base deformations.
- Difficult Installation: Requires care and special adhesives.
When to Choose: For rooms with extreme conditions (high humidity, temperature fluctuations), when the budget is unlimited, and durability and absolute moisture protection are a priority.
Brief Summary for Selection:
- Mineral Wool: Optimal balance of price, efficiency, and safety if you are prepared to provide a vapor barrier.
- Foam Board: The most budget-friendly option, suitable for dry rooms, but requires attention to fire safety and ventilation.
- XPS: A good choice for humid rooms and where strength is important, but also requires ventilation.
- PPU: The most effective, but also the most expensive, for professional installation.
- Foam Glass: An elite option, ideal for humid rooms, but very expensive.
Remember that for internal wall insulation, it’s best to choose materials with low thermal conductivity and, if possible, vapor-permeable ones (like mineral wool), provided you properly organize the vapor barrier. The main task is not to “trap” moisture inside the wall.
How to Insulate Walls from the Inside Yourself: A Step-by-Step Guide from A to Z
So, we’ve covered the materials. Now let’s move on to the process itself. Insulating walls from the inside yourself is a feasible task; the main thing is to follow the technology clearly and not skip important steps.
Step 1: Surface Preparation
- Cleaning: Remove old wallpaper, paint, and plaster (if it’s peeling) from the walls. The surface should be clean, dry, and even.
- Priming: Treat the walls with a deep-penetrating antiseptic primer. This will prevent the appearance of mold and mildew and improve the adhesion of subsequent layers.
- Leveling: If the walls have significant unevenness, they will need to be leveled. For mineral wool or XPS, minor irregularities can be compensated with battens.
- Mold Treatment: If there are already signs of mold on the walls, they must be thoroughly removed with special agents and re-treated with an antiseptic.
Step 2: Frame Installation (for Mineral Wool, Foam Board, XPS)
This step is necessary if you are using board insulation. For PPU or gluing foam board/XPS, a frame may not be needed.
- Marking: Determine the thickness of the insulation and, consequently, the thickness of the frame. Using a level and plumb bob, mark the wall for vertical and horizontal profiles (or battens, if you choose a wooden frame).
- Fastening Guides: Secure the guide profiles (or battens) around the perimeter of the room (floor, ceiling, walls).
- Installing Vertical Profiles: Insert vertical profiles (or battens) with a spacing corresponding to the width of the insulation, plus a small margin. The spacing is usually 40, 60, or 80 cm.
- Checking for Straightness: At each stage, carefully check the verticality of the profiles with a level.
Step 3: Installing the Insulation
For Mineral Wool, Foam Board, XPS:
- Installation: Insert the insulation boards between the frame profiles or press them tightly against the wall (if no frame is used).
- Density: The insulation should be installed tightly, without gaps. If using mineral wool, it should slightly expand the profiles.
- Joints: The joints between the insulation boards should be as tight as possible. For mineral wool, it’s best to seal the joints with special tape.
- Multi-layer Installation: If it’s necessary to install insulation in multiple layers, offset the joints of each subsequent layer relative to the previous one (like brickwork) to avoid “cold bridges.”
For PPU:
- Spraying: PPU is applied by specialists using special equipment. It’s important to ensure a dense, gap-free coverage.
Step 4: Installing the Vapor Barrier
This step is critically important, especially when using mineral wool or vapor-permeable insulation.
- Material Selection: Use a special high-density vapor barrier membrane.
- Fastening: The membrane is attached to the frame or wall using a construction stapler.
- Overlap: Overlap the membrane sheets by at least 10-15 cm.
- Sealing Joints: All joints and connections of the membrane (to the floor, ceiling, walls, pipes) must be hermetically sealed with special aluminum or butyl tape. This is MANDATORY!
- Placement: It’s best to attach the vapor barrier on the outer side of the insulation (closer to the room).
Step 5: Installing the Finish Coating
- Sheathing: The finish coating is installed over the vapor barrier. Most commonly, this is drywall, clapboard, or OSB boards. When installing drywall, it is attached to the frame with screws.
- Plastering and Painting/Wallpapering: The drywall is plastered, sanded, and then painted or wallpapered.
Important Note: If you used XPS or foam board, which are practically impermeable to vapor, then a vapor barrier from the room side may not be necessary, but it is highly desirable. The main thing is to ensure ventilation. It’s best to leave a ventilation gap between the insulation and the finish coating, or between layers of insulation, if the structure allows.
Vapor Barrier and Ventilation: How to Protect Insulation and Walls from Moisture
We’ve already mentioned the importance of vapor barrier and ventilation, but let’s elaborate on this. These are perhaps the most critical aspects of internal insulation, upon which the durability and safety of the entire structure, as well as the health of the residents, depend.
Vapor Barrier: Why It’s Needed and How to Do It Correctly
The Problem: Warm, humid air from the room, seeking out colder, complex parts of the wall (in our case, the insulation), releases its moisture upon cooling. If this humid air enters the insulation unimpeded, it accumulates there, reducing the material’s thermal insulation properties and causing it to become damp. Moisture in the insulation is a direct path to wall freezing, mold and mildew formation, and structural damage.
Solution: A vapor barrier membrane. This is a special material installed from the room side (closer to the moisture source) and prevents vapor from entering the insulation. Proper vapor barrier means:
- Using Quality Membranes: Choose special vapor barrier films or membranes designed for these purposes. They have high density and low vapor permeability.
- Hermetic Sealing: This is the key factor. The membrane must be installed without a single gap. All seams between sheets, as well as connections to walls, floor, ceiling, windows, pipes, and electrical wiring, must be thoroughly sealed with special aluminum or butyl tape. Do not skimp on the tape – the hermetic sealing of the entire system depends on its quality.
- Installation Direction: If the membrane has a double-sided coating (foil-faced), the foil side should face the room.
- Offsetting in Multi-layer Insulation: If you are installing insulation in two layers, install the vapor barrier only behind the first, outer layer of insulation.
Ventilation: When It’s Indispensable
Why It’s Needed: Even with a perfect vapor barrier, residual moisture can accumulate in the structure, or leaks may occur. Also, if you have used non-porous materials (XPS, PPU), they need to “breathe.” A ventilation gap between the insulation and the finish coating, or between layers of insulation, ensures air circulation, which allows excess moisture to be removed from the structure.
How to Do It:
- Ventilation Gap: When installing the frame for the finish coating (drywall, clapboard), leave a small gap (2-5 cm) between the vapor barrier and this layer. This gap is created by the thickness of the battens or profiles to which the finish coating is attached.
- Ventilation Openings: For better air circulation, it’s advisable to provide small ventilation openings in the lower and upper parts of the wall (e.g., in the baseboard and near the ceiling), covered with decorative grilles.
- Material Considerations: If you are using foam board or XPS, a ventilation gap becomes even more relevant, as these materials hardly allow vapor to pass through.
Important: Never attach the finish coating directly to the insulation, bypassing the vapor barrier and, if possible, the ventilation gap. This is a grave mistake that can lead to serious consequences.
Choosing Fasteners and Profiles: What You’ll Need for Insulation Installation

To create a reliable and durable structure for internal wall insulation, you will need appropriate materials for fastening and frame construction. The correct choice of these components is the key to a successful outcome.
Frame Materials
There are two main frame options:
- Metal Frame (galvanized profiles): This is the most preferred option for most rooms. It is strong, durable, and not subject to rot or deformation. The following types of profiles are used:
- Guide Profile (PN): Attached to the floor and ceiling along the perimeter.
- Stud Profile (PS): Vertical elements inserted into the guides. The installation spacing usually corresponds to the width of the insulation.
- Connectors and Brackets: Used to create a more rigid structure if the walls are uneven or additional fastening is required.
- Wooden Frame (battens): A more budget-friendly option, but with its own nuances. Dry wooden battens are used (40×40 mm, 50×50 mm, or larger, depending on the insulation thickness). It’s important that the wood is well-dried and treated with antiseptic and fire retardant (to increase fire resistance).
Fasteners
The choice of fasteners depends on the wall material:
- Dowel-nail or Anchor Bolt: For fastening metal profiles or wooden battens to concrete or brick walls. Choose dowels of the appropriate length to ensure they are securely fastened to the load-bearing wall.
- Self-tapping Screws for Metal: Used to connect elements of the metal frame to each other.
- Self-tapping Screws for Wood: Used for assembling wooden frames.
- Dowel-mushroom (disc dowel): A special fastener with a wide head used for additional fastening of insulation boards (especially mineral wool, foam board) to the wall. Usually, 5-7 dowels per square meter are used.
- Construction Stapler and Staples: For fastening vapor barrier film.
- Tape or Butyl Tape: For sealing the seams of the vapor barrier film.
Tools
You will also need:
- Level (laser or spirit): For checking verticality and horizontality.
- Tape Measure: For accurate measurements.
- Plumb Bob: For checking verticality.
- Knife or Scissors: For cutting insulation and membranes.
- Screwdriver: For driving screws.
- Hammer Drill: For drilling holes for dowels.
- Utility Knife or Jigsaw: For cutting insulation boards (depending on the material).
- Personal Protective Equipment: Gloves, respirator, goggles (especially when working with mineral wool).
Carefully select fasteners that match your wall type and the weight of the structure. Incorrectly chosen fasteners can lead to the frame or insulation simply falling off.
Common Mistakes in Internal Wall Insulation: How to Avoid Them
In the process of internal wall insulation, as in any construction or renovation work, there are pitfalls. It’s worth knowing about the most common mistakes to avoid them in your project and not have to redo the work.
1. Absence or Incorrect Installation of Vapor Barrier
Problem: Moisture from the room penetrates the insulation unimpeded, causing it to become damp, reducing thermal efficiency, and leading to mold. This is the most frequent and critical mistake.
How to Avoid: Always use a quality vapor barrier membrane, install it from the room side (closer to the room), and ensure hermetic sealing of joints with special tape. Do not neglect this step!
2. Incorrect Insulation Material Choice
Problem: Using a material unsuitable for the given conditions (e.g., foam board in damp rooms without adequate ventilation, or mineral wool without a vapor barrier).
How to Avoid: Carefully study the characteristics of insulation materials, their vapor permeability, moisture resistance, and combustibility. Choose the material based on the room’s specifics and your priorities (cost, environmental friendliness, non-combustibility).
3. Formation of “Cold Bridges”
Problem: Insulation is installed with gaps, joints between boards are not sealed, or the frame passes through the insulation layer, creating a direct path for cold.
How to Avoid: Install insulation as tightly as possible, without gaps. When using mineral wool, it should be slightly larger than the frame opening to hold firmly. When insulating in multiple layers, offset the joints. Use special frame connectors that minimize thermal conductivity.
4. Ignoring the Dew Point
Problem: The dew point shifts inside the wall (behind the insulation), leading to its dampness and freezing. This most often occurs due to the absence or insufficient hermetic sealing of the vapor barrier.
How to Avoid: A proper vapor barrier is your main ally. It must be as hermetic as possible.
5. Lack of Ventilation Gap
Problem: The finish coating is installed directly against the insulation or vapor barrier, which prevents residual moisture from escaping the structure.
How to Avoid: If possible, create a small ventilation gap between the vapor barrier and the finish sheathing, ensuring air circulation.
6. Neglecting Priming and Antiseptic Treatment
Problem: Presence of mold or mildew on the walls before starting work, or their appearance later due to high humidity.
How to Avoid: Before starting work, thoroughly clean the walls and treat them with an antiseptic. This is especially important for rooms with high humidity.
7. Incorrect Fastener Choice
Problem: Using unsuitable dowels or screws, which can lead to unreliable fastening of the frame or insulation.
How to Avoid: Choose fasteners that match the wall material type and the structure’s weight. For concrete walls, use anchors or appropriate dowel-nails.
By avoiding these mistakes, you can create a truly effective and durable insulation system that will serve you for many years.
Expert Tips: How to Achieve Maximum Effect from Internal Insulation

So, we’ve come a long way from choosing materials to installation. Now, allow me, as a practicing designer, to share a few professional secrets that will help you achieve the best results and make your home even more comfortable.
- Combine Materials: Don’t be afraid to combine different insulation materials. For example, to create ideal sound and thermal insulation, you can use a layer of mineral wool followed by a layer of XPS. The main thing is to maintain the sequence and properly install the vapor barrier.
- Special Attention to Cold Bridges: I’ll repeat, but this is very important. Check every joint, every connection. If you are using mineral wool, make sure it tightly fills the frame openings and doesn’t sag.
- Don’t Skimp on Vapor Barrier: This is your main protection against moisture. Cheap film can tear, and low-quality tape can peel off, rendering all your efforts useless. It’s better to invest in reliable materials once.
- Insulate Comprehensively: If possible, insulate not only the walls but also the floor and ceiling. Comprehensive insulation provides maximum effect and allows you to completely eliminate drafts and freezing.
- Think About Utilities in Advance: Outlets, switches, lights – all of these will have to be moved. Think about how you will bring them out from under the insulation layer and sheathing so that it is aesthetic and safe.
- Ventilation is Not a Luxury, but a Necessity: Even if you think you don’t need it, provide at least minimal ventilation openings. This will help your structure “breathe” and extend its service life.
- Wooden Frame – Only with Thorough Preparation: If you still decide to use wood, make sure it is well-dried and treated with antiseptics. Otherwise, over time, it may deform or become a breeding ground for mold.
- Use Beacons for a Straight Frame: When installing the frame, especially if you are working without a laser level, use stretched strings or cords as beacons. This will help you achieve perfectly straight surfaces.
- Don’t Forget About Finishing: After insulation and sheathing, don’t rush with the final finishing. Let the structure “settle” for some time.
- Thermal Imager to the Rescue: If possible, after completing the work, scan the walls with a thermal imager. This will visually show if there are any “cold bridges” or other problem areas.
Internal wall insulation is a serious step that requires a careful approach. But by following our tips and recommendations, you can make your home warmer, cozier, and significantly save on heating. I wish you success in creating your ideal interior!
Рекомендуем:
 Wall Cladding with Wood Paneling: A Step-by-Step Guide
 PVC Wall Panels: Cheap and Cheerful. Installation Guide
 MDF Panel Wall Finishing: Installation Guide
 Washable wallpaper for the kitchen: why it’s the best idea for your renovation?
 Aislamiento de paredes interiores: materiales y tecnología
 What to do if mold or mildew appears on the walls?
 Bathroom: Tile or Paint. What Will Everyone Face?
 DIY Decorative Stone Wall Installation: Your Guide to Home Transformation
 How to Make a Brick Wall in an Interior (Imitation)
 Grout for tiles: how to choose the color and apply it correctly
Joint filler for tiles: how to choose the color and apply it correctly
Grout for tiles: how to choose the color and apply it correctly
Joint filler for tiles: how to choose the color and apply it correctly
 How to Update Old Tiles Without Removing Them: 99 Ways to Transform Your Bathroom and Kitchen
Panneaux PVC pour murs : bon marché et efficace. Guide d’installation
How to Update Old Tiles Without Removing Them: 99 Ways to Transform Your Bathroom and Kitchen
Panneaux PVC pour murs : bon marché et efficace. Guide d’installation
 How to Tile Walls in a Bathroom: A Detailed Guide
 generatepress
Revêtement mural en panneaux MDF : guide d’installation
Isolation des murs par l’intérieur : matériaux et technologie
Papier peint lavable pour la cuisine : pourquoi est-ce la meilleure idée pour votre rénovation ?
Revêtement mural en lambris : guide étape par étape
Que faire si du champignon ou de la moisissure apparaît sur les murs ?
generatepress
Revêtement mural en panneaux MDF : guide d’installation
Isolation des murs par l’intérieur : matériaux et technologie
Papier peint lavable pour la cuisine : pourquoi est-ce la meilleure idée pour votre rénovation ?
Revêtement mural en lambris : guide étape par étape
Que faire si du champignon ou de la moisissure apparaît sur les murs ?