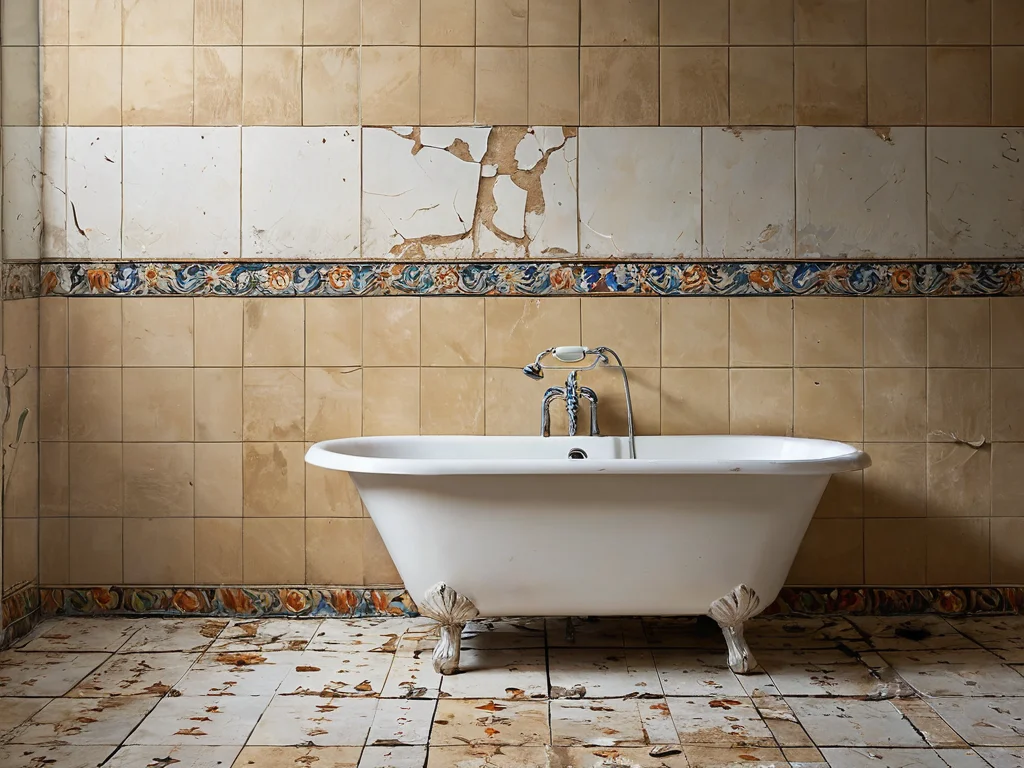
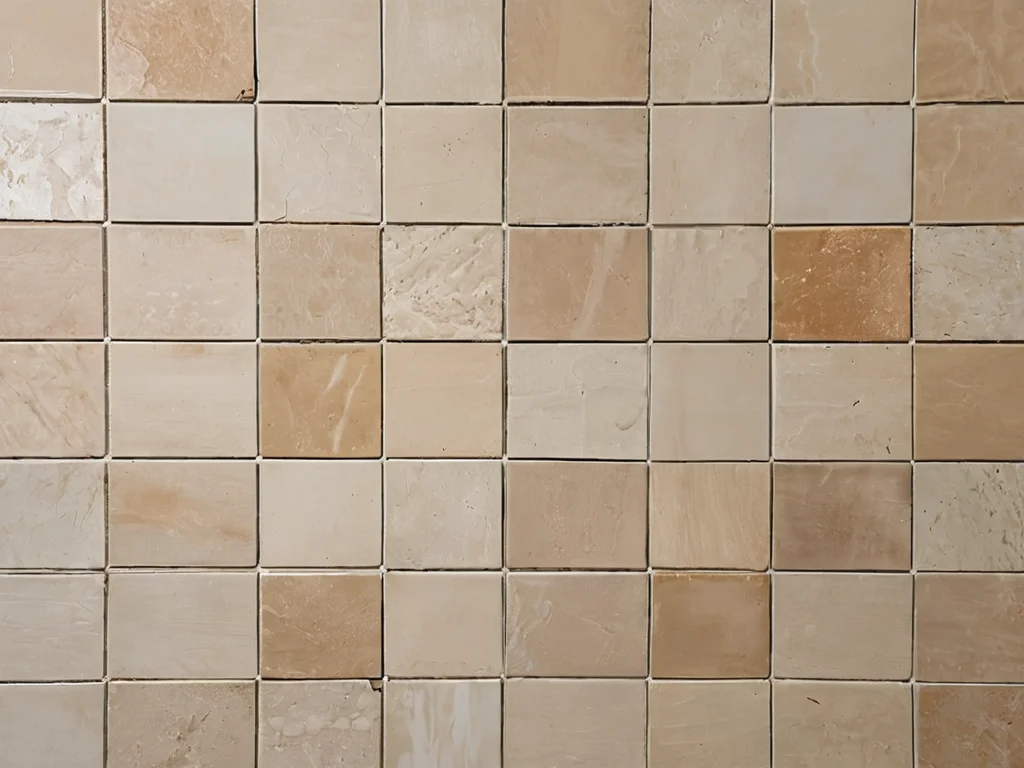
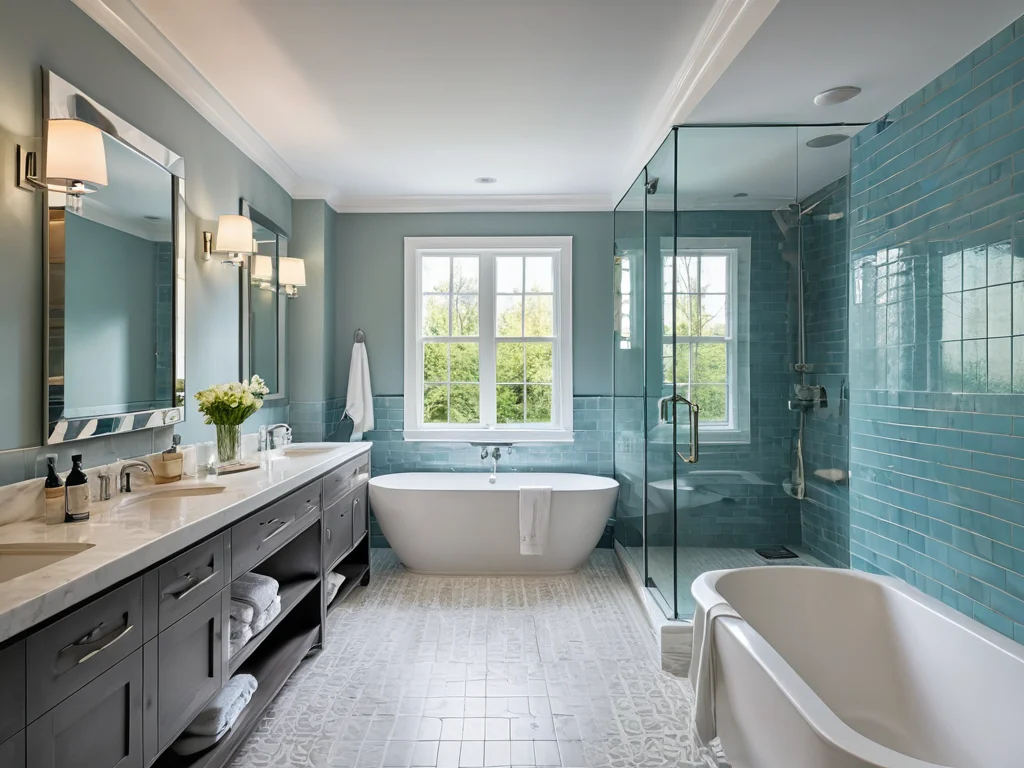
Old tiles in the kitchen or bathroom can look outdated, but the process of removing them is often daunting. It involves noise, dust, dirt, and most importantly, significant time and financial costs. But what if we told you there are many ways to refresh your interior while keeping the old tiles in place? Today, we’ll dive into the world of life hacks and modern materials that will allow you to transform your home without radical measures. We’ll explain why sometimes it’s better not to rush with demolition, what alternatives exist, how to choose materials correctly, and avoid common mistakes. Ready to be inspired and transform your bathroom or kitchen?
Why You Shouldn’t Rush to Remove Old Tiles: 5 Reasons to Leave Them As Is
The decision to remove old tiles is usually the beginning of a long and not always pleasant journey. Before you make such a decision, let’s understand why in some cases it’s better to leave the good old tiles in place and give them a new life.
Firstly, saving time and effort. Tile removal is a long and laborious process. You’ll need to use a hammer drill, hammer, chisel, and then thoroughly clean the surface of adhesive and mortar residue. This often takes several days, if not weeks, depending on the room size and complexity of the work. Updating tiles over the old ones can take just one or two days, significantly saving your time and nerves.
Secondly, reducing costs. Besides buying new tiles, you’ll have to spend money on adhesive, grout, demolition and installation tools, as well as construction waste disposal. The cost of new tiles, especially if you choose high-quality imported options, can be quite substantial. Updating existing tiles often turns out to be a much more budget-friendly solution.
Thirdly, reducing construction waste. Anyone who has dealt with renovations knows how much waste is generated during demolition. Removing old tiles creates a large volume of waste that needs to be properly disposed of, which can also incur additional costs and effort. Updating tiles “over” minimizes this aspect.
Fourthly, preserving surface integrity. When removing old tiles, there’s a risk of damaging the substrate, whether it’s walls or floors. This is especially relevant for drywall constructions or old plaster bases. Careless actions can lead to the need for additional repair work, increasing the final cost and complexity of the renovation.
Fifthly, preserving room geometry. The thickness of tiles and adhesive is a few millimeters. If you update tiles by applying a new layer of paint, film, or decorative plaster, you hardly change the dimensions of the walls or floor. This can be important in small rooms where every centimeter counts.
Thus, before you grab a hammer drill, it’s worth considering all alternative options. Perhaps your old tiles deserve a second chance!
Updating Tiles Without Demolition: TOP 7 Modern Solutions for Your Interior

When we talk about updating tiles without removing them, we open up a whole arsenal of modern materials and techniques. These solutions allow you to radically change the look of your bathroom or kitchen, give your interior freshness and individuality, while avoiding the hassle associated with a complete tile replacement. Let’s look at the most popular and effective methods.
- Painting Tiles: One of the most affordable and fastest methods. Modern tile paints have excellent adhesion, moisture resistance, and durability. They allow you to completely change the color and even create an interesting pattern.
- Tile Stickers and Vinyl Film: An ideal option for those who love to experiment or want a temporary solution. Stickers are easy to apply, remove without a trace, and offer a huge variety of designs – from mosaic imitations to geometric patterns.
- Self-Leveling Floor Over Tiles: Although this method is more often used for floor tiles, there are also special compounds for walls. This allows you to create an absolutely seamless, smooth, and very durable coating that looks ultra-modern.
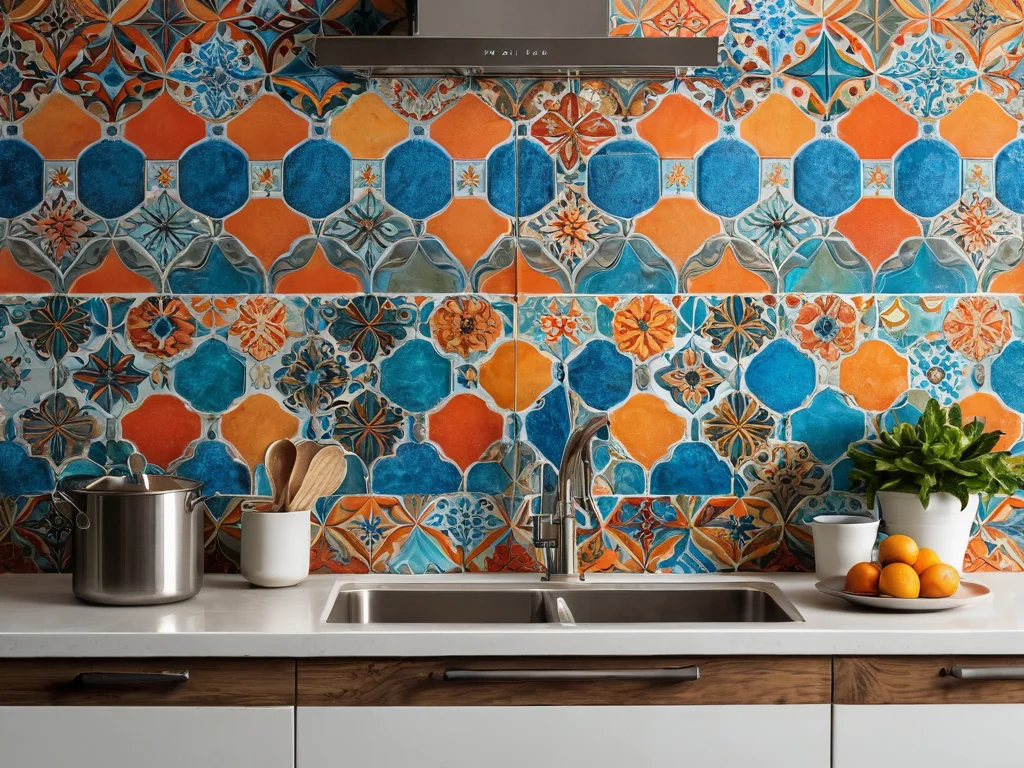
- Decorative Plaster: Decorative plaster application techniques allow you to imitate various textures – from concrete and stone to silk. This gives the tiles a unique, textured look and adds depth to the interior.
- Epoxy Resins: With the help of transparent or colored epoxy resins, you can create unique design effects by pouring them over the tile surface or creating volumetric 3D images.
- 3D Panels Over Tiles: There are special decorative panels that attach directly to existing tiles. They can imitate wood, stone, or create futuristic reliefs.
- Polymer Compounds and Liquid Wallpaper: Some modern polymer compounds and even liquid wallpaper can be applied to tiles, creating textured and interesting surfaces.
Each of these methods has its own advantages and features, which we will discuss in detail later. When choosing a suitable option, consider the desired result, budget, and your renovation skills.
Tile Paint: Choosing the Best Coating for Your Bathroom and Kitchen (Comparison + Tips)
Tile paint is perhaps the most popular and versatile way to update old ceramics without removing them. Modern manufacturers offer a wide range of specialized paints that are highly resistant to moisture, temperature fluctuations, and mechanical stress. Let’s look at the types of paints available and how to choose the ideal option for your bathroom or kitchen.
Types of Tile Paints:
- Acrylic Paints: These are the most common and affordable option. They have good adhesion, dry quickly, have a mild odor, and are available in a huge palette of colors. Acrylic tile paints are usually water-resistant after complete drying. They are ideal for updating tiles in bathrooms, kitchens, and old plumbing fixtures.
- Epoxy Paints: These paints create a more durable and wear-resistant coating. They consist of two components (base and hardener) that are mixed before application. Epoxy paints have excellent water resistance, resistance to chemicals, and abrasion. This makes them an ideal choice for floors or surfaces subjected to intensive use. However, they are more expensive than acrylics and require more thorough surface preparation.
- Polyurethane Paints: Also offer high strength and resistance to abrasion and moisture. Often used for floor coatings, but can also be used for walls. Can be one- or two-component.
- Rubber Paints: A relatively new product on the market. These paints create an elastic, waterproof coating that can cover minor cracks. They are well-suited for damp rooms.
How to Choose Paint:
- Room Purpose: For bathrooms and kitchens, choose paints with increased moisture resistance and resistance to detergents. If the tiles are on the floor, opt for wear-resistant formulations like epoxy or polyurethane.
- Surface Type: Make sure the paint is specifically designed for tiles. Some universal paints may not provide adequate adhesion.
- Color and Finish: Paints come in glossy, matte, and semi-matte finishes. Glossy surfaces reflect light and visually enlarge the space, but dust and fingerprints are more noticeable on them. Matte finishes hide minor defects but can visually shrink the room.
- Manufacturer: Opt for trusted brands that specialize in paints for bathrooms and kitchens. Read reviews from other users.
Application Tips:
- Surface Preparation is key to success. Thoroughly wash the tiles, degrease them (e.g., with alcohol or a special degreaser), and dry them. Refill old grout if it’s damaged.
- Priming: Before painting, be sure to apply a special primer for non-absorbent surfaces (e.g., quartz primer). This will ensure better paint adhesion and prolong its lifespan.
- Application: Apply paint in thin coats (usually 2-3 coats). Allow each coat to dry completely according to the manufacturer’s instructions. Use a brush for hard-to-reach areas and a roller for larger surfaces.
- Protective Varnish: For additional protection and durability, especially in high-humidity or high-use areas, you can cover the painted tiles with a special clear tile varnish.
Properly selected and applied paint can transform your tiles, giving them a completely new, fresh look that will delight you for years to come.
Tile Stickers and Vinyl Film: A Quick Way to Transform Old Tiles (Step-by-Step Guide)
If you’re looking for the fastest, easiest, and most budget-friendly way to refresh old tiles, then stickers and vinyl film are your choice. These materials allow you to instantly change the color, pattern, and overall style of your bathroom or kitchen, and the application process requires no special skills or tools. Let’s take a detailed look at how to do it.
Advantages of Stickers and Film:
- Speed: Application takes minimal time.
- Simplicity: Requires no professional skills.
- Affordability: Significantly cheaper than new tiles or even paint.
- Variety of Designs: A huge selection of patterns, colors, imitations – from mosaic to wood.
- Temporary Solution: Ideal if you’re renting or planning a major renovation in the future. The film is easily removed without leaving a trace.
- Moisture Resistance: Most vinyl films and stickers are moisture-resistant and suitable for bathrooms.
Types of Stickers and Films:
- Self-Adhesive Film: Wide rolls of film that are cut to tile size or cover large areas. Can be solid color or printed.
- Ready-Made Stickers: Cut to tile shape or consist of individual elements (e.g., borders, corners, patterns) that are combined on the surface.
- 3D Stickers: Imitate texture and volume, such as mosaic or brickwork.
Step-by-Step Application Guide:
- Surface Preparation: This is the most important step! Thoroughly wash the tiles to remove dirt, grease, and soap scum. Degrease the surface with alcohol or a special cleaner. Ensure the tiles are perfectly dry.
- Measurement and Cutting: Measure each tile or area you plan to cover. If using roll film, cut it into pieces of the required size, leaving a small margin (1-2 mm) on the edges to ensure full coverage. If using ready-made stickers, make sure they precisely match your tile size.
- Applying Film/Sticker: Start applying from one edge, gradually peeling off the protective paper backing. Use a plastic squeegee (or a plastic card wrapped in a soft cloth) to smooth the film, pushing out air bubbles. Move from the center to the edges.
- Removing Bubbles: If bubbles still appear, try to gently lift the film in that spot and smooth it again. If a bubble is small and won’t come out, you can prick it with a thin needle and gently press it down.
- Finishing Joints: If you’re covering each tile separately, it’s important that the sticker precisely matches the tile edges. If you’re using film to cover multiple tiles, carefully trim it along the grout lines with a utility knife.
- Securing: Go over the entire surface with a dry cloth or squeegee to ensure the film is well adhered.
Tips for a Perfect Result:
- For bathrooms, choose film with a matte or semi-matte finish, as glossy surfaces can show water spots.
- If you have very old tiles with unevenness or cracks, the film may not hide them. In this case, it’s better to choose a thicker film or consider painting.
- After applying the film, let it “settle” onto the surface for 24 hours before exposing it to intense moisture.
Tile stickers and vinyl film are a truly quick and affordable way to give your old tiles a new, stylish face!
Self-Leveling Floor Over Tiles: How to Create a Seamless Coating Without Extra Hassle
Self-leveling floors are a modern solution that allows you to achieve a perfectly smooth, seamless, and very durable coating. And yes, you can pour them even over old tiles, which opens up interesting possibilities for updating your floor without removing it. This method requires a certain degree of care and adherence to technology, but the result can exceed all expectations, especially if you’re aiming for a minimalist or industrial style.
Advantages of Self-Leveling Floors on Tiles:
- Seamless Surface: The absence of seams significantly simplifies cleaning and prevents dirt and moisture buildup.
- High Strength and Wear Resistance: Self-leveling floors are resistant to mechanical loads, abrasion, and chemical exposure.
- Aesthetics: A smooth, monolithic coating looks very modern and stylish. You can choose any color or create unique effects (e.g., 3D floors).
- Moisture Resistance: Ideal for bathrooms and kitchens.
- Application Over Existing Coating: Allows you to avoid the labor-intensive removal of old tiles.
Features of Choosing a Self-Leveling Floor:
- Cement-Based Self-Leveling Floors: The most common option. They create a strong, durable surface. Require more thorough base preparation, including priming.
- Polymer Self-Leveling Floors: Can be based on epoxy, polyurethane, or methyl methacrylate resins. They have excellent elasticity, resistance to moisture, and chemicals. Epoxy is harder, polyurethane is more elastic and resistant to temperature fluctuations.
Preparing Tiles for Self-Leveling Floor Application:
- Cleaning: Completely clean the tiles of dirt, grease, adhesive residue, and old grout.
- Joint Repair: Fill all joints between tiles and any cracks in the tiles with a special repair compound or epoxy putty. The joints should be level with the tile surface to ensure smoothness.
- Sanding: Lightly sand the tile surface to create roughness for better adhesion. Remove dust after sanding.
- Priming: Apply a special primer for damp and non-absorbent surfaces (e.g., epoxy primer). The primer evens out the absorbency of the base and improves adhesion to the self-leveling floor.
Application Process:
- Mixing the Compound: Follow the manufacturer’s instructions. Usually, components are mixed in a strictly defined proportion to a homogeneous mass.
- Application: Start pouring the compound from the farthest corner of the room, moving towards the exit. Use a wide trowel or squeegee to evenly distribute the compound over the surface.
- Leveling: For perfect leveling, you can use a special spiked roller, which will help remove air bubbles and distribute the compound.
- Drying: Allow the first layer to dry according to the instructions (usually 12-24 hours). Apply a second layer if necessary.
- Finishing Coat: After complete drying, you can apply a protective varnish (e.g., polyurethane) for additional strength and scratch resistance.
Important Considerations:
- A self-leveling floor increases the floor height by a few millimeters, which may require trimming doors or baseboards.
- Working with self-leveling floors requires care, as the compound hardens quickly.
- Ensure good room ventilation during work.
A self-leveling floor over tiles is a stylish and durable solution that can completely transform your floor, giving it a modern and flawless look.
Putty and Decorative Plaster: Turning Old Tiles into an Effective Accent
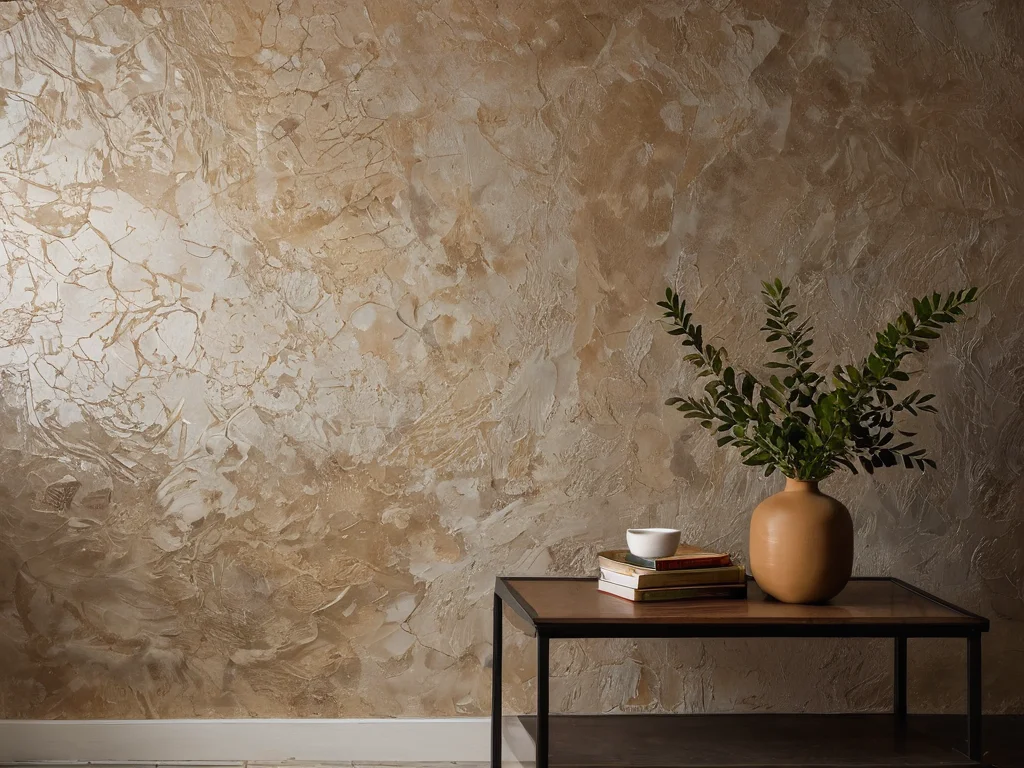
If you want to give old tiles not just a new color, but a distinct texture and depth, then decorative plaster or putty is what you need. These materials allow you to create unique patterns on the tile surface, imitate natural materials, or simply give walls a noble matte effect. Let’s look at how you can transform your tiles using these techniques.
Putty for Leveling and Creating Texture:
- Preparation: As with painting, the tile surface must be perfectly clean, dry, and degreased.
- Application: For leveling minor imperfections and filling joints, finishing putty is used. It can be applied in a thin layer with a spatula.
- Creating Relief: After applying the putty, while it’s still wet, you can create various patterns. For this, use textured rollers, spatulas with different attachments, sponges, or even ordinary objects (e.g., a comb).
- Painting: After the putty has completely dried, it can be painted. It’s best to use acrylic or latex paints, which adhere well to a smooth surface.
Decorative Plaster: The Effect of Natural Materials and Textures:
- Types of Decorative Plaster: There are many types, each creating a unique effect:
- Venetian Plaster: Imitates polished marble, creating a smooth, glossy surface with deep color variations.
- Structural Plaster: Contains various fillers (stone chips, quartz) that create a pronounced relief.
- Textured Plaster: Allows you to imitate various surfaces – from wood and stone to leather and fabric.
- Microcement: A very thin but durable material that creates a concrete surface effect. Ideal for loft interiors.
- Surface Preparation: For decorative plaster, cleanliness and absence of grease are also important. If the tiles are glossy, they can be lightly sanded for better adhesion.
- Application: Decorative plaster is applied with special tools (trowels, spatulas, rollers) depending on the desired effect. Multiple layers are often required.
- Application Techniques:
- Creating Relief: Using spatulas, trowels, textured rollers, sponges, brushes, fabrics.
- Creating a Marble Effect: The “Venetian” technique involves applying thin layers multiple times with subsequent polishing.
- Creating a Concrete Effect: Microcement is applied in several layers with intermediate sanding.
- Finishing: After drying, decorative plaster can be coated with protective varnish, wax, or stain to add shine, moisture resistance, or the desired shade.
Tips for Transforming Tiles:
- Start Small: If you’re working with decorative plaster for the first time, try a small area or a single tile first to practice the technique.
- Joints as a Design Element: Instead of completely hiding them, you can emphasize the joints by using contrasting grout or painting them a different color.
- Combining Techniques: Try combining tile painting with applying decorative elements from putty or plaster in specific areas (e.g., in the backsplash area).
- Moisture Protection: For bathrooms and kitchens, choose plasters that, after drying and treatment with a protective compound (varnish, wax), become moisture-resistant.
Putty and decorative plaster offer the opportunity to turn ordinary old tiles into a true work of art, giving your interior a unique character and style.
Main Mistakes When Updating Tiles Yourself: How to Avoid Disappointment
Updating old tiles yourself is a great way to save money and be creative. However, as with any endeavor, there are pitfalls. Incorrect material selection, failure to follow the technology, or rushing can lead to disappointment and the need to redo the work. To avoid this, let’s look at the most common mistakes to avoid.
Mistake 1: Insufficient Surface Preparation
- Problem: Tiles are not sufficiently cleaned of dirt, grease, soap scum, grout residue, or mold.
- Why it’s bad: Any coating (paint, film, plaster) will not adhere to a dirty or greasy surface. This will lead to peeling, bubbling, and rapid wear.
- Solution: Thoroughly wash the tiles, degrease them (use alcohol, acetone, or special degreasers). If there is old, crumbling grout, it’s better to remove it and replace it with new.
Mistake 2: Ignoring Primer
- Problem: Skipping the priming step, especially on glossy or non-absorbent surfaces.
- Why it’s bad: Paint or film may not adhere well to a smooth surface and can peel off over time.
- Solution: Always use a special primer for non-absorbent surfaces (quartz primer, adhesion primer). It creates roughness and improves adhesion.
Mistake 3: Incorrect Material Selection
- Problem: Using regular paint or film not intended for damp rooms or tiles.
- Why it’s bad: Bathrooms and kitchens have high humidity, temperature fluctuations, and exposure to detergents. Ordinary materials will quickly lose their appearance, start to peel, or mold.
- Solution: Choose only specialized tile paints, moisture-resistant vinyl films, or other materials designed for use in bathrooms and kitchens.
Mistake 4: Too Thick a Layer of Paint or Plaster
- Problem: Applying the material in a thick, uneven layer in hopes of finishing the job faster.
- Why it’s bad: A thick layer dries slowly, can crack, bubble, or peel off.
- Solution: Apply paint or plaster in thin, even layers. Follow the manufacturer’s instructions for the number of coats and drying time between them.
Mistake 5: Insufficient Drying Before Use
- Problem: Starting to use the bathroom or kitchen immediately after updating the tiles.
- Why it’s bad: The fresh coating has not yet gained full strength and can be damaged by water, detergents, or mechanical impact.
- Solution: Allow the coating to dry completely and gain strength. For paints, this can take from 24 hours to several days. For self-leveling floors – even longer.
Mistake 6: Improper Tool Usage
- Problem: Using old, worn-out rollers or brushes that leave lint or streaks.
- Why it’s bad: The result of the work looks messy, brush strokes or lint spoil the appearance.
- Solution: Use only clean, high-quality tools suitable for the chosen type of coating. For smooth surfaces, it’s better to use short-nap rollers or foam rollers; for textured surfaces, use special rollers or spatulas.
Mistake 7: Underestimating the Complexity of the Work
- Problem: Thinking that updating tiles is very simple and not paying enough attention to details.
- Why it’s bad: Neglecting details (e.g., grout lines, corner joints) can spoil the overall impression of the updated interior.
- Solution: Study instructions, watch tutorial videos, assess your abilities. If in doubt, it’s better to ask for professional help or start with a less critical area.
By avoiding these common mistakes, you can achieve excellent results when updating tiles yourself and be satisfied with the transformed interior.
Durability Secrets: How to Care for Updated Tiles So They Last for Years
You’ve successfully transformed old tiles, investing time, effort, and possibly money. Now the main task is to preserve the result and extend the lifespan of the updated coating. Proper care is not a complex science, but it will help your tiles remain beautiful and functional for years to come. Let’s break down the main care secrets.
General Care Rules for Painted Tiles:
- Mild Detergents: For daily cleaning, use mild, non-abrasive detergents. Avoid aggressive chemicals, solvents, acetone, abrasive powders, and stiff brushes that can damage the paintwork.
- Gentle Cleaning: Wash tiles with a soft sponge or microfiber cloth. Rinse the surface thoroughly with clean water to remove detergent residue, and wipe dry to avoid streaks.
- Prompt Stain Removal: Try to remove stains from water, soap, cosmetics, or food immediately. The longer dirt stays on the surface, the harder it will be to remove.
- Protection from Mechanical Damage: Avoid dropping heavy objects on the tiles, especially if they have been painted. Step on the tiles carefully, especially if they are walls or decorative elements.
- Ventilation: Ensure good ventilation in the bathroom and kitchen. This will help prevent excess moisture, which can negatively affect any coating, including paint.
Care Specifics for Tiles Covered with Film or Stickers:
- Gentle Washing: Film and stickers should also be washed with mild detergents and a soft sponge.
- Avoid Vigorous Rubbing: Do not rub the film surface forcefully to avoid damaging the pattern or protective layer.
- Temperature Limitations: Some types of film may lose their properties under sharp temperature changes or hot steam.
- Removal: If you decide to change the design or remove the film, do so carefully, preheating it with a heat gun. This will help the adhesive soften and make removal easier.
Care for Tiles Under Decorative Plaster or Self-Leveling Floor:
- Follow Manufacturer’s Recommendations: Each type of plaster and self-leveling floor has its own care specifics. Carefully study the instructions for the materials used.
- Protective Coating: If you applied a finishing varnish or wax, surface care will be easier. Regularly wipe it with a damp cloth.
- Restoration: In case of minor scratches or damage, some types of decorative plaster and self-leveling floors can be locally restored.
When to Consider Replacement:
- If the coating is severely damaged, peeling, has deep scratches, or stains that cannot be removed.
- If you are tired of the old design and want to radically change the interior.
Proper care will allow you to enjoy your updated tiles for as long as possible, maintaining the aesthetic appearance of your bathroom or kitchen. Remember that even the simplest update requires attention and care to ensure the result delights you for years to come!
Рекомендуем:
 Bathroom: Tile or Paint. What Will Everyone Face?
 Grout for tiles: how to choose the color and apply it correctly
Joint filler for tiles: how to choose the color and apply it correctly
Grout for tiles: how to choose the color and apply it correctly
Joint filler for tiles: how to choose the color and apply it correctly
 How to Tile Walls in a Bathroom: A Detailed Guide
 How to Make a Brick Wall in an Interior (Imitation)
 Wall Cladding with Wood Paneling: A Step-by-Step Guide
 Comment rénover du vieux carrelage sans le retirer : 99 façons de transformer votre salle de bain et votre cuisine
 Washable wallpaper for the kitchen: why it’s the best idea for your renovation?
 DIY Decorative Stone Wall Installation: Your Guide to Home Transformation
 What to do if mold or mildew appears on the walls?
 Internal Wall Insulation: Materials and Technology
 MDF Panel Wall Finishing: Installation Guide
 PVC Wall Panels: Cheap and Cheerful. Installation Guide
Revêtement mural en lambris : guide étape par étape
Pose de pierre décorative sur le mur par vous-même : votre guide pour transformer votre maison
Comment poser du carrelage mural dans la salle de bain : guide détaillé
Revêtement mural en panneaux MDF : guide d’installation
Papier peint lavable pour la cuisine : pourquoi est-ce la meilleure idée pour votre rénovation ?
Salle de bain : carrelage ou peinture. À quoi chacun sera-t-il confronté ?
Comment réaliser un mur en briques dans un intérieur (imitation)
PVC Wall Panels: Cheap and Cheerful. Installation Guide
Revêtement mural en lambris : guide étape par étape
Pose de pierre décorative sur le mur par vous-même : votre guide pour transformer votre maison
Comment poser du carrelage mural dans la salle de bain : guide détaillé
Revêtement mural en panneaux MDF : guide d’installation
Papier peint lavable pour la cuisine : pourquoi est-ce la meilleure idée pour votre rénovation ?
Salle de bain : carrelage ou peinture. À quoi chacun sera-t-il confronté ?
Comment réaliser un mur en briques dans un intérieur (imitation)