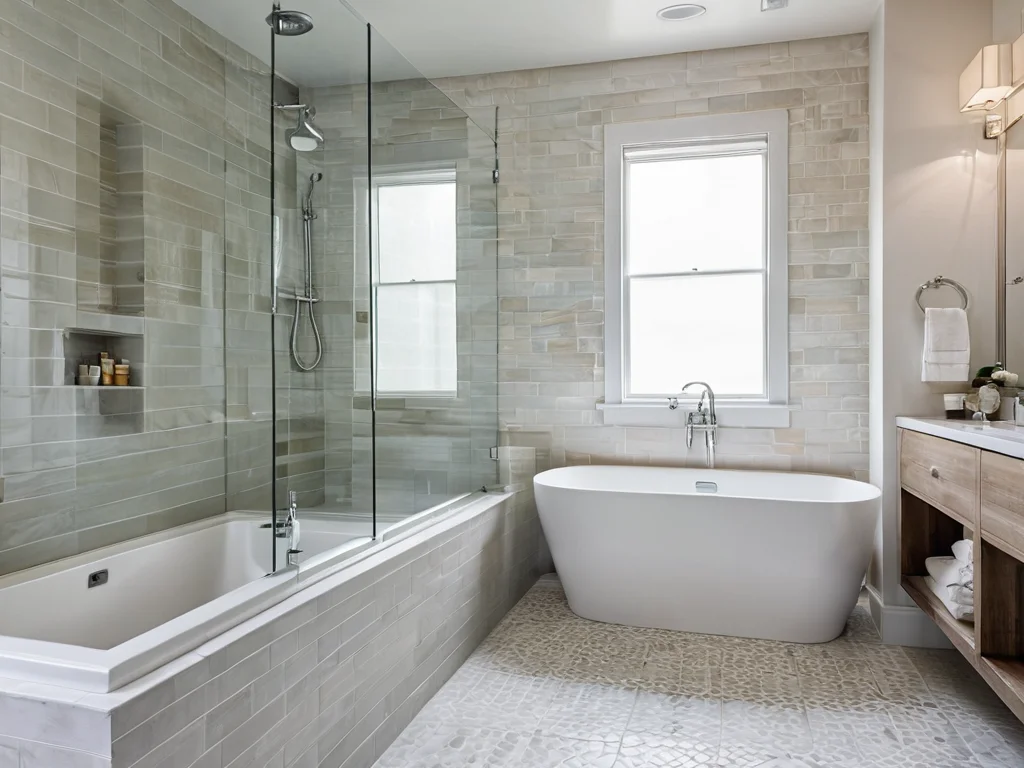
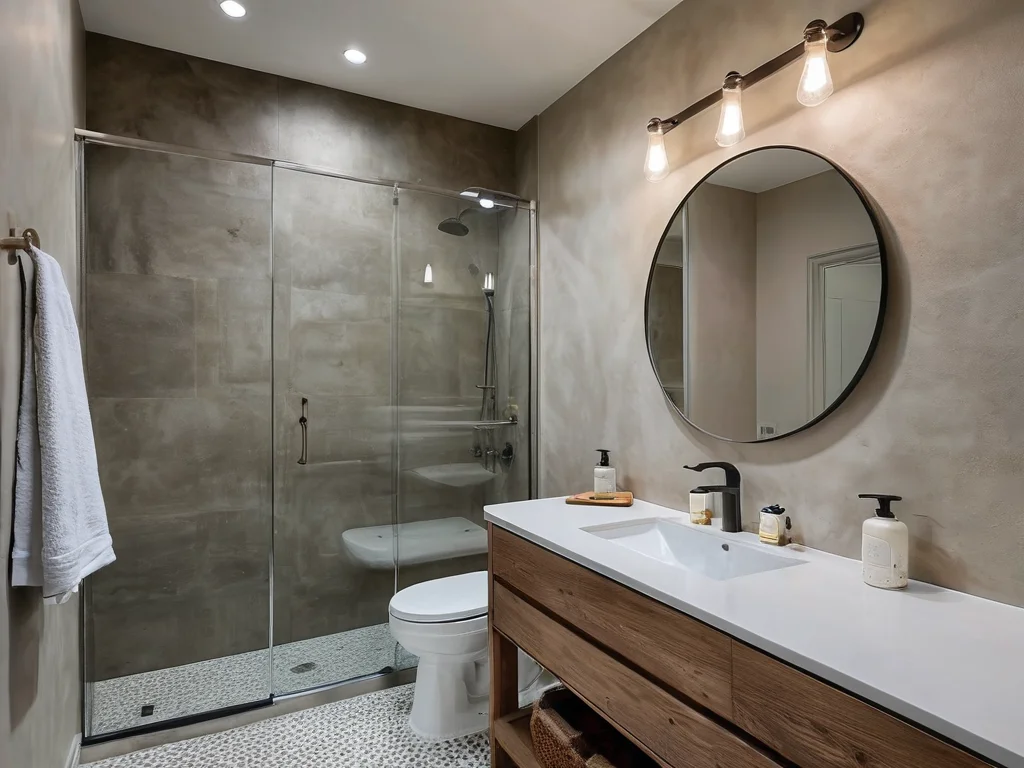
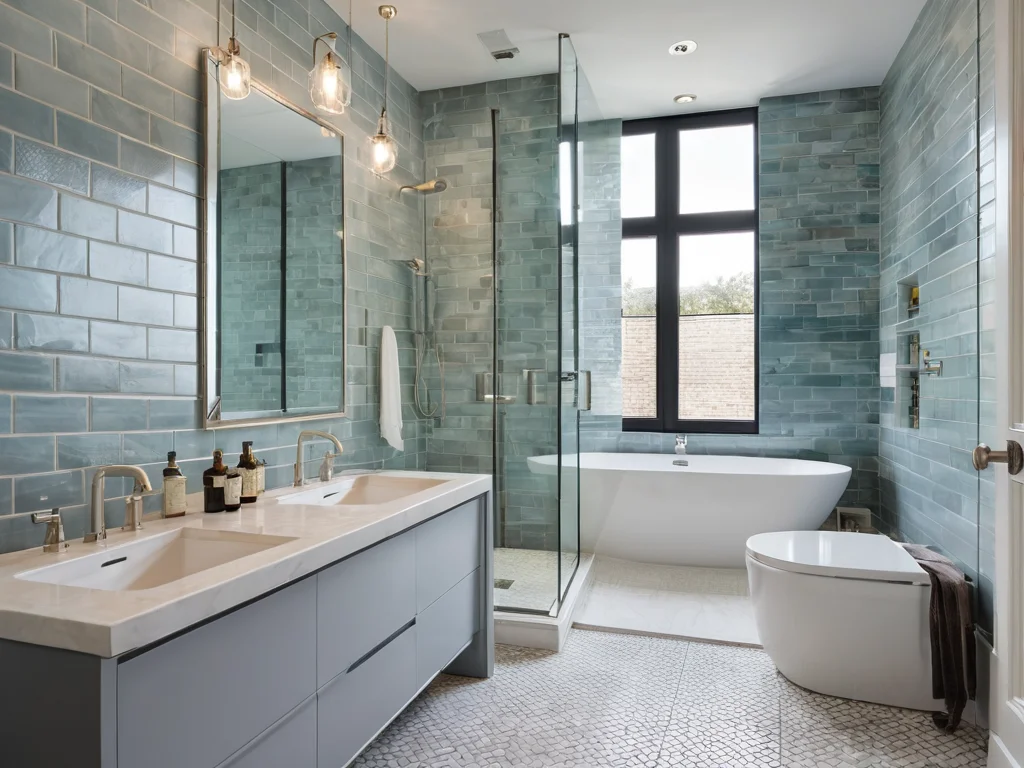
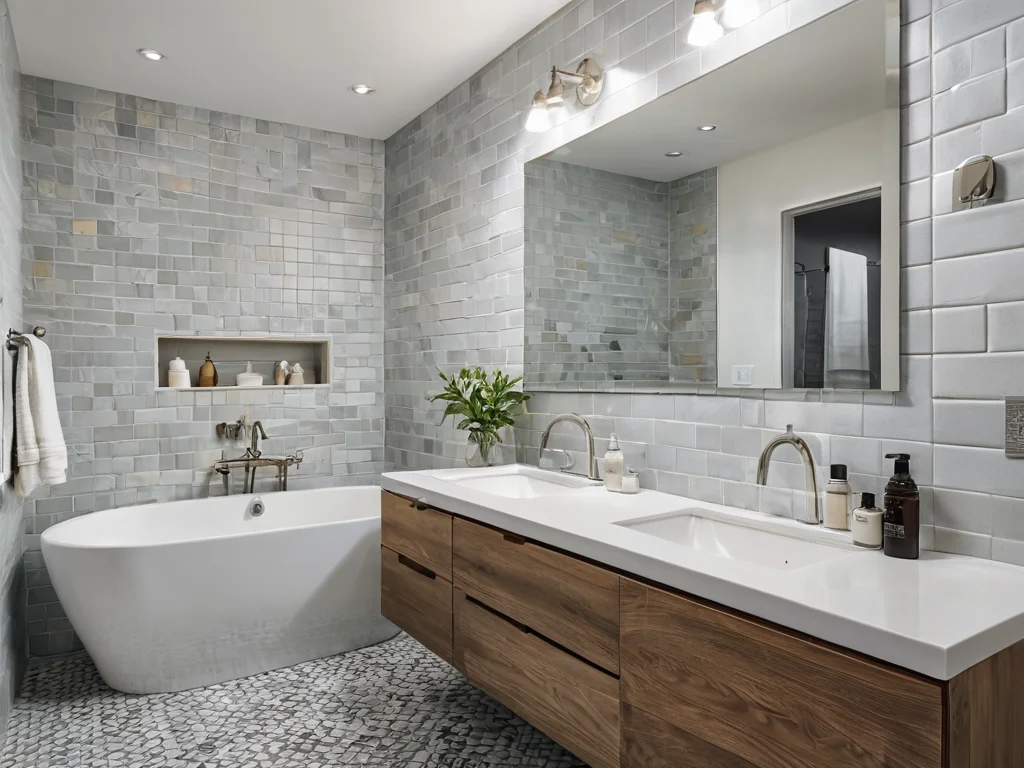
The bathroom is not just a place for hygiene procedures; it is a true oasis of peace and comfort in your home. And, of course, the main role in creating the atmosphere is played by wall finishing. Bathroom tiles are a classic that never goes out of style. They are durable, moisture-resistant, and offer an endless variety of designs. But for the result to please you for many years, it is important to approach the tiling process with maximum responsibility. Don’t be afraid to tackle this job yourself – with our detailed guide, you’ll succeed!
Today, we will break down all the subtleties and nuances that will help you tile the walls in your bathroom flawlessly. From surface preparation to final grout filling – we will go through each stage together. You will learn how to avoid common mistakes, what materials to choose, and how to apply the secrets of professionals to make your bathroom a source of pride and admiration.
Secrets of Wall Preparation: You Can’t Do Without It!
Wall preparation is the foundation of all future work. If this stage is skipped or done poorly, even the most expensive and beautiful tiles can delaminate or crack. Therefore, let’s pay special attention to this moment.
1. Surface Cleaning:
- Remove Old Coatings: If there are old wallpapers, paint, or other coatings on the walls, they must be completely removed. Wallpaper is easily removed with a wet method, but old paint, especially oil-based, is best scraped off with a spatula or a special scraper.
- Degreasing: After removing old coatings, the walls must be thoroughly degreased. This can be done with special products or simply by wiping them with a solution of soda or ammonia alcohol. This is important for the adhesive to bond well with the surface.
- Dust and Dirt Removal: Wipe the walls with a dry cloth or vacuum cleaner to remove all dust and small debris.
2. Wall Leveling:
- Assessing Unevenness: Check the walls with a long spirit level or straight edge. Minor unevenness (up to 3 mm) can be corrected with adhesive. If the differences are more significant, leveling will be required.
- Plastering: For large unevenness, plaster is used. Apply it to the wall, level it with a rule, and let it dry completely.
- Puttying: After the plaster dries (or for minor unevenness), the walls are puttied. Putty fills small cracks and pores, creating a perfectly smooth surface. After the putty dries, it needs to be sanded with sandpaper to obtain a smooth surface.
3. Priming:
- Why is Primer Needed? Primer improves the adhesion (bonding) of the adhesive to the surface, reduces the wall’s absorbency (so the adhesive doesn’t dry too quickly), and prevents the formation of mold and mildew.
- How to Apply? Apply primer in an even layer using a roller or brush. For wet rooms like bathrooms, it is recommended to use special moisture-resistant primers.
- Drying Time: Be sure to let the primer dry completely according to the manufacturer’s instructions.
4. Waterproofing:
- Why is it Important? The bathroom is a high-humidity area. Waterproofing will protect the walls from moisture penetration, prevent mold growth, and extend the life of both the tiles and the building structure.
- Materials: Special mastics or coating compounds are used for waterproofing.
- Application: Apply the compound to the walls, paying special attention to corners and joints. Usually, two coats are required, with each subsequent coat applied perpendicular to the previous one after it has dried.
Remember that perfect preparation is 80% of success in tiling. Don’t rush this stage, and the result will surely please you.
Choosing the Right Tile Adhesive: Which is Best for Your Bathroom?
Choosing the adhesive is no less important a stage than preparing the walls. The correct adhesive determines the strength of the tile’s bond to the substrate, the durability of the finish, and, ultimately, the appearance of your bathroom.
1. Types of Tile Adhesives:
- Cement-based Adhesives: This is the most common and versatile type of adhesive. It consists of cement, sand, mineral fillers, and modifying additives. Cement-based adhesives have high strength, moisture resistance, and frost resistance (which may be relevant if the bathroom is in an unheated room). They come in different grades, varying in composition and properties.
- Dispersion Adhesives: These adhesives are sold ready-to-use in buckets. They do not require mixing with water. Dispersion adhesives have good elasticity and adhesion, making them an excellent choice for laying large-format tiles or on substrates that may undergo minor deformations. However, they are generally more expensive and less moisture-resistant than cement-based ones.
- Epoxy Adhesives: These are two-component adhesives that are mixed immediately before use. Epoxy adhesives have exceptional strength, chemical resistance, and moisture resistance. They are ideal for high-humidity areas, as well as for tiling swimming pools or shower cabins. But they are more expensive and more difficult to work with, requiring special skills.
2. What to Consider When Choosing?
- Operating Conditions: For bathrooms, cement-based adhesives with polymer modifiers are generally suitable, providing increased moisture resistance and elasticity.
- Tile Type: For ceramic tiles, standard cement-based adhesive is usually sufficient. For porcelain stoneware, especially large-format, or natural stone, it is better to choose adhesives with increased elasticity (marked S1 or S2).
- Substrate: If the walls in your bathroom are plastered or puttied, ordinary cement-based adhesive will work. If the substrate is unstable, prone to vibration or deformation (e.g., drywall), then an elastic adhesive should be chosen.
- Manufacturer: Prefer well-known brands that have proven themselves in the market. This guarantees stable product quality.
- Expiration Date: Check the expiration date of the adhesive, especially if you are buying it in advance.
3. Preparing the Adhesive:
- Proportions: Strictly follow the instructions on the packaging. An incorrect ratio of water to dry mix can degrade the adhesive’s properties.
- Mixing: Use a construction mixer at low speed. Achieve a homogeneous consistency without lumps.
- Resting Time: After mixing, let the adhesive stand for 5-10 minutes, and then mix again. This activates the adhesive components.
- Pot Life: The prepared adhesive mixture has a limited pot life (usually 30-60 minutes). Try to use it within this time. Do not add water to adhesive that has already started to set – this will spoil its properties.
Properly selected and prepared adhesive is the key to the durability and beauty of your tiles.
Tile Layout: How to Avoid Mistakes and Beautifully Design a Bathroom
Tile layout is a kind of blueprint for future tiling. A well-thought-out layout not only allows you to beautifully design the bathroom but also minimizes the amount of tile cutting, thus saving material and time.
1. Planning:
- Measure the Walls: Before starting work, carefully measure all walls that will be tiled.
- Consider Tile Sizes: Determine how many whole tiles fit on each wall and how many will need to be cut.
- Visualization: It is best to make a schematic drawing of the layout on paper or use special software. This will help you see how the tiles will be arranged, where the seams and cuts will be.
2. Basic Layout Principles:
- Start from the Center: For the best aesthetic effect, especially if you have an accent wall or niche, it is recommended to start the layout from the center. Find the center of the wall, mark vertical and horizontal lines, and start tiling from them. This will result in a symmetrical tile arrangement with equal cuts on the edges.
- Consider Plumbing Placement: Plan the layout so that tile cuts do not fall in the most visible areas, such as the central part of the wall above the sink or bathtub.
- Large Tiles: If you are using large-format tiles, try to minimize the number of cuts to maintain a sense of continuity.
- Decorative Elements: If your design includes decorative inserts, borders, or mosaics, their placement should also be carefully considered during the layout stage.
- Rows: Try to keep the horizontal rows of tiles straight. This can be done using a laser level or by stretching a string.
3. Where to Start Tiling?
- First Row: It is best to start tiling from the most visible area, for example, from the row above the bathtub or from the central part of the wall.
- Guide: For the straightness of the first row (and all subsequent rows), it is recommended to use an aluminum or plastic profile attached to the wall. It will serve as a support for the first row of tiles.
- Hidden Areas: Tile cuts usually occur in the upper rows or in areas behind plumbing fixtures. These are less noticeable and do not spoil the overall appearance.
4. Important Points:
- Grout Width: Do not forget to leave a gap between the tiles for the grout. Special plastic crosses are used for this. The grout width depends on the tile size and design.
- Tile Allowance: Always buy tiles with a 10-15% allowance. This is necessary in case of breakage during transportation, defects, or for future replacement.
A well-planned layout is the key to a flawless result. Do not neglect this stage, and your bathroom will look like it’s from a magazine cover.
The Tiling Process: From the First Row to the Ceiling
So, the walls are prepared, the adhesive is chosen, the layout is thought out – it’s time to start the tiling process itself. This stage requires neatness, precision, and patience.
1. Applying Adhesive:
- To the Wall or to the Tile? There are two options: apply adhesive to the wall or to the tile. For most cases, especially when working with medium-sized tiles, it is recommended to apply adhesive to the wall. For large-format tiles or to ensure maximum adhesion, some craftsmen apply adhesive to both the wall and the tile (double application).
- Tool: Use a notched trowel (comb). The height of the trowel’s teeth should correspond to the tile size (the larger the tile, the higher the teeth).
- Technique: Apply adhesive to an area that you can tile within 10-15 minutes (the adhesive’s pot life). Evenly spread the adhesive with the trowel to avoid voids.
2. Laying Tiles:
- First Row: Start by laying the first row. Place the tile against the wall, press gently, and twist it to ensure the adhesive is evenly distributed. Check for straightness with a level.
- Inserting Spacers: Insert plastic crosses between the tiles to ensure uniform grout thickness.
- Subsequent Rows: Lay the next row, pressing the tiles against the wall and adjacent tiles. Monitor vertical and horizontal alignment using a level.
- Cutting: If tile cutting is required, use a tile cutter or glass cutter. Cuts are usually made in the upper rows or corners.
- Difficult Areas: In areas where pipes pass or near electrical outlets, tiles will need to be cut or holes made. For this, you can use special drill bits or an angle grinder (grinder) with a diamond disc.
3. Quality Control:
- Level: Regularly check the straightness of the tiling with a level horizontally, vertically, and diagonally.
- Tapping: Gently tap each laid tile with the handle of a trowel. If the sound is dull, the adhesive has bonded well. A ringing sound indicates a void under the tile, which needs to be corrected by adding adhesive.
- Removing Excess Adhesive: Immediately remove excess adhesive that has squeezed out onto the grout lines or tile surface with a damp sponge or cloth. Dried adhesive will be much harder to remove.
4. Drying Time:
- Waiting: After all tiles are laid, let the adhesive dry completely. This usually takes 24-48 hours, depending on the type of adhesive and room conditions.
- Don’t Touch! During this time, try not to touch the tiles, walk on them, or put any load on the walls.
Patience and neatness at every stage are your main tools for achieving a perfect result.
Grouting: How to Make Joints Strong and Aesthetic
Grouting is the final touch that not only gives a finished look to your tiling but also protects the joints from moisture, dirt, and mold. Properly done grouting is the key to the durability and hygiene of your bathroom.
1. Choosing Grout:
- Cement-based Grouts: The most common and affordable option. They consist of cement, sand, and special additives. Cement-based grouts are suitable for most tile types and joints from 2 to 10 mm wide. For wet rooms, it is better to choose cement-based grouts with polymer components, which increase their moisture resistance and elasticity.
- Epoxy Grouts: This is a more expensive, but also higher quality option. Epoxy grouts consist of epoxy resin, hardener, and pigments. They have exceptional strength, moisture resistance, chemical resistance, and do not absorb dirt. Epoxy grout is ideal for kitchen backsplashes, shower cabins, and high-traffic areas. It is also not subject to color change over time. However, working with epoxy grout requires certain skills, as it sets quickly.
- Selection Factors: When choosing grout, consider the joint width, tile type (any grout is suitable for glazed tiles; for unglazed or porous tiles, it is better to choose epoxy or special cement grouts with fine aggregate), and the bathroom’s operating conditions.
2. Preparing for Grouting:
- Cleaning Joints: Before grouting, the joints must be clean and dry. Remove any adhesive residue, dust, and dirt from them using a spatula or brush.
- Removing Spacers: Remove the plastic crosses that were used to form the joints.
- Masking: If you are working with glazed tiles or are afraid of staining them, you can tape the edges of the tiles with painter’s tape.
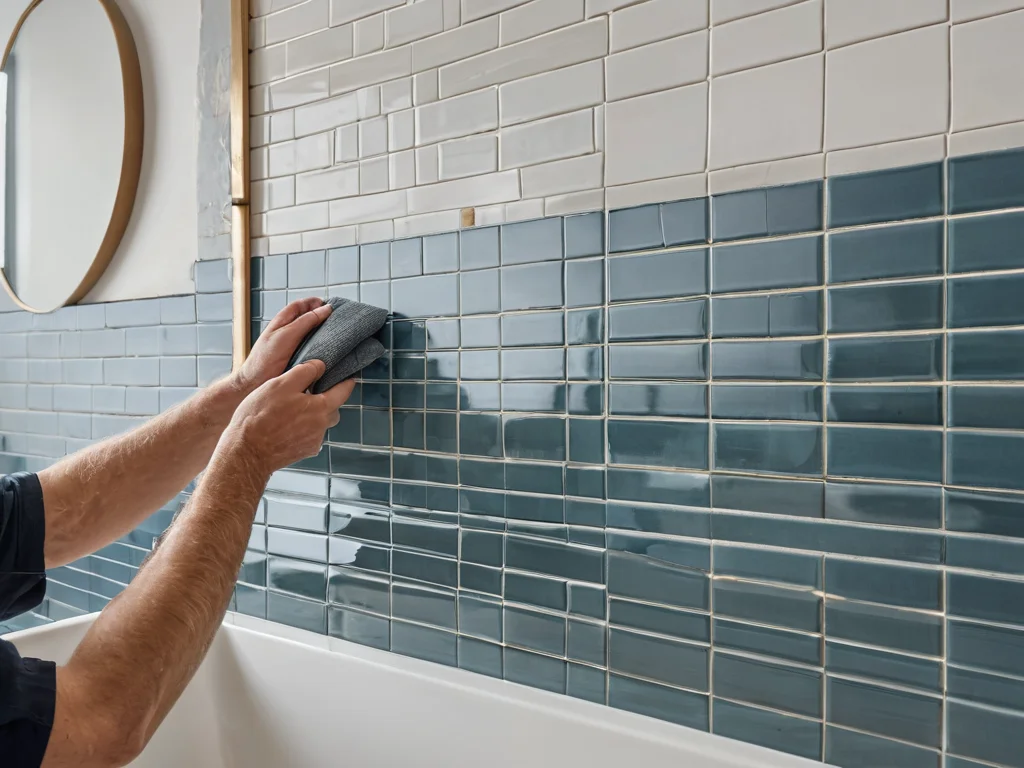
3. Grouting Process:
- Preparation: If you are using dry grout, follow the instructions on the packaging. Thoroughly mix the mixture with water until a homogeneous consistency similar to thick sour cream is achieved.
- Application: Use a rubber float (spatula) to apply the grout. Apply it with diagonal movements, filling all the joints. Try to work in such a way that grout does not remain on the tile surface.
- Removing Excess: After you have filled a section of joints, remove excess grout with the same rubber float, moving diagonally to the joints.
- Initial Cleaning: After 15-20 minutes, when the grout begins to set, perform an initial cleaning of the tiles with a damp sponge. Move the sponge diagonally to avoid washing out the grout from the joints. Rinse the sponge frequently in clean water.
- Final Cleaning: After the grout has completely dried (usually after 24 hours), remove any remaining haze with a dry soft cloth or microfiber towel.
4. Joint Maintenance:
- Protection: For additional protection of joints from moisture and dirt, especially in the shower area, they can be treated with special water-repellent compounds.
- Regular Cleaning: Keep the bathroom clean to prevent mold and joint soiling.
Neat grouting is an important stage that will transform your tiles from individual elements into a single, beautiful, and harmonious canvas.
Hidden Pitfalls: 5 Common Mistakes When Tiling a Bathroom
Even with a detailed guide, beginners often make mistakes that have to be corrected later. Let’s look at the 5 most common “pitfalls” and learn how to avoid them.
1. Improper Substrate Preparation:
- What’s the Mistake? Ignoring the stages of leveling, priming, or waterproofing. The result is tiles peeling off, cracks appearing, and mold.
- How to Avoid? Never neglect preparation. Thoroughly level the walls, prime them, and most importantly, do quality waterproofing, especially in risk areas (near the bathtub, sink, shower).
2. Incorrect Adhesive Choice or Mixing:
- What’s the Mistake? Using adhesive unsuitable for the conditions or tile type; incorrect proportions of water and dry mix; using expired adhesive.
- How to Avoid? Carefully read the adhesive’s specifications and choose it for your tile and substrate. Strictly adhere to mixing proportions. Don’t skimp on adhesive; choose trusted manufacturers.
3. Lack of Level Control:
- What’s the Mistake? Tiling by eye without constant level checks. The result is crooked rows, uneven joints, and distorted room geometry.
- How to Avoid? Constantly use a spirit level (bubble or laser) to check the straightness of each row and each tile.
4. Uneven or Too Wide Joints:
- What’s the Mistake? Using spacers of the wrong size, their absence, or uneven filling of joints with grout. This spoils the appearance and can lead to grout crumbling.
- How to Avoid? Always use calibrated spacers to form straight joints of uniform width. Carefully fill the joints with grout, removing excess.
5. Lack of Tile Allowance:
- What’s the Mistake? Buying tiles just enough without accounting for possible breakage or defects. As a result, when a damaged tile needs to be replaced, it turns out that the required batch is no longer available.
- How to Avoid? Always buy tiles with a 10-15% allowance of the total area. Store them in a dry place.
By avoiding these common mistakes, you will significantly increase your chances of creating perfectly straight and durable tile finishes.
Pro Life Hacks: Master Secrets for Flawless Tiles
Professional tilers have their own little secrets that allow them to work faster, neater, and achieve a flawless result. Here are some such “life hacks” worth adopting:
- Wet Cleaning Method: Before laying the next tile, moisten the wall or tile with water. This will help the adhesive spread better and give you a little more time to adjust the position.
- Double Adhesive Application for Large Formats: If you are working with large-format tiles, apply a thin layer of adhesive not only to the wall but also to the back of the tile itself. This will ensure full adhesive coverage without voids.
- Using a Water Level: To check the straightness of vertical rows, you can use a water level. It accurately shows the vertical line, even if the wall is slightly uneven.
- Plasticizer for Grout: Instead of water, you can use a special plasticizer to mix cement-based grout. It will make the grout more plastic, durable, and moisture-resistant.
- Sponge Cleaning: When grouting, always keep two buckets of clean water nearby. One bucket is for the initial removal of excess grout from the sponge, the second is for final rinsing. Change the water frequently.
- Checking for Voids: After laying the tiles, but before the adhesive dries, you can tap each tile. If the sound is dull – everything is fine. If it’s ringing – there is a void under the tile. In this case, carefully remove the tile, add adhesive, and lay it back, leveling with a level.
- Template Cutting: If you need to make many identical cuts (e.g., for pipes), make one template from cardboard or plastic, and then use it for all tiles.
- Cleaning Adhesive Residue: After the adhesive has completely dried, if there are any traces left on the tiles, they can be removed using the same grout you used to fill the joints. Apply a little grout to a sponge and gently wipe the areas with adhesive.
Applying these simple but effective techniques will help you achieve professional quality in tiling and make the process more enjoyable.
Tiling a bathroom is a task that requires attention to detail, neatness, and patience. But by following our recommendations, you can handle it yourself and create the bathroom of your dreams. The main thing is not to rush, to prepare the surface thoroughly, to choose materials correctly, and to control every stage of the work. Good luck!
Рекомендуем:
 Grout for tiles: how to choose the color and apply it correctly
Joint filler for tiles: how to choose the color and apply it correctly
Grout for tiles: how to choose the color and apply it correctly
Joint filler for tiles: how to choose the color and apply it correctly
 DIY Decorative Stone Wall Installation: Your Guide to Home Transformation
 How to Update Old Tiles Without Removing Them: 99 Ways to Transform Your Bathroom and Kitchen
 Bathroom: Tile or Paint. What Will Everyone Face?
 How to Make a Brick Wall in an Interior (Imitation)
 Wall Cladding with Wood Paneling: A Step-by-Step Guide
 Washable wallpaper for the kitchen: why it’s the best idea for your renovation?
 Internal Wall Insulation: Materials and Technology
 MDF Panel Wall Finishing: Installation Guide
 PVC Wall Panels: Cheap and Cheerful. Installation Guide
 What to do if mold or mildew appears on the walls?
 Comment poser du carrelage mural dans la salle de bain : guide détaillé
Pose de pierre décorative sur le mur par vous-même : votre guide pour transformer votre maison
Comment poser du carrelage mural dans la salle de bain : guide détaillé
Pose de pierre décorative sur le mur par vous-même : votre guide pour transformer votre maison
 Как стильно оформить книжные полки: секреты декораторов
 Галерея из постеров и фотографий: как правильно составить композицию
 Как выровнять потолок штукатуркой: подробное руководство для идеального результата
 Декоративные подушки: как мастерски сочетать цвета, принты и фактуры на диване
 Деревянный пол мечты: чем паркетная доска отличается от массивной и что выбрать для вашего дома?
Comment rénover du vieux carrelage sans le retirer : 99 façons de transformer votre salle de bain et votre cuisine
Деревянный пол мечты: чем паркетная доска отличается от массивной и что выбрать для вашего дома?
Comment rénover du vieux carrelage sans le retirer : 99 façons de transformer votre salle de bain et votre cuisine