Hello, friends! Your favorite designer and author of the blog design-foto.ru is here. Today we’re going to talk about a seemingly simple but very important topic – how to properly seal drywall seams. This stage is a real test of strength for your future walls, as it determines how smooth, even, and, most importantly, durable your finish will be. If you’ve ever seen thin, disheartening cracks spreading across freshly painted walls, running precisely along the joints of drywall sheets, you know how unpleasant it is. But don’t worry! In this article, I will reveal all the secrets on how to avoid this misfortune and achieve a truly seamless, perfect result. We’ll go through the entire process from choosing the right materials to the final sanding, so by the end of the article, you’ll be ready to tackle this task yourself with flying colors.
Why Seal Drywall Seams at All: The Main Reason to Avoid Cracks
So, why do we need to seal drywall seams so carefully? It might seem like the sheets are flat, a joint is a joint – so what? Here’s the thing: drywall, despite its apparent strength, is a fairly flexible material and sensitive to the slightest deformations. The frame it’s attached to is also not monolithic. Any temperature fluctuations, humidity changes, even slight house settling or vibrations from passing traffic – all of this causes the structure to move slightly. Imagine each drywall sheet as a separate plate living its own life. If there’s just a gap between these plates, or if it’s sealed with something inelastic, any attempt to move will cause the material holding these plates together to simply tear. This is where those annoying cracks running along the seams appear. The main reason for their occurrence is the lack of elasticity at the joint and the insufficient strength of the joint itself.
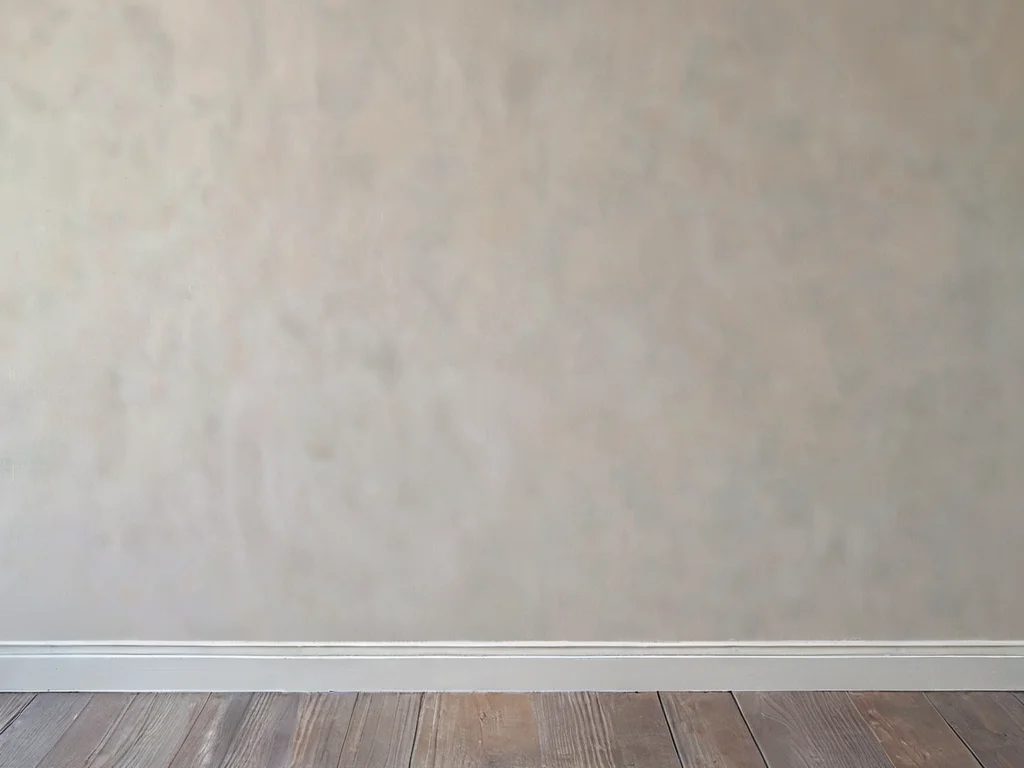
Furthermore, properly sealed seams are the foundation for a perfect finish. If you want smooth, even walls for painting or thin wallpaper, any imperfections and joints will be noticeable. Spackle not only fills the seam itself but also small indentations from screws, leveling the entire surface. It’s like building a house: the foundation must be strong and even to avoid problems with crooked walls later. Here, the seams are the foundation of your future wall’s smoothness. Therefore, this stage must be approached with maximum responsibility and attention to detail. Don’t skimp on materials and don’t rush – and the result will surely please you.
Perfect Preparation: What You’ll Need for a Seamless Result (Materials and Tools)
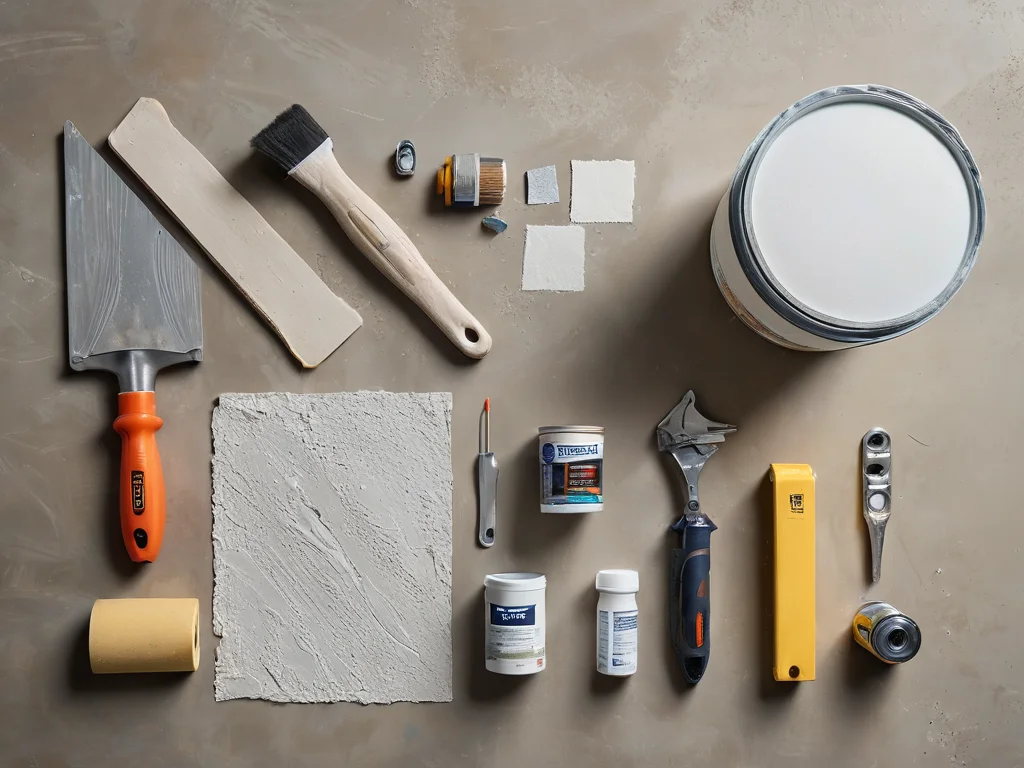
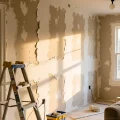
Before we get directly to sealing the seams, let’s make sure we have everything we need. The right set of tools and materials is already half the battle. Imagine you’re about to cook a complex dish: without the right ingredients and kitchen utensils, nothing will work out. It’s the same with drywall. Preparation is everything!
So, what will we need:
- Joint Spackle: We’ll discuss this in more detail in the next section, but I’ll say right away that it’s best to use special compounds for sealing drywall joints. They have the necessary plasticity and adhesion.
- Reinforcing Tape: This is the key element for preventing cracks. Its choice is also important, and we’ll thoroughly analyze all options.
- Putty Knives: You’ll need at least two putty knives. One wider (e.g., 10-15 cm) for applying the main layer of spackle and leveling, and one narrower (5-8 cm) for ease of working in corners and on joints, as well as for applying the first, thinner layer. It’s best if the putty knives are flexible but durable.
- Mixing Container: A plastic bucket or a special bowl where you’ll mix the spackle. The volume depends on the amount of work, but it’s better to have some extra.
- Spackle Mixer (drill attachment): If you’re mixing a large volume or working with dry mixes, you can’t do without a drill or screwdriver attachment. This will ensure a uniform consistency without lumps.
- Primer: It’s essential to prime the drywall surface before starting work. Primer improves adhesion (grip) of the spackle to the surface and reduces material consumption.
- Roller or Brush for Primer: To apply the primer evenly.
- Sandpaper or Sanding Screen: For final leveling and removing minor imperfections after the spackle has dried. It’s best to use medium grit (e.g., P120-P180) for the first pass and fine grit (P240-P320) for the final sanding.
- Respirator and Safety Glasses: A lot of dust is generated during sanding, so it’s important to take care of your safety.
- Clean Water: For preparing the spackle and washing tools.
- Knife or Scissors: For cutting the reinforcing tape.
Make sure the drywall sheets are securely fastened to the frame, with no sagging. The joint between the sheets should be even, without chips or damage. If there are any flaws, they must be corrected before spackling. Also, don’t forget to remove construction dust from the surface; this is important for good adhesion.
Spackle or Fugenfüller: Choosing the Best Compound for Sealing Drywall Joints
Now let’s move on to the heart of the process – spackling. There are many compounds on the market, but for sealing drywall joints, there are definite leaders. It’s important to understand that regular finishing spackle, which is perfect for leveling an entire wall, may not be suitable for reinforcing joints. Why? Because it’s typically less elastic and more brittle. With the slightest movement of the structure, it will simply crack.
Specialized joint spackles (often called fugenfüllers) are exactly what we need. What makes them different?
- Elasticity: These compounds contain special additives that give them flexibility. This allows them to “breathe” with the drywall, compensating for minor deformations and preventing cracks.
- Plasticity and Workability: They are easy to apply, fill joints well, and are easy to level.
- High Adhesion: They adhere excellently to the drywall surface and reinforcing tape.
- Minimal Shrinkage: They shrink very little when drying, meaning you won’t have to re-spackle the joints multiple times.
Popular Brands and Their Products:
- Knauf Fugen: Probably the most well-known and proven option. It’s a dry gypsum-based compound that needs to be mixed with water. It has excellent properties in terms of strength, plasticity, and minimal shrinkage. Ideal for drywall joints, especially when used with reinforcing tape.
- Knauf Uniflot: A more advanced version designed specifically for seamless joint sealing technology. It boasts even greater strength and less shrinkage. Often used for drywall joints with a factory edge, where maximum reliability is required.
- Gips Aqua: Another good option from a domestic manufacturer that has proven itself to be reliable.
- Shelten Fugen: A good alternative, often compared in quality to Knauf.
Dry or Ready-Mixed?
Mostly, fugenfüllers are sold as dry mixes. This is convenient because they have a long shelf life, and you can mix exactly what you need. The main thing is to strictly follow the water proportions indicated by the manufacturer and mix thoroughly. Ready-mixed spackles also exist, but they are generally more expensive and better suited for finishing large areas rather than for spot work on joints.
Important! If you have a humid room (bathroom, kitchen), choose special moisture-resistant spackles. For regular living rooms, standard gypsum-based compounds will suffice.
Joint Tape, Paper Tape, or Fleece Tape: Which Reinforcing Tape to Choose for Seams

Reinforcing tape is the secret ingredient that makes a seam truly strong and prevents cracks. Without it, even the best spackle may not do the job. There are several main types of tapes on the market, and each has its pros and cons. The choice depends on your preferences, the type of seam, and even your experience.
1. Self-Adhesive Fiberglass Mesh (Serpyanka):
- Pros:
- Convenience: Thanks to its self-adhesive backing, it’s easy and quick to apply to the seam. You don’t need to wait for the first layer of spackle to dry, as with paper tape.
- Simplicity: Ideal for beginners.
- Strength: Reinforces the seam well.
- Cons:
- Risk of tape “sagging”: If the seam is not perfectly even, or if you apply too thick a layer of spackle at once, the self-adhesive tape can slightly “sink” into the spackle, and this unevenness will be visible after sanding.
- Not suitable for humid rooms: Some types of fiberglass mesh can lose their properties in high humidity.
- Can cut the putty knife: When applying spackle over the mesh, the edges can be slightly cut, creating additional unevenness.
2. Paper Reinforcing Tape (e.g., Uniband):
- Pros:
- Perfect Smoothness: When applied and spackled correctly, it provides an absolutely smooth surface, without the risk of “sinking.”
- High Strength: The paper backing is very strong and reinforces the seam well, preventing it from stretching.
- Best choice for external corners: Especially effective for corners, where it helps create a perfectly straight line.
- Cons:
- More difficult to work with: Requires care and time. The tape needs to be applied to the first, still wet layer of spackle, and then a second layer is applied.
- Risk of delamination: If the surface is poorly primed or the tape is not applied well, it can delaminate.
3. Fleece Tape (Reinforcing Fleece):
- Pros:
- Strength and Elasticity: Combines the strength of paper tape with some elasticity.
- Good Adhesion: Adheres excellently to spackle.
- Good Spackle Permeability: The seam turns out smooth.
- Cons:
- Cost: Usually more expensive than fiberglass mesh and paper tape.
- Requires skill: Like paper tape, it requires care when working.
What to Choose?
For beginners: I would recommend starting with self-adhesive fiberglass mesh (serpyanka). It forgives some mistakes and significantly simplifies the process. Just be careful when applying the first layer of spackle so as not to push the tape out.
For a perfect result and experienced craftsmen: If you strive for absolute perfection and are willing to dedicate more time to the process, your choice is paper reinforcing tape. It gives the best results, especially on joints where perfect geometry is needed.
Universal option: Fleece tape is a good compromise between ease of use and quality. It’s suitable if you want a reliable seam without unnecessary complications.
Important: Before applying any tape, make sure the drywall surface is dry, clean, and primed. This will ensure reliable adhesion.
Step-by-Step Guide: How to Seal Drywall Seams Without Visible Joints (with Photo Examples)
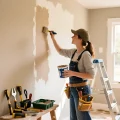
So, we’ve prepared everything we need, chosen the perfect materials. It’s time to get started. Don’t be intimidated if you’re doing this for the first time; by following these steps, you’ll get excellent results!
Step 1: Surface Preparation and Priming
- Ensure all drywall sheets are securely fastened.
- Remove dust and dirt from the surface, especially at the joints.
- Apply a coat of primer to the entire surface, paying special attention to the joints. Let the primer dry completely according to the manufacturer’s instructions (usually 1-2 hours). Primer not only strengthens the surface but also improves spackle adhesion.
Step 2: Preparing the Spackle Mixture
- Pour the required amount of dry spackle into a clean container.
- Add clean room-temperature water, strictly following the proportions indicated on the packaging. This is usually a ratio of water to dry mix.
- Thoroughly mix the mixture with a mixer at low speed until a uniform, creamy consistency without lumps is achieved. The spackle should not be too liquid (runny) or too thick (difficult to mix).
- Let the mixture stand for 5-10 minutes, then mix again. This is important for better plasticity.
Step 3: Reinforcing the Joints
Option A: With Self-Adhesive Fiberglass Mesh (Serpyanka)
- Apply a thin layer of spackle (literally 1-2 mm) along the joint of the drywall sheets using a narrow putty knife.
- Carefully apply the self-adhesive serpyanka to the wet spackle layer, pressing it firmly against the surface. Make sure the mesh completely covers the joint and runs straight down the center.
- Immediately, while the first layer of spackle is still wet, run a putty knife over the tape, pressing it into the spackle and leveling the surface. Try not to push the spackle out from under the tape, but also don’t leave excess on it.
- Let this layer dry slightly (usually 30-60 minutes).
- Apply a second, wider layer of spackle over the tape, leveling the joint with the sheet surface. The width of this layer should be about 5-10 cm on each side of the joint.
Option B: With Paper Reinforcing Tape
- Apply a thin, even layer of spackle along the joint (1-2 mm).
- Carefully apply the paper tape to the wet spackle layer, smoothing it with a putty knife from the center to the edges to remove excess spackle and air bubbles. Make sure the tape lies straight in the center of the joint.
- Immediately apply a second, wider layer of spackle (5-10 cm on each side) over the tape, pressing it into the material and leveling the surface. This layer should completely cover the tape.
- Remove excess spackle from the edges to make the seam as smooth as possible.
Step 4: Filling Screw Indentations
- Fill the screw indentations with spackle using a narrow putty knife.
- Let the spackle dry slightly, then apply a second, leveling layer.
- After drying, lightly sand these areas if necessary.
Step 5: Drying and Sanding
- Allow the first layer of spackle to dry completely. Drying time depends on the thickness of the layer, temperature, and humidity in the room (usually from a few hours to a day).
- After drying, if there are any imperfections or bumps, they can be gently smoothed with sandpaper or sanding screen.
- If necessary, apply a second, finishing layer of spackle, making it wider than the first (15-20 cm on each side of the seam) for better leveling.
- After the second layer has completely dried, perform the final sanding. Use fine-grit sandpaper (P240-P320). Sand carefully, using circular motions, trying not to “wear through” the reinforcing tape.
- After sanding, be sure to remove dust with a damp cloth.
Tip: Apply spackle in thin layers. It’s better to apply 3 thin layers than one thick one. This will reduce the risk of shrinkage and cracks.
Master Secrets: How to Apply Spackle to Drywall Corners and External Joints
Corners are the most vulnerable areas in drywall constructions. This is where cracks most often appear if a little extra effort isn’t applied and some tricks aren’t used. Let’s look at how to handle internal and external corners.
Internal Corners:
- Preparation: Ensure the corner is straight. If there are gaps, they can be pre-filled with spackle.
- Reinforcement: Paper reinforcing tape is best used here. Cut a piece of the required length, fold it in half along its entire length to create a corner.
- Applying Spackle: Apply a thin layer of spackle to one side of the corner. Carefully press one half of the paper tape into it, then smooth it with a putty knife from the fold to the edges, removing excess spackle and air bubbles.
- Second Side: Repeat the same for the other side of the corner. Make sure the tape adheres tightly and doesn’t lift.
- Leveling: After the spackle has set slightly, apply a second, thinner layer, slightly widening the coverage area onto the adjacent walls. Use a narrow putty knife to create a straight corner line.
- Finishing: After complete drying, if necessary, perform light sanding.
External Corners:
External corners require special attention as they are often subjected to mechanical impact. Special metal or plastic perforated corner profiles, also called corner beads or corner trowels, are ideal for them.
- Applying the Corner Bead: The corner bead is fixed to the outer edge of the corner. It can be temporarily secured with a construction stapler or a small amount of spackle.
- Applying Spackle: Apply spackle along the entire corner bead. Then, using a wide putty knife, carefully press it against the surface, embedding the corner bead into the spackle and simultaneously leveling the spackle on both sides of the bead. The main goal is for the corner bead to be completely hidden under a layer of spackle.
- Leveling: Try to make the surface as smooth as possible. If the spackle is uneven, let it dry slightly, then apply a second, thinner layer to smooth out all transitions.
- Finishing: After complete drying, if there are any imperfections, gently sand them with fine-grit sandpaper.
Important: Use special corner trowels. They have a beveled shape and allow for more effective leveling of spackle on corners, creating perfect geometry. For external corners, if you are not using a metal profile, paper tape folded in half can also be a good solution, but it requires more skill when applying spackle.
Common Mistakes When Sealing Drywall Joints and How to Avoid Them (Case Studies)
Even with the most careful approach, unfortunate mistakes can sometimes happen that can ruin the entire job. Let’s look at the most common ones and learn how to avoid them so your finish is flawless.
Case 1: Cracks Appeared Again!
- Cause: Regular finishing spackle was used without reinforcing tape; reinforcing tape was not used or was of poor quality; tape not intended for humid rooms was used in the bathroom; reinforcing tape was not used on external corner joints.
- Solution: Always use specialized joint spackles (fugenfüllers) and reinforcing tape (fiberglass mesh, paper, or fleece). For external corners without using metal profiles, also use reinforcing tape.
Case 2: Bumps and Unevenness Visible on the Surface, Tape “Sticking Out”
- Cause: Too thick a layer of spackle was applied directly over the tape; the tape was not pressed well into the first layer of spackle; self-adhesive fiberglass mesh was used, which “sagged” into the spackle.
- Solution: Apply spackle in thin layers. Press the tape as carefully as possible, but firmly. If using fiberglass mesh, the first layer of spackle should be thin so it can be easily leveled over the tape. For an absolutely smooth surface, especially if you’re a beginner, it’s better to use paper tape.
Case 3: Spackle Cracked During Drying
- Cause: Too thick a layer of spackle was applied at once; spackle with high shrinkage was used; mixing technology was violated (too much water); poor adhesion to the substrate.
- Solution: Apply spackle in thin layers (no more than 2-3 mm at a time). Use high-quality spackles with minimal shrinkage. Strictly follow water proportions when mixing. Always prime the surface before applying spackle.
Case 4: Tape Came Off
- Cause: The drywall surface was poorly prepared (dusty, greasy); primer was not applied; spackle was applied to an already partially dried layer, to which the tape did not adhere.
- Solution: Thoroughly clean and prime the surface before starting work. When using paper tape, it should be applied to a still wet, but already set, layer of spackle.
Case 5: Sanding “Eats” Through Spackle, Revealing the Tape
- Cause: Overly aggressive sanding; too thin a layer of spackle over the tape; using too coarse sandpaper.
- Solution: Sand carefully, without excessive pressure. Use sanding screen or fine-grit sandpaper (P240-P320). If the tape is still visible after the first pass, apply another thin layer of spackle and let it dry before sanding again.
General Advice: Don’t rush! Let each layer of spackle dry thoroughly. Carefully read the manufacturer’s instructions on the product packaging. It’s better to spend a little more time and do it right than to redo it later.
The Final Touch: How to Achieve Perfect Smoothness Before Painting or Wallpapering
We’ve reached the home stretch! After all the seams have been sealed, leveled, and completely dried, it’s time for the final sanding. This is the moment when all our efforts turn into a perfectly smooth surface, ready for any type of finish.
Preparing for Sanding:
- Tools: You’ll need sanding screen (with P120-P180 grit for leveling if there were significant imperfections) or fine-grit sandpaper (P240-P320 for final sanding). Using sanding screen on a comfortable holder or a special sanding machine (if the area is large) significantly simplifies the process and makes it more uniform.
- Protection: Be sure to wear a respirator and safety glasses! Sanding drywall and spackle is a process accompanied by a lot of dust.
Sanding Process:
- First Pass (if necessary): If there are obvious bumps, ridges, or unevenness after the spackle has dried, start with coarser sandpaper or sanding screen. Move smoothly, with light circular motions, trying to remove only excess material. Don’t press too hard, so as not to “wear through” the seam to the tape.
- Final Sanding: After leveling the main imperfections, switch to fine-grit sandpaper (P240-P320). This stage will give the surface perfect smoothness. Move with the same smooth, circular motions. The goal is to make the seam indistinguishable from the rest of the sheet surface by touch and sight.
- Checking: Periodically stop and run your hand over the spackled area. You should feel a smooth, even surface without any transitions. You can also use a lamp directed at an acute angle to the wall – it will immediately reveal all imperfections.
Cleaning the Surface:
After sanding is complete, a large amount of dust will remain on the wall. This is a critically important step that cannot be skipped.
- Dry Cleaning: First, go over the entire surface with a dry cloth or a shop vacuum to collect the main dust.
- Wet Cleaning: Then, take a clean damp cloth (well wrung out so as not to leave streaks) and wipe the entire wall surface. This will remove the finest dust that remained after dry cleaning.
Priming Before Final Finishing:
After the wall has completely dried from wet cleaning, it needs to be primed again. This final coat of primer:
- Will equalize the absorbency of the surface (in areas where spackle was applied and on the drywall itself).
- Will improve the adhesion of paint or wallpaper glue.
- Will prevent stains on the paint or seams showing through wallpaper.
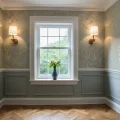
Let the primer dry completely. Now your wall is ready for painting, wallpapering, or any other finishing. You’ve done an excellent job, and the result will please you for years to come!
Рекомендуем:
 How to Properly Plaster Walls for Painting: Perfect Smoothness
 How to Repair Cracks and Holes in Walls Before Finishing: A Complete Guide
 Wall Putty for Wallpaper: How Many Coats Are Needed and How to Apply?
 Starting and Finishing Putty: What’s the Difference and How to Use It
 Wallpapering Corners: Master Secrets
 Aligning Walls with Drywall Adhesive: When This Method is Your Salvation?
 Sanding Walls After Puttying: A Perfect Surface with Your Own Hands
 How to Update Old Tiles Without Removing Them: 99 Ways to Transform Your Bathroom and Kitchen
 DIY Decorative Stone Wall Installation: Your Guide to Home Transformation
 DIY Venetian Plaster: Is It Possible?
 How to Hang Vinyl Wallpaper on a Paper Backing?
 How to Hang Wallpaper Without Seams: The Technique for Perfect Joints
 Betonokontakt: A Comprehensive Guide to Application for Perfect Renovation
 Comment boucher les joints de plaques de plâtre pour éviter les fissures
 Wall Cladding with Wood Paneling: A Step-by-Step Guide
 New wallpaper over old: is it possible and when should you try it?
 What to do if wallpaper is peeling at the seams?
 Gypsum or Cement Plaster: What and Where to Use?
 Priming Walls Before Wallpapering and Painting: The Ideal Foundation for Renovation
 Joint filler for tiles: how to choose the color and apply it correctly