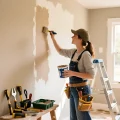
Anyone who has ever thought about transforming their home has faced the need to prepare walls for finishing. And it would seem, what could be simpler than removing small imperfections? However, it is precisely the hidden defects, such as cracks and holes, that can spoil the entire impression of a fresh renovation. Why is this so important, and how can this task be accomplished without hiring expensive specialists? In this article, we will thoroughly analyze all the nuances: from choosing the right materials to the subtleties of performing the work. You will learn how to restore the ideal smoothness to your walls yourself, ready for any type of decoration.
Why are cracks and holes in the wall a serious problem before renovation?
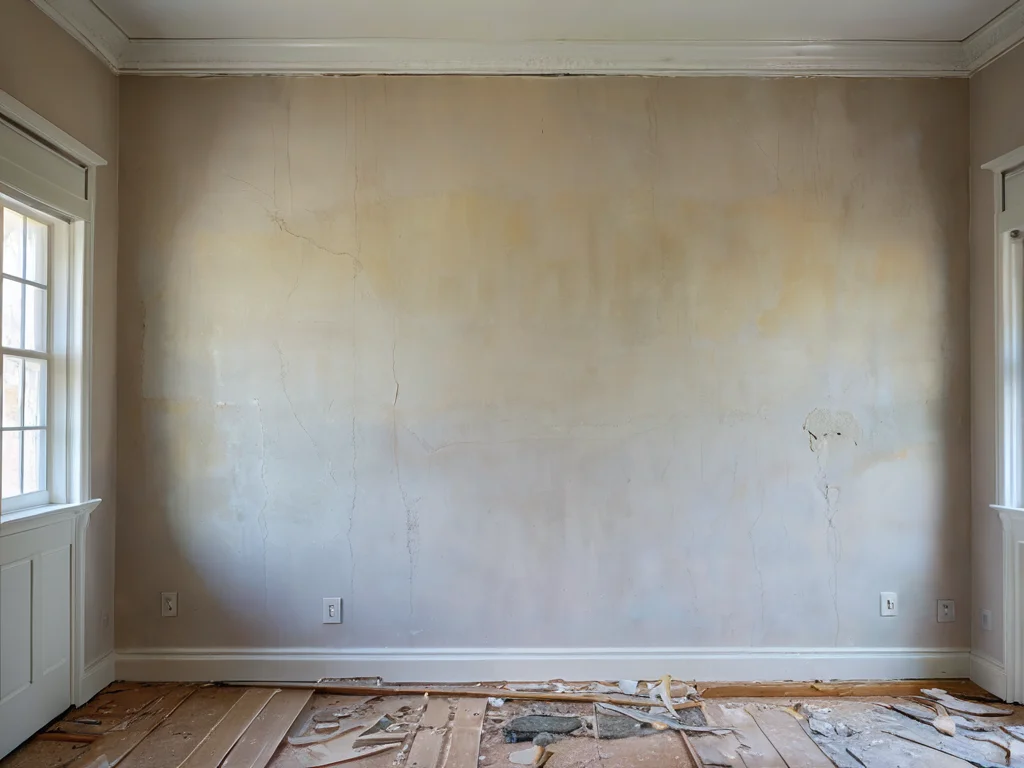
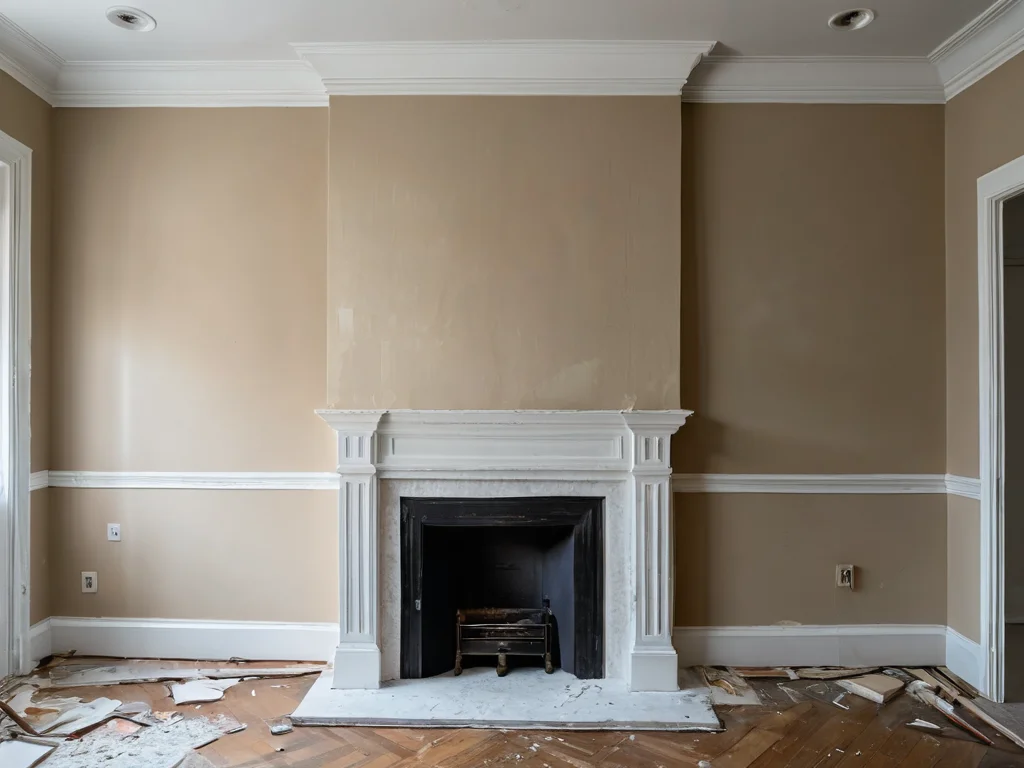
Imagine: you’ve finally completed the long-awaited renovation, hung beautiful wallpaper, or applied stylish paint. For the first few days, you enjoy the result, but soon you notice that unsightly lines – cracks – are starting to show through the finishing coat. Or perhaps you decided to hang a new picture, and an old nail hole became clearly visible on the perfectly smooth surface. Sounds painfully familiar, doesn’t it?
The problem is that cracks and holes are not just an aesthetic flaw. They are indicators of deeper processes occurring with your wall. If ignored, the finishing coat, no matter how expensive and high-quality, will quickly lose its pristine appearance. Wallpaper may start to peel, paint may crack and bubble, and plaster may crumble. This is especially relevant for new buildings, where the house is still settling, and old buildings, where walls are subject to natural deformations.
In addition, defects can become “cold bridges” through which drafts enter the room, or places where dust and dirt accumulate, which are difficult to clean. Therefore, before proceeding with painting, wallpapering, or applying decorative plaster, it is necessary to thoroughly prepare the surface, eliminating all existing defects. This is the key to the durability and impeccable appearance of your interior. Remember: quality preparation is 80% of success in any renovation.
What types of defects are there on walls: from minor scratches to deep cracks?
Before starting the repair, it is important to understand what exactly we are dealing with. Wall defects can be very diverse, and each requires its own approach to elimination.
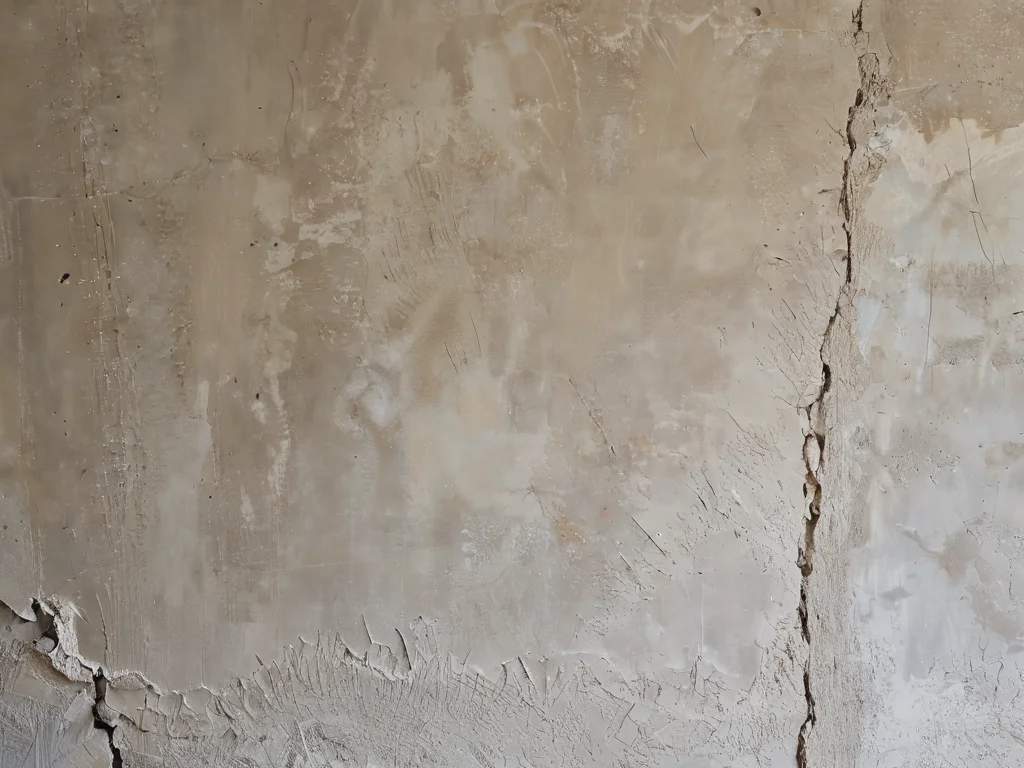
- Minor scratches and chips: These are usually superficial damage that does not penetrate deep into the wall material. They can appear from careless handling of tools, moving furniture, or pets. Such defects are easily eliminated with finishing putty.
- Small cracks (hairline cracks): Often arise due to uneven house settlement, temperature or humidity fluctuations. These cracks can be superficial or penetrate deeper. Their elimination requires a more thorough approach, including reinforcement.
- Deep cracks: These run through the entire thickness of the finishing layer, and sometimes through the wall material itself (e.g., concrete or brick). The causes can be structural – foundation shifts, deformation of load-bearing structures. Such cracks require special attention and sometimes even consultation with a specialist.
- Holes and openings: Can be caused by various reasons – from old mounts for shelves and pictures to openings for sockets or pipes. The size and depth of the hole determine the method of filling it.
- Unevenness and bumps: Occur due to errors in applying previous layers of plaster or putty. They also need to be leveled before finishing.
- Old paint or putty build-up: Can interfere with the even adhesion of wallpaper or create unevenness when painting. They should be carefully removed.
Understanding the type of defect will help you correctly select the necessary materials and tools, as well as choose the most effective repair technology. Do not underestimate even the smallest, at first glance, damages. As they say, “the devil is in the details,” and this rule applies particularly strictly in renovation.
What to use to fill cracks in the wall: choosing the right putty (gypsum, cement, acrylic)
The construction materials market offers a wide selection of putty compounds, each with its own characteristics and intended for specific tasks. To choose the most suitable option for filling cracks and holes, let’s look at their main types:
Gypsum putty
Composition: Based on gypsum, with the addition of polymer fillers and plasticizers. Often sold as a dry mix that needs to be diluted with water before use.
Advantages:
- Excellent plasticity: Easy to apply, fills imperfections well.
- Fine-grained structure: Allows for a perfectly smooth surface, which is especially important before painting or applying thin wallpaper.
- Fast drying: Reduces renovation time.
- Environmental friendliness: Gypsum is a natural material that does not release harmful substances.
- Good vapor permeability: Allows walls to “breathe”.
Disadvantages:
- Moisture sensitivity: Not suitable for use in high-humidity areas (bathrooms, kitchens) as it can degrade when exposed to water.
- Low strength: Less resistant to mechanical damage compared to cement mixtures.
When to use: Ideal for filling small cracks, chips, joints between drywall sheets, and for final leveling of walls in dry rooms (bedroom, living room, hallway).
Cement putty
Composition: Based on cement, with the addition of sand and various modifiers.
Advantages:
- High strength and durability: Resistant to mechanical stress and abrasion.
- Moisture resistance: Excellent for use in areas with high humidity.
- Frost resistance: Can be used for exterior work.
Disadvantages:
- Coarse grain: Often has a coarser texture, making it difficult to achieve a perfectly smooth surface.
- Tendency to shrink: Can shrink when drying, leading to new small cracks, especially when applied thickly.
- Brittleness: Can crack under strong vibrations or base deformations.
When to use: Recommended for filling deep cracks, leveling significant unevenness, working with concrete and brick bases, and for use in bathrooms, kitchens, and balconies.
Acrylic (polymer) putty
Composition: Based on acrylic polymers. Can be in the form of a ready-made paste or a dry mix.
Advantages:
- Plasticity and elasticity: Fills cracks well, resistant to minor deformations and vibrations.
- Adhesion: Excellent adhesion to various types of surfaces.
- Moisture resistance: Resistant to moisture, but not completely waterproof.
- Fine fraction: Allows for a very smooth surface.
- Durability: Retains its properties for a long time.
Disadvantages:
- High cost: Usually more expensive than gypsum and cement analogues.
- Low vapor permeability: Can impede natural air exchange in the wall.
- Drying time: Ready-made pastes dry slower than dry mixes.
When to use: An excellent choice for filling small and medium cracks, chips, joints, and for final leveling of walls before painting, especially if the walls are subject to minor deformations. Suitable for most rooms, including kitchens and bathrooms (provided good ventilation).
Important advice: For filling cracks in brick or block masonry, as well as in concrete walls, it is best to use cement or universal putties. For drywall and plastered surfaces in dry rooms, gypsum or acrylic compounds are well suited.
Master class: step-by-step instructions for filling cracks and holes in the wall
So, we have decided on the materials. Now let’s move on to the process itself. By following these step-by-step instructions, you can professionally fill any cracks and holes.
Step 1: Surface preparation
This is the most important stage, on which the quality and durability of the result directly depend. You cannot apply putty to a dusty, dirty, or unstable surface.
- Cleaning: Thoroughly clean the area around the crack or hole of dust, dirt, peeling paint or wallpaper. Use a brush, spatula, or vacuum cleaner.
- Grooving (for cracks): If the crack is thin, like a “hair,” it needs to be slightly widened. Using a sharp spatula or a special knife, go along the crack, making a small V-shaped groove about 5-10 mm deep and wide. This will allow the putty to penetrate better and ensure a more reliable bond.
- Removing unstable areas (for holes): Remove all crumbling particles of concrete or plaster around the hole. If the edges of the hole are unstable, carefully reinforce them.
- Dust removal: After all mechanical work, thoroughly remove dust with a brush or vacuum cleaner.
Step 2: Priming
Primer penetrates the pores of the material, strengthens it, improves adhesion of the putty to the surface, and reduces the absorbency of the base. This will prevent the putty mixture from drying out too quickly, which is important for even setting.
- Primer selection: For most surfaces, a universal deep-penetrating acrylic primer is suitable. For concrete bases, special concrete contact can be used.
- Application: Apply the primer to the cleaned area with a brush or roller. Ensure that the compound evenly covers the entire surface, especially inside the grooved crack or hole.
- Drying time: Allow the primer to dry completely according to the manufacturer’s instructions (usually from 30 minutes to several hours).
Step 3: Reinforcement (for cracks)
For reliable crack repair, especially if they tend to reappear, it is recommended to use reinforcing material.
- Self-adhesive mesh tape (serpyanka): This is a self-adhesive fiberglass mesh tape. It is applied along the crack over the primer.
- Paper tape (fleece): Also used for reinforcing joints and cracks. It is applied to a layer of putty and then pressed with a spatula.
- Application: Apply the self-adhesive mesh tape or paper tape to the primed crack so that it completely covers it. If using paper tape, first apply a thin layer of putty, lay the tape, and then immediately apply another thin layer of putty over it, pressing it into the tape.
For deep holes: Sometimes, for large holes, a patch of drywall, fiberglass, or special mounting mesh may be required, which is attached to the wall and then covered with putty.
Step 4: Applying putty
Now we proceed to the direct filling of the defect.
- Mixing the compound: If you are using a dry mix, prepare the solution according to the instructions on the packaging. It is important to achieve a homogeneous consistency without lumps.
- Applying the first layer: Use a narrow spatula to fill the crack or hole with the putty mixture. Try to press the compound into the defect as much as possible to avoid leaving voids. When using self-adhesive mesh tape, apply putty over the tape, thoroughly filling the mesh cells.
- Leveling: Remove excess putty with a wide spatula, aiming for the smoothest possible surface.
- Drying: Allow the first layer of putty to dry completely. Drying time depends on the type of putty, layer thickness, and room conditions.
Step 5: Applying subsequent layers
Several layers of putty may be required to achieve perfect smoothness.
- Applying the second layer: After the first layer has dried, if necessary, apply a second, wider layer of putty, covering the area around the repaired section. This will help to smooth the transition and create a level plane.
- Sanding: After the last layer has completely dried, proceed to sanding. Use fine-grit sandpaper (grit P120-P180) or sanding mesh attached to a block or special float.
- Dust removal: Thoroughly clean the treated area of dust with a brush or vacuum cleaner.
- Final priming: Before applying the finishing coat (paint, wallpaper), it is recommended to prime the repaired area again. This will ensure uniform color and better adhesion of the finishing material.
Important: Each layer of putty should be thinner than the previous one. Start with a thicker mixture to fill the defect and finish with a final, more plastic layer for leveling.
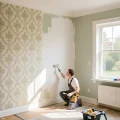
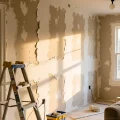
How to prepare a wall for defect repair: cleaning, priming, and reinforcement
We have already touched upon this topic in the step-by-step instructions, but it is worth emphasizing the importance of proper preparation again. This is the foundation on which all your further renovation will rest. Negligence at this stage can nullify all your efforts.
1. Thorough cleaning – the basis of everything
Before doing anything, you need to understand what you are working with. Remove all excess:
- Old coatings: Wallpaper, paint, old plaster – anything that is peeling or not holding securely must be removed. Use a spatula, scraper, and for wallpaper – water with vinegar or a special solution.
- Dust and dirt: Dust is the main enemy of adhesion. It prevents putty and primer from penetrating the material’s structure and bonding reliably. Use a brush, then a vacuum cleaner. To remove grease stains, a soapy solution may be needed, but after that, the wall must be rinsed with clean water and allowed to dry completely.
- Protrusions and build-ups: Dried drops of plaster, paint build-up, remnants of mounting foam – all this must be carefully cut or scraped off with a spatula.
2. Grooving cracks – the key to strength
As mentioned earlier, thin cracks need to be slightly “opened” so that the putty can penetrate deep and create a strong “lock”.
- Tools: A sharp spatula, utility knife, chisel, or even a small hammer with a chisel (for deeper cracks) are perfect for this purpose.
- Technology: Run the tool along the crack, forming a V-shaped groove or a small channel. The depth and width depend on the size of the crack, but usually 5-10 mm is sufficient. Remove all debris and dust from the resulting recess.
Important nuance: If a crack runs through the joint of two materials (e.g., wall and reveal), it must be reinforced. The reason is that different materials have different coefficients of thermal expansion, and at the joint, they will move independently of each other, which will lead to the crack reappearing.
3. Priming – strengthening and preparation
This step cannot be skipped. Primer performs several important functions at once:
- Strengthening: By penetrating the porous structure, the primer binds fine dust particles and strengthens the surface, making it more durable.
- Reducing absorbency: A primed wall absorbs moisture more evenly. This prevents the first layer of putty from drying out too quickly, which can lead to cracking.
- Improving adhesion: Primer creates a special film that ensures a reliable bond between the putty and the base.
- Types of primers: For most jobs, a universal deep-penetrating primer is suitable. If the wall is very dusty or crumbling, use special reinforcing compounds.
- Application technique: Apply the primer in an even layer with a brush or roller. Make sure the compound penetrates all recesses and cracks.
- Drying time: Allow the primer to dry completely. Do not rush to the next stage until the surface is dry to the touch.
4. Reinforcement – protection against recurring cracks
Reinforcement is the process of creating a reinforcing frame that will prevent further spread of cracks.
- Self-adhesive mesh tape (serpyanka): The most popular and convenient option. Apply the tape to the primed but not yet puttied surface exactly in the center of the crack. Press the tape firmly to ensure it adheres well.
- Paper tape: Used less often, but also effective. It is applied to the first layer of putty, carefully pressed with a spatula, and then immediately covered with a second thin layer.
- Fiberglass fabric: A stronger material that is also used for reinforcement. It is glued to the wall using special adhesive or putty.
- Why is it needed: The reinforcing layer evenly distributes stress across the surface, preventing the crack from “opening up” again under the influence of deformations or temperature changes.
Remember that proper preparation is the key to your future peace of mind. Do not save time on these stages, and the result will surely please you.
Secrets of ideal leveling: how to achieve a smooth surface after puttying
Filling a crack or hole is only half the battle. The main task is to ensure that after the repair, there are no traces of intervention left on the wall, and the surface is perfectly smooth and even. The secret lies in the correct technique of applying and leveling the putty.
- Correct tool: Use two spatulas: one narrow (5-10 cm) for applying putty into the defect and one wide (20-40 cm) for leveling. The wide spatula should be sufficiently rigid, with a straight, undamaged blade.
- Applying the first layer: Use a narrow spatula to fill the crack or hole with the putty mixture. Try to apply the compound so that it slightly protrudes above the wall level – this will allow us to level the surface later.
- Working with a wide spatula: Take the wide spatula and hold it at a slight angle to the wall (approximately 30-45 degrees). Gently move the spatula across the surface, as if “sweeping away” excess putty and simultaneously leveling the applied layer.
- Direction of movement: Move smoothly, without sudden jerks. Try to move the spatula from the center towards the edges of the filled area, covering a small part of the healthy surface.
- Correct pressure: The pressure should be even. Too much pressure can “pull out” the putty from the crack, while too little will leave unevenness.
- “Overlap”: Apply putty with a wide spatula with a slight overlap to avoid visible seams and boundaries between the fresh and old layers.
- Removing excess: After each pass, clean the wide spatula of excess putty onto a separate scoop or the edge of the bucket.
- Multiple layers are the key to success: To achieve perfect smoothness, 2-3 thin layers of putty are often required, not one thick one. Each subsequent layer is applied after the previous one has completely dried.
- Sanding – the finishing touch: After the last layer has completely dried, the surface needs to be sanded. Use fine-grit sandpaper (P120-P180) or sanding mesh. Sand in circular motions, applying light pressure.
- Checking for evenness: During sanding, run your hand over the surface. You should feel perfect smoothness. You can also use a long rule or level to check the wall’s evenness.
- Cleanliness after sanding: After sanding, be sure to remove all dust with a damp sponge or cloth, and then let the wall dry.
- Final priming: The final step is to apply a thin layer of primer. This will even out the surface’s absorbency and prepare it for finishing.
Remember that practice is the best teacher. The more you practice, the faster you will learn to achieve perfectly smooth walls. Don’t be afraid to experiment and find your own working style.
Common mistakes when filling cracks and how to avoid them: professional tips
Even when following instructions, beginners often make mistakes that can spoil the result. Let’s look at the most common ones and learn how to avoid them.
- Mistake #1: Ignoring surface preparation.
Problem: Applying putty to a dusty, greasy, or peeling base. As a result, the putty does not hold well, cracks, or peels off along with the finishing coat.
Solution: Always thoroughly clean, degrease (if necessary), and prime the surface before starting work. For cracks – always groove and reinforce. - Mistake #2: Using low-quality or unsuitable putty.
Problem: Using cement putty for final leveling, which leads to small scratches, or gypsum putty in the bathroom, which can lead to its degradation.
Solution: Choose putty according to the type of surface, operating conditions, and the nature of the defect. For fine leveling and smoothness – gypsum or acrylic. For wet rooms and large unevenness – cement. - Mistake #3: Applying too thick a layer of putty at once.
Problem: A thick layer of putty (more than 10-15 mm) dries unevenly, which can lead to shrinkage cracks.
Solution: If the defect is deep, fill it in several thin layers (3-5 mm each), allowing each layer to dry well. - Mistake #4: Insufficient reinforcement.
Problem: Refusal to use self-adhesive mesh tape or other reinforcing tape when filling cracks, especially in new buildings or at material joints. Cracks reappear.
Solution: Always reinforce cracks, especially if they are long or through-and-through. Self-adhesive mesh tape is your best friend in the fight against recurring cracks. - Mistake #5: Incorrect application and leveling.
Problem: Leftover grooves from the spatula, unevenness, “ridges” after application.
Solution: Use two spatulas – a narrow one for application and a wide one for leveling. Apply putty with smooth, overlapping strokes, holding the wide spatula at an angle. - Mistake #6: Skipping sanding or performing it poorly.
Problem: Leftover unevenness, bumps, spatula marks. The finishing coat will not lie well.
Solution: After the putty has completely dried, be sure to sand the surface with fine-grit sandpaper or mesh. Run your hand over it – the surface should be perfectly smooth. - Mistake #7: Neglecting final priming.
Problem: Uneven color of the finishing coat (especially paint) due to different absorbency of the repaired area and the rest of the wall.
Solution: Before painting or wallpapering, always prime the puttied areas. This guarantees a uniform result. - Mistake #8: Working too quickly.
Problem: Rushing at any stage – from preparation to drying of layers.
Solution: Renovation requires patience. Allow each layer of putty and primer to dry according to the instructions. Do not try to speed up the process with heaters, as this can lead to uneven drying and cracking.
By following these tips, you can avoid the most common mistakes and achieve a professional result, even if you have never done such work before.
Life hacks: how to quickly and effectively fix minor wall defects
Sometimes it happens that you need to quickly bring a wall into order, but there is no time for a full renovation. Or the defects are minor, and there is no point in starting large-scale work. In such cases, small tricks and life hacks come to the rescue.
- Minor scratches and chips: If the scratch is very fine, it can simply be painted over with the same paint as the wall. If the chip is small but deep, you can use ready-made finishing putty in a tube (often acrylic). It is plastic, easy to apply, and dries quickly. Simply apply it with a small spatula or even your finger (with a glove), level it, and let it dry.
- “Hairline cracks” on wallpaper: If thin cracks have appeared on old wallpaper, and you are not planning to re-paste them in the near future, you can try this: carefully apply wallpaper paste to the crack with a thin brush, press it down, and let it dry. This method is temporary but can hide the defect for some time.
- Spray putty: There are special aerosol putties that are very convenient for quickly fixing minor defects, scratches, and small dents. Simply spray the compound onto the damaged area, let it dry, and lightly sand if necessary.
- Using toothpaste (as a last resort!): Yes, strangely enough, for the smallest scratches and nail holes in painted walls, ordinary white toothpaste (not gel!) is sometimes used. It is quite plastic and can be painted over after drying. However, this is a very temporary solution that is only suitable for the most insignificant defects and does not tolerate moisture.
- Ready-made repair pencils: Special repair pencils or markers containing putty or paint are sold in hardware stores. They are convenient for masking minor scratches and chips, especially if you need to match the color to your wall.
- Eraser spatula: For very small and superficial scratches, a regular eraser can sometimes help. It can “erase” a thin layer of dirt or damaged paint, making the defect less noticeable.
- Flexible spatulas: When working with acrylic putty or sealant, which are used to fill cracks, try using flexible plastic spatulas. They adhere better to the surface and allow for more precise material distribution without damaging the surrounding coating.
- Applying putty with an overlap: When filling a crack, try to extend slightly beyond its edges, applying putty to the “healthy” wall. Then, after drying, use a wide spatula to remove excess and create a smooth transition. This will reduce the need for further sanding.
- Using a damp sponge after sanding: After sanding, before priming, wipe the repaired area with a slightly damp sponge. This will remove the finest dust that may have remained in the pores and ensure better adhesion of the primer.
Remember that these life hacks are more for quick and minor fixes. For major renovations and guaranteed durability, it is best to adhere to the classic technology with thorough preparation, correct material selection, and careful execution of all work stages.
Рекомендуем:
 Starting and Finishing Putty: What’s the Difference and How to Use It
 Priming Walls Before Wallpapering and Painting: The Ideal Foundation for Renovation
 Betonokontakt: A Comprehensive Guide to Application for Perfect Renovation
 DIY Decorative Stone Wall Installation: Your Guide to Home Transformation
 How to Update Old Tiles Without Removing Them: 99 Ways to Transform Your Bathroom and Kitchen
 Sanding Walls After Puttying: A Perfect Surface with Your Own Hands
 Bark Beetle Decorative Plaster: Application Technology
 DIY Venetian Plaster: Is It Possible?
 Liquid Wallpaper: Pros, Cons, and Application Technology
 Wall Cladding with Wood Paneling: A Step-by-Step Guide
 How to Hang Vinyl Wallpaper on a Paper Backing?
 What to do if wallpaper is peeling at the seams?
 New wallpaper over old: is it possible and when should you try it?
 Grout for tiles: how to choose the color and apply it correctly
Joint filler for tiles: how to choose the color and apply it correctly
Grout for tiles: how to choose the color and apply it correctly
Joint filler for tiles: how to choose the color and apply it correctly
 How to Hang Wallpaper Without Seams: The Technique for Perfect Joints
 How to Tile Walls in a Bathroom: A Detailed Guide
 Washable wallpaper for the kitchen: why it’s the best idea for your renovation?
 PVC Wall Panels: Cheap and Cheerful. Installation Guide
 What to do if mold or mildew appears on the walls?