Greetings, dear connoisseurs of stylish and cozy spaces! Today we will talk about how to give your home a unique charm and character with such an effective element as a brick wall. But don’t rush to break or dismantle existing coverings. In the age of modern technology, it is possible to imitate real brickwork with amazing accuracy and minimal effort. Our article is your comprehensive guide to the world of decorative brick, which will help you transform any room, be it a living room, bedroom, or kitchen. We will consider all the pros and cons of various materials, analyze step-by-step instructions, and share secrets on how to make your new “brick” wall indistinguishable from the original.
Why Imitate Brickwork: 5 Reasons to Add an Accent to Your Interior
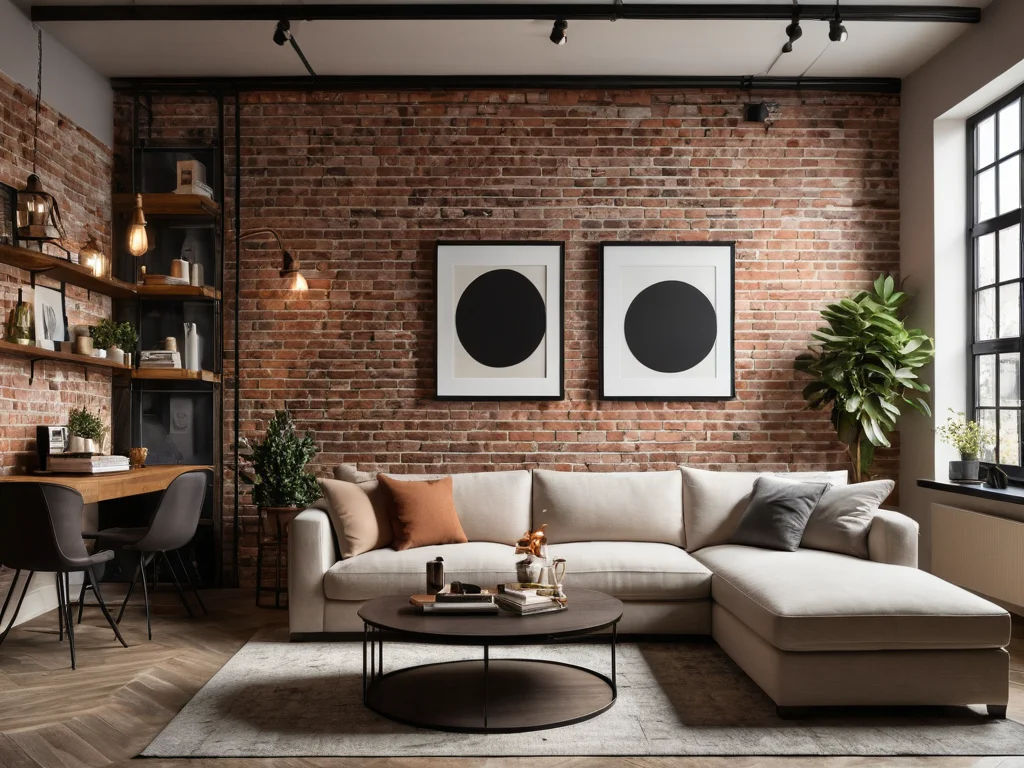
Brickwork is not just a building material, but a whole story embodied in texture and color. It carries the spirit of the industrial era, loft style, but at the same time adapts perfectly to a wide variety of interior solutions, from Scandinavian minimalism to cozy Provence. Why is brick imitation so popular today, and what advantages does it offer?
- Creating a unique atmosphere. Brick brings a sense of warmth, coziness, and a certain brutality to the interior simultaneously. It can become a background for family photos, book collections, or art objects, emphasizing your individuality.
- Zoning space. With the help of a brick wall, you can visually highlight certain areas in the room, for example, the dining area in the kitchen, the fireplace area in the living room, or the headboard in the bedroom.
- Accent and focus. A brick wall instantly attracts attention, becoming the main accent in the room. It’s a great way to add a twist to the interior without overloading it with details.
- Visual correction. A correctly placed brick wall can help correct the proportions of the room, for example, visually widen a narrow room or “raise” the ceiling.
- Style and practicality. Modern materials for brick imitation are not only beautiful but also quite practical: they are easy to clean, resistant to abrasion, and can last for many years, retaining their original appearance.
DIY Brick Wall: Analyzing the 5 Most Popular Imitation Methods (Wallpaper, Tiles, Decorative Plaster, Panels, Paints)
Today, there are many ways to create the effect of a brick wall without resorting to real masonry. Let’s analyze the most popular and accessible of them, weighing the pros and cons of each method.
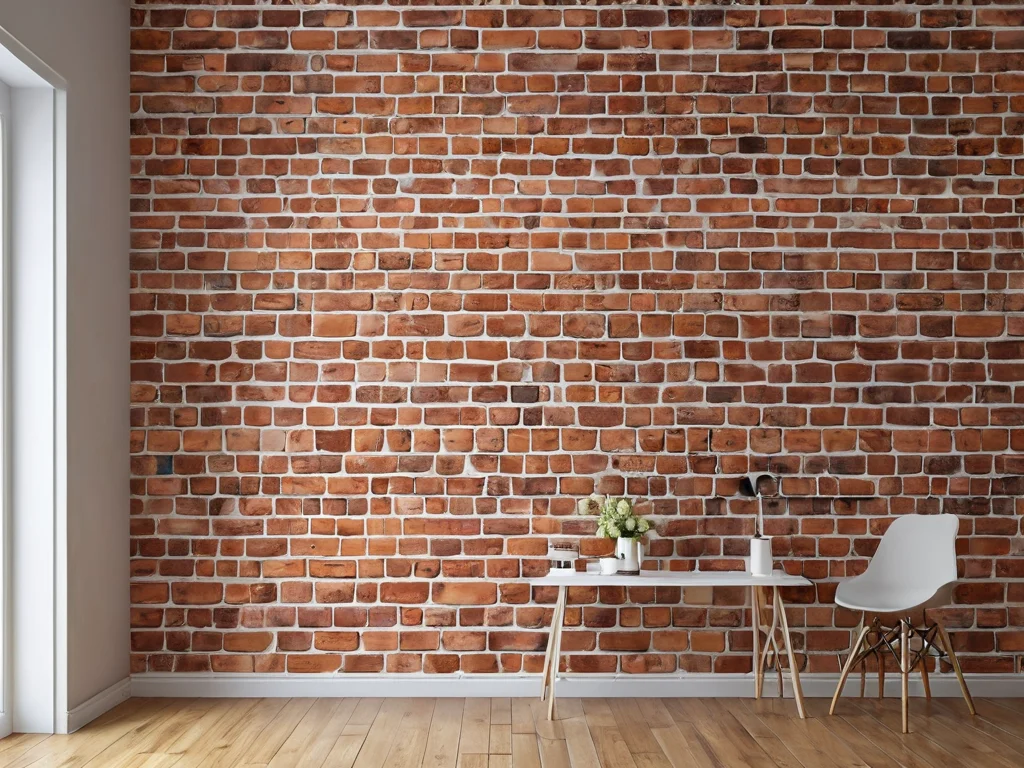
- Brick-effect wallpaper. This is perhaps the quickest and most budget-friendly option. Modern photo wallpapers can reproduce the texture and relief of brick with high accuracy.
- Pros: Ease of application, a huge selection of designs and colors, low cost, the ability to quickly change the interior.
- Cons: Less durable compared to other materials, may look less realistic up close, sensitive to moisture and mechanical damage.
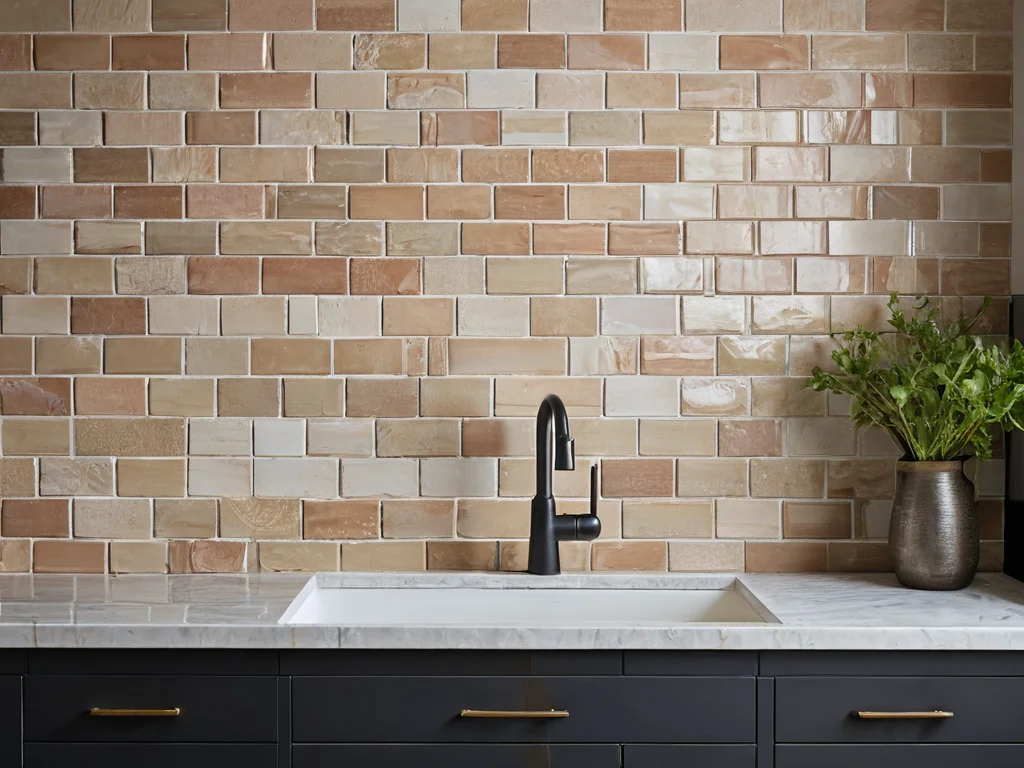
- Brick-effect ceramic tiles. This is a more durable and realistic option that imitates natural brick.
- Pros: High strength, durability, resistance to moisture and dirt, realistic appearance, ease of maintenance, a wide selection of textures and colors.
- Cons: More complex installation process, requires certain skills, higher cost compared to wallpaper, the wall is cold to the touch.
- Brick-effect decorative plaster. Allows you to create a unique texture that imitates aged or decorative brick.
- Pros: Seamless coating, the ability to create various effects (aged, smooth, textured brick), durability, moisture resistance (with proper treatment), repairability (individual areas can be repainted or puttied).
- Cons: Requires certain skills and time for application, higher cost of materials and labor than wallpaper.
- Gypsum panels or tiles. Imitate natural stone or brick, made of gypsum.
- Pros: Lightweight, easy to install, environmentally friendly, good thermal and sound insulation, can be painted in any color.
- Cons: Fragility, sensitivity to moisture (requires additional protection), not as realistic as tiles or plaster, medium price range.
- Painting with a stencil. The most budget-friendly and creative way to create a unique design.
- Pros: Maximum economy, complete freedom in choosing color and pattern, ability to create a unique design, suitable for small accents.
- Cons: Labor-intensive, requires neatness and precision, difficult to achieve perfect relief imitation, not suitable for large surfaces, looks simpler than other options.
How to Choose a Material for Brick Imitation: A Guide to the Best Solutions for Living Room, Bedroom, and Kitchen

The choice of material depends on your goals, budget, and desired effect. Let’s look at which options are best suited for different rooms.
For the Living Room
In the living room, a brick wall can become the central element of the interior, a background for a TV or fireplace, or be used for zoning. Realism and aesthetics are important here.
- Brick-effect ceramic tiles: An excellent choice for creating an impressive accent wall. It looks expensive and natural, giving the interior a special atmosphere. It looks especially good in loft, industrial, grunge styles, but can also be interestingly incorporated into more classic or modern interiors.
- Decorative plaster: Allows you to create unique textures that imitate old, worn brick, or smooth, modern brick. This is a versatile option that suits most styles. You can choose plaster with an “noble antiquity” or “loft brutality” effect.
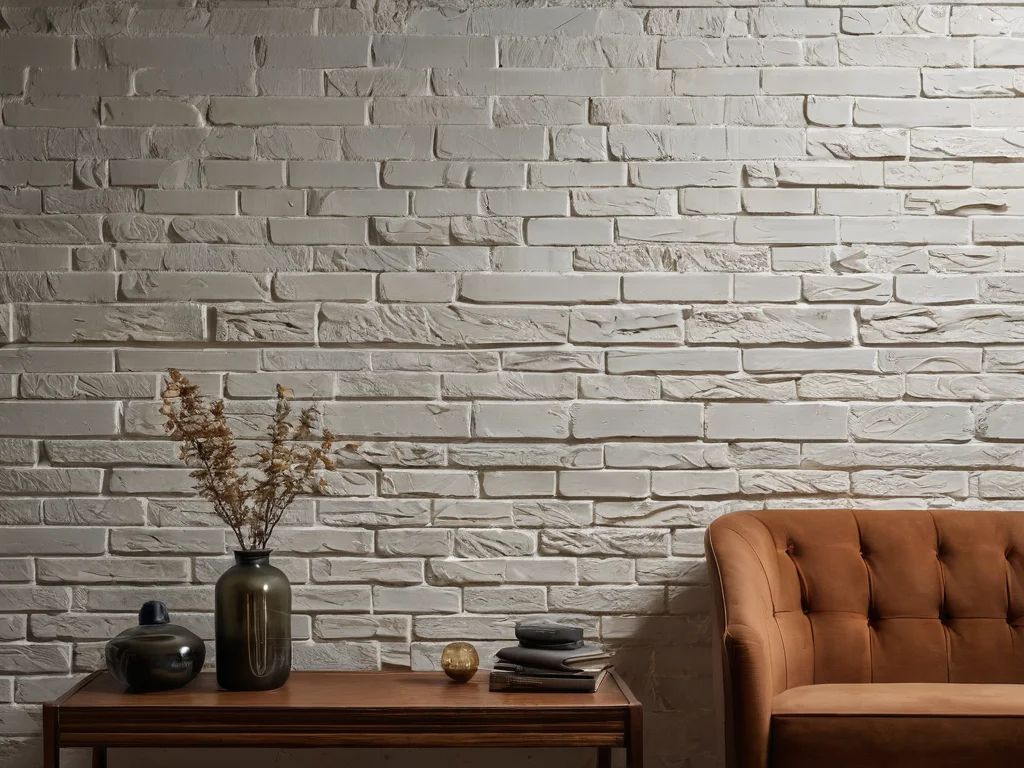
- Gypsum panels/tiles: Well suited for creating a cozy atmosphere. They can be painted in any color, which provides additional freedom for creativity. For example, a white brick wall made of gypsum panels will fit perfectly into Scandinavian or country style.
For the Bedroom
In the bedroom, a brick wall should create a sense of coziness and tranquility. Avoid overly dark or aggressive colors unless you are aiming for a specific style.
- Brick-effect wallpaper: The easiest and quickest option for the bedroom. Easy to apply, a wide selection of colors (e.g., soft beige, light gray, white brick), which allows you to create a soft and cozy background for the bed.
- Painting or decorative plaster: If you want a more durable solution, choose painting or plaster. You can choose pastel shades of brick or even paint the imitation in the color of the walls to create a light textured effect without overloading the space.
- Gypsum panels: Also well suited for bedrooms, especially if painted in light colors. They add texture but do not make the room darker or colder.
For the Kitchen
Practicality and resistance to moisture and dirt are important in the kitchen.
- Brick-effect ceramic tiles: The ideal option for a kitchen backsplash or an accent wall. It is easy to clean, resistant to high temperatures and moisture. You can choose tiles that imitate vintage brick or a more modern option.
- Decorative plaster: Also well suited for kitchens, especially if you choose moisture-resistant compounds and cover them with protective varnish. You can create an “aged” brick effect that will fit perfectly into loft or country style.
- Plastic panels with brick imitation: A budget-friendly and practical option for the kitchen. Easy to install, easy to clean, moisture-resistant. However, they look less natural than tiles or plaster.
Step-by-Step Instructions: How to Hang Brick-Effect Wallpaper So the Wall Looks Real
Hanging brick-effect wallpaper is a task that even a beginner can handle. The main thing is to follow the technology and be careful.
- Surface preparation. The wall must be smooth, clean, and dry. Remove old wallpaper, paint, dust, and dirt. If there are irregularities on the wall, they should be leveled with putty and then primed. Primer will improve the adhesion of the wallpaper to the wall.
- Marking. Determine where your “brick” wall will be located. Mark the boundaries with a pencil and level. If you are only wallpapering part of the wall (e.g., behind the headboard), clearly mark this area.
- Wallpaper preparation. Unroll the wallpaper and make sure the pattern on all sheets matches. Manufacturers often indicate how to properly align the seams.
- Applying glue. Glue is applied to the wall (if it’s non-woven wallpaper) or to the sheet itself (if it’s vinyl). Use the glue recommended by the wallpaper manufacturer. Apply the glue evenly, avoiding lumps.
- Hanging. Start hanging from the corner or from the marked line. Carefully apply the first sheet to the wall, aligning it vertically with a level or plumb bob. Smooth the wallpaper with a plastic spatula or roller from the center to the edges, pushing out air bubbles.
- Aligning seams. The next sheet is hung butt-jointed to the previous one. It is important that the brick pattern matches perfectly. Work carefully to avoid shifting the wallpaper.
- Trimming. Excess wallpaper at the edges, top, and bottom is carefully trimmed with a sharp knife or utility knife.
- Finishing. After the glue has dried (usually 24 hours), the wallpaper can be wiped with a damp sponge (if the type of wallpaper allows).
Important! To achieve maximum realism, choose wallpaper with a deep texture and high-resolution photo printing. The use of decorative elements, such as aged frames or metal shelves, will also help enhance the effect.
Brick Tile Installation Technology: From Wall Preparation to Final Grouting
Installing brick-effect tiles is a more labor-intensive, but also more durable and realistic process. Follow these steps, and your wall will look flawless.
- Base preparation. The wall must be strong, even, dry, and cleaned of dust, dirt, and old coatings. If necessary, level the wall with plaster or drywall. Then, be sure to prime the surface for better adhesive bonding.
- Marking. Draw horizontal and vertical lines on the wall that will serve as guides for tile installation. Determine the center of the wall and start laying from there so that the tiles are laid symmetrically.
- Tile preparation. Before starting work, lay out the tiles on a flat surface to assess their appearance, shades, and possible defects. Mix tiles from different boxes to achieve a more natural pattern.
- Adhesive preparation. Mix tile adhesive according to the instructions on the package. It is important to achieve a uniform consistency without lumps.
- Tile installation. Apply adhesive to the wall with a notched trowel, covering a small area. Start laying from the bottom row, pressing each tile to the wall and slightly rotating it for better adhesion. Use special tile spacers to create even joints.
- Tiling corners and complex areas. When laying tiles around sockets, switches, or on corners, use a tile cutter or an angle grinder with a diamond disc to cut the tiles.
- Grouting. After the adhesive has completely dried (usually after 24 hours), remove the spacers and clean the joints of adhesive residue. Then, proceed to grouting. Choose grout of a suitable color (usually gray, beige, or brown shades) and fill the joints with it using a rubber trowel.
- Final cleaning. 15-20 minutes after applying the grout, remove its excess from the tile surface with a damp sponge, trying not to wash the grout out of the joints.
Tip: To imitate old brick, choose tiles with an uneven texture and varied shades. You can use contrasting grout color to emphasize each “brick.”
Brick-Effect Decorative Plaster: How to Create Stone Texture Effortlessly
Decorative plaster is a versatile material that allows you to realize the boldest design ideas. Creating the effect of brickwork with its help is a feasible task.
- Wall preparation. The wall must be smooth, clean, and dry. Treat it with a deep-penetrating primer.
- Applying the base coat. Apply a layer of decorative plaster, leveling the surface. Let it dry slightly.
- Forming bricks. There are several ways to create the brick relief:
- Using a stencil. Apply a stencil with a brick pattern to the wall and carefully apply plaster to it with a spatula, filling the contours.
- Using a ruler and spatula. Using a long ruler and a narrow spatula (or a special tool), carefully press horizontal and vertical lines that imitate the joints between bricks. The depth of the lines should be small to avoid creating too deep grooves.
- Using a plasticizer and stencil. Special plasticizers can be used to make the plaster more pliable and allow for a more pronounced relief.
- Creating texture. After forming the bricks, you can give the surface additional texture. Use a sponge, brush, or other tools to create an effect of aging, wear, or light roughness.
- Painting. After the plaster has completely dried (drying time depends on the type of plaster and room conditions, usually 24-48 hours), you can start painting. Use acrylic or latex paints. For a more realistic effect, you can use two or three shades of the same color, applying them unevenly, or use the “dry brush” technique to highlight the relief.
- Applying a protective coating. After painting, cover the wall with a transparent acrylic varnish (matte or glossy) to protect it from moisture and dirt, and to give it a finished look.
Tip: To create an aged brick effect, use cement or acrylic-based plaster. After drying, sand the surface to create wear marks, and then paint with aged shades.
Common Mistakes When Creating a DIY Brick Wall: How to Avoid Them
Even the simplest materials can spoil the impression if common mistakes are made. Let’s look at the pitfalls that may await you and how to avoid them.
- Insufficient surface preparation. If the wall is uneven, dusty, or damp, any finishing material will not adhere well and will quickly peel off. Solution: Thoroughly level, clean, and prime the wall before starting work.
- Using the wrong adhesive or mortar. Wallpaper paste and tile adhesive are different things. The wrong adhesive will cause the finish to fall off. Solution: Always use materials recommended by the manufacturer of your chosen finish.
- Lack of marking or incorrect marking. Without straight lines and guides, even the highest quality materials will be laid crookedly, and all the work will be in vain. Solution: Use a level, plumb bob, and pencil for accurate marking. Start laying or wallpapering from the central part of the wall or from the most visible corner.
- Careless pattern matching (for wallpaper and tiles). If you don’t pay attention to the seams, the brick imitation will look unnatural, as if you assembled a puzzle from crookedly cut pieces. Solution: Patiently match the pattern on each sheet or each tile. Do not rush.
- Incorrect grout selection (for tiles). Grout that is too dark or too light can spoil the entire effect. Solution: Choose grout that harmonizes with the tile color and emphasizes its texture. Neutral gray-beige shades often look most natural.
- Excessive decorative elements. A brick wall is already a bright accent. If you overload it with many pictures, shelves, lamps, you will get a “vinaigrette” that will spoil all the beauty. Solution: Use decor sparingly. Choose accessories that complement, rather than compete with, the brick wall.
- Ignoring room specifics. For example, using paper brick-effect wallpaper in a bathroom is a bad idea due to high humidity. Solution: Consider the purpose of the room and choose moisture-resistant materials for kitchens, bathrooms, and hallways.
Designer Life Hacks: How to Stylishly Incorporate a Brick Wall into Any Interior
To make your “brick” wall a true highlight of the interior, not just a finishing material, try these designer tricks:
- Playing with lighting. Proper lighting can transform any surface. Use directional spotlights, sconces, or LED lighting to emphasize the brick texture and create atmospheric shadows. Lighting from above or below will give the wall volume and drama.
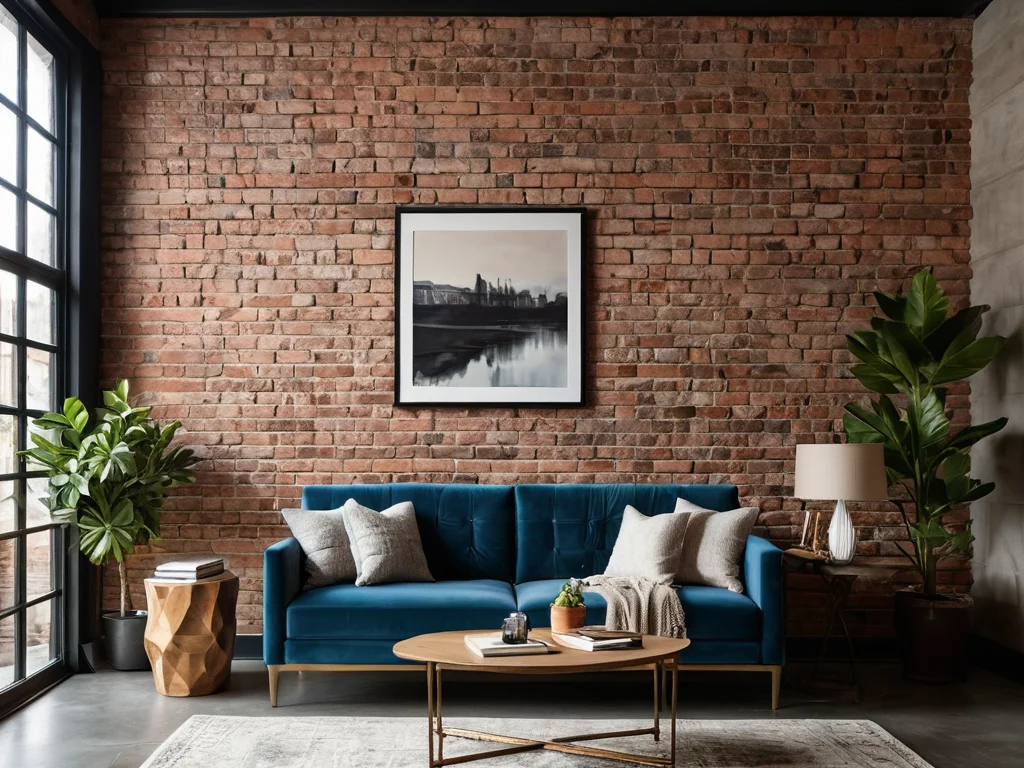
- Contrast of textures. Combine a “brick” wall with smooth, glossy, or soft textile surfaces. For example, a velvet sofa, silk curtains, or a glossy coffee table look great next to rough brick. This contrast makes the interior more interesting and deep.
- Color combinations. A brick wall can be a background or a standalone color accent. If you choose neutral brick (white, gray, beige), feel free to use bright colors in furniture and decor. If the brick has a rich red or brown hue, choose a calmer color palette for the rest of the interior to avoid overloading.
- Using decor. Emphasize the style of the brick wall with appropriate decor. This can include vintage posters, black and white photographs, metal shelves, chalkboards, green plants in simple pots. Choose decor that echoes the overall style of the room.
- Zoning with brick. Use a brick wall not only for finishing but also for functional zoning. For example, a brick wall can separate the kitchen from the living room, create a cozy niche for a workspace, or draw attention to a fireplace.
- Don’t be afraid to experiment with painting. If you’re tired of classic red brick, it can always be painted. White brick will add light and airiness, gray will add elegance, and black will add boldness. Painting allows you to easily adapt a brick wall to any interior style.
- Create a “story.” A brick wall should live its own life. Add shelves with your favorite books, family photos, vintage items to it. This will give the wall individuality and make the interior more “alive” and lived-in.
Creating a brick wall imitation is an exciting process that allows you to bring a piece of history, coziness, and style into your home. Choose materials that are right for you, follow our advice, and let your interior be truly unique!
Рекомендуем:
 How to Update Old Tiles Without Removing Them: 99 Ways to Transform Your Bathroom and Kitchen
 How to Tile Walls in a Bathroom: A Detailed Guide
 DIY Decorative Stone Wall Installation: Your Guide to Home Transformation
 Washable wallpaper for the kitchen: why it’s the best idea for your renovation?
 Grout for tiles: how to choose the color and apply it correctly
Joint filler for tiles: how to choose the color and apply it correctly
Grout for tiles: how to choose the color and apply it correctly
Joint filler for tiles: how to choose the color and apply it correctly
 Wall Cladding with Wood Paneling: A Step-by-Step Guide
 Bathroom: Tile or Paint. What Will Everyone Face?
 Internal Wall Insulation: Materials and Technology
 PVC Wall Panels: Cheap and Cheerful. Installation Guide
 What to do if mold or mildew appears on the walls?
 MDF Panel Wall Finishing: Installation Guide
 Comment réaliser un mur en briques dans un intérieur (imitation)
Revêtement mural en lambris : guide étape par étape
Revêtement mural en panneaux MDF : guide d’installation
Pose de pierre décorative sur le mur par vous-même : votre guide pour transformer votre maison
Comment rénover du vieux carrelage sans le retirer : 99 façons de transformer votre salle de bain et votre cuisine
Papier peint lavable pour la cuisine : pourquoi est-ce la meilleure idée pour votre rénovation ?
Panneaux PVC pour murs : bon marché et efficace. Guide d’installation
Salle de bain : carrelage ou peinture. À quoi chacun sera-t-il confronté ?
Comment réaliser un mur en briques dans un intérieur (imitation)
Revêtement mural en lambris : guide étape par étape
Revêtement mural en panneaux MDF : guide d’installation
Pose de pierre décorative sur le mur par vous-même : votre guide pour transformer votre maison
Comment rénover du vieux carrelage sans le retirer : 99 façons de transformer votre salle de bain et votre cuisine
Papier peint lavable pour la cuisine : pourquoi est-ce la meilleure idée pour votre rénovation ?
Panneaux PVC pour murs : bon marché et efficace. Guide d’installation
Salle de bain : carrelage ou peinture. À quoi chacun sera-t-il confronté ?