Greetings, dear friends and connoisseurs of beautiful interiors! Today we will talk about how to transform your home with vinyl wallpaper on a paper backing. This is one of the most popular and versatile wall finishing materials that can not only give a room a new look but also hide minor surface defects. If you are undertaking renovations and want to achieve a perfect result, then this article is for you. We will cover all the nuances of selection, preparation, and, of course, the hanging process itself, so that your new interior will delight your eyes for years to come.
Vinyl Wallpaper on a Paper Backing: Why It’s a Great Choice for Your Renovation?
Vinyl wallpaper on a paper backing is perhaps the golden mean in the world of wall coverings. Let’s figure out why it has gained such popularity and what advantages you get by choosing it.
What is Vinyl Wallpaper on a Paper Backing?
- Top Layer: Polyvinyl chloride (PVC), or vinyl. It is responsible for the durability, moisture resistance, and decorative properties of the wallpaper. Vinyl can imitate various textures: plaster, textiles, stone, wood, and, of course, create smooth or embossed patterns.
- Bottom Layer (Backing): Paper. Most often, a two-layer paper (duplex) is used, which ensures the stability and strength of the canvas. The paper backing makes the wallpaper more affordable compared to non-woven alternatives.
Key Advantages of Vinyl Wallpaper on a Paper Backing:
- Durability and Wear Resistance: The vinyl layer protects the wallpaper from mechanical damage, abrasion, and fading. This makes them an excellent choice for high-traffic areas, such as hallways or children’s rooms.
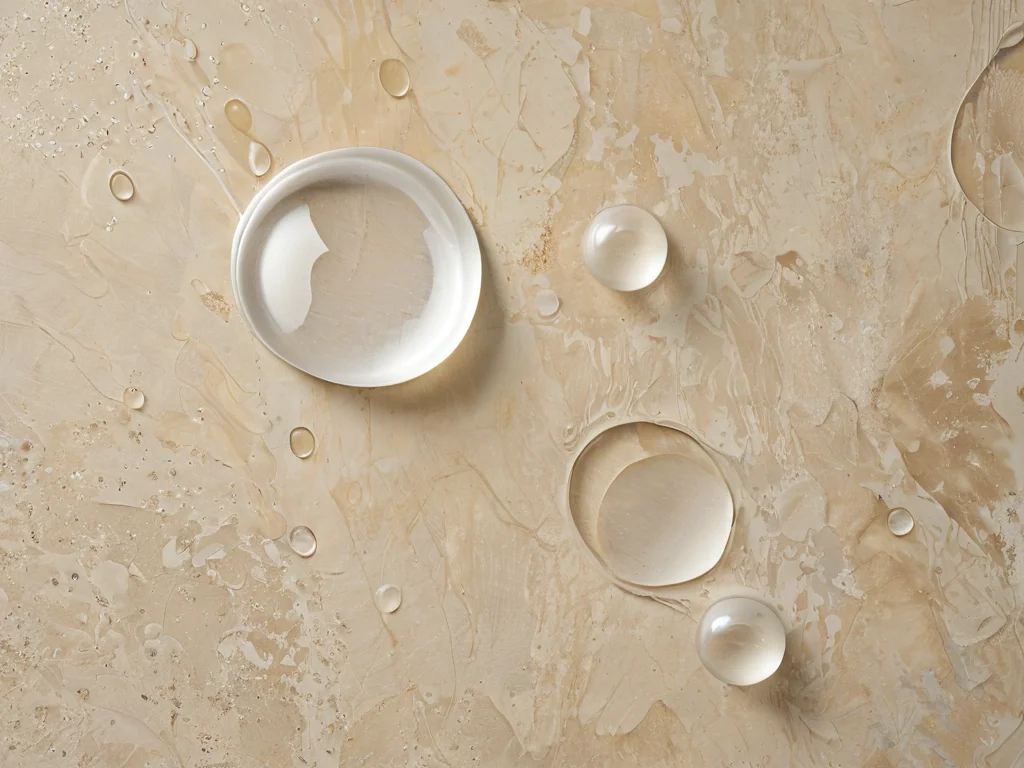
- Moisture Resistance: Thanks to the vinyl coating, such wallpaper is not afraid of moisture. They can be wiped with a damp cloth, which significantly simplifies care and maintenance. This is an important advantage for kitchens and bathrooms (although for areas in direct contact with water, it is better to use special washable wallpaper).
- Masking Defects: The embossed structure of vinyl wallpaper, especially with a pronounced pattern or texture, perfectly hides minor irregularities and cracks on the walls. This can save you time and money on perfect wall leveling.
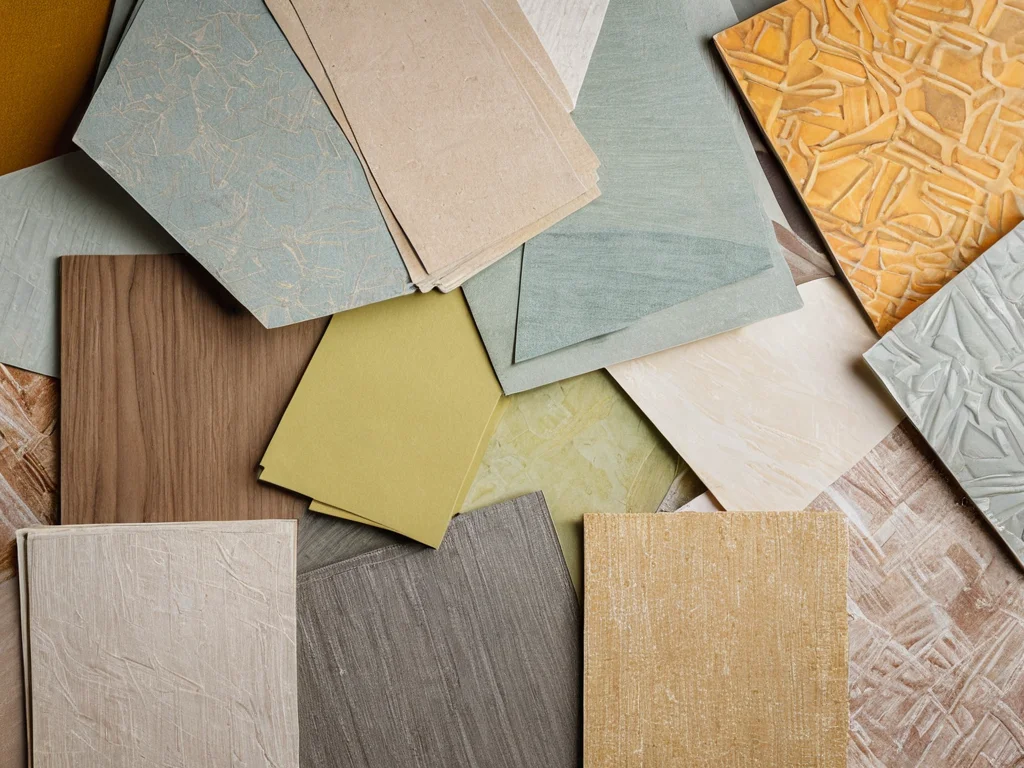
- Wide Range of Designs: Manufacturers offer a huge variety of colors, patterns, and textures. From classic floral motifs to modern geometric prints, from imitating natural materials to abstract designs – you will definitely find an option that suits your interior.
- Easy to Care For: As mentioned earlier, the ability to clean with a damp cloth makes them very practical. Dust, fingerprints, minor stains – all are easily removed.
- Relative Affordability: Compared to other types of wallpaper (e.g., non-woven or textile), vinyl wallpaper on a paper backing often has a more attractive price, making it accessible to a wide range of consumers.
However, there are some points to consider:
- Vapor Permeability: The paper backing is less breathable than non-woven. This means that the walls under such wallpaper may “breathe” less. In well-ventilated rooms, this is not a problem, but in rooms with high humidity and poor ventilation, a more thorough approach to wall preparation may be required.
- Adhesive: Vinyl wallpaper on a paper backing requires a special adhesive designed specifically for heavy wallpaper. Regular wallpaper paste may not be sufficient.
- Difficulty of Removal: Sometimes vinyl wallpaper can be harder to remove from the wall than regular paper wallpaper, leaving a layer of vinyl. However, modern production technologies and proper hanging minimize this problem.
Overall, vinyl wallpaper on a paper backing is an excellent solution for those seeking a balance between quality, durability, aesthetics, and price. They transform the space, making it cozier and easier to maintain.
Inspiration: 7 Stylish Interiors with Vinyl Wallpaper on a Paper Backing
Sometimes the hardest part is imagining how a particular type of wallpaper will look in a real interior. To help you choose and inspire you to make changes, we have gathered 7 examples of stylish solutions using vinyl wallpaper on a paper backing.
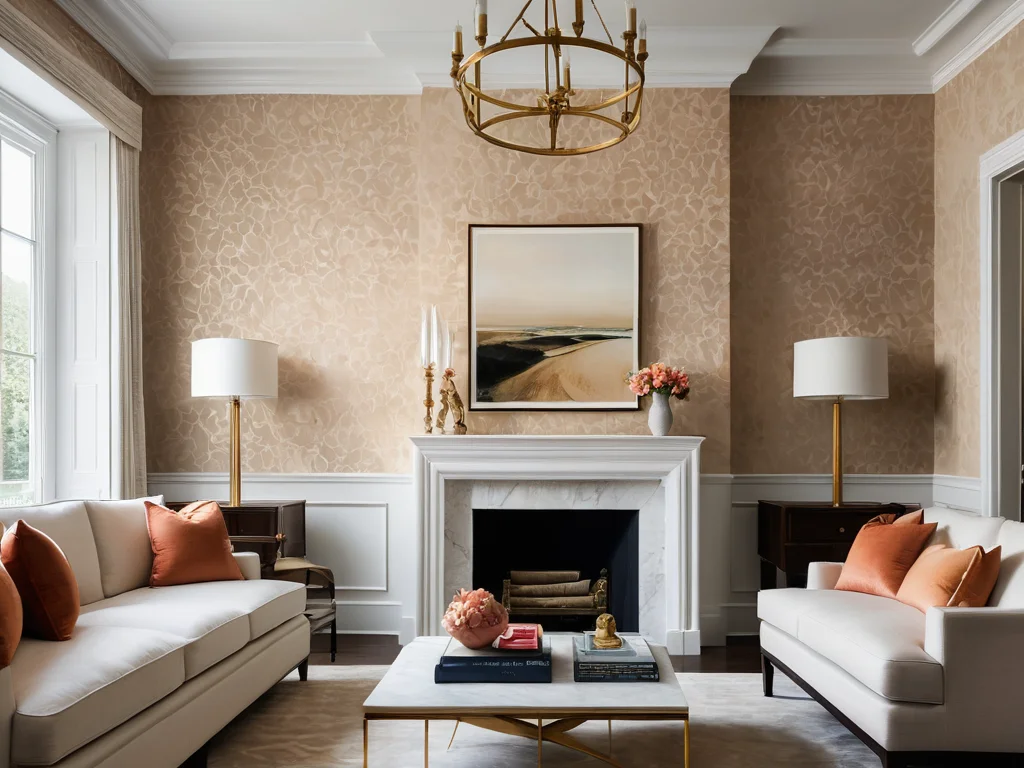
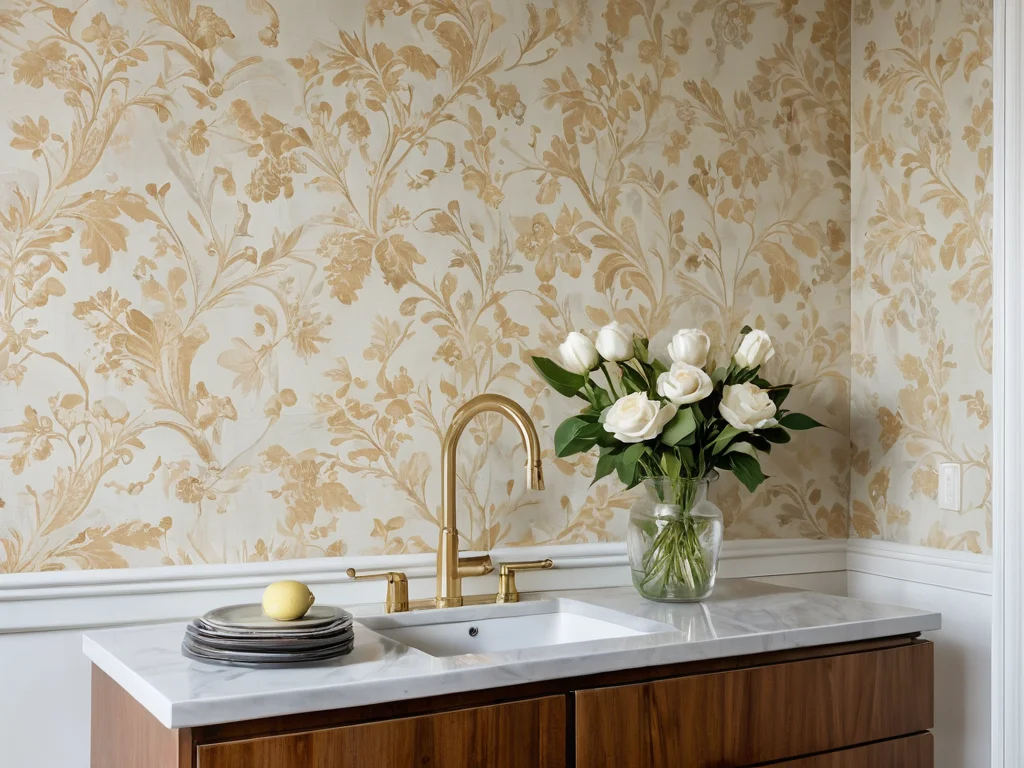
- Classic Living Room with Silk Imitation:
- Description: Light, cream, or beige wallpaper with a subtle embossed pattern imitating silk fabric. Such wallpaper adds elegance and coziness to the room, creating a sense of luxury without excessive pomp.
- How it Works: Wallpaper with a light texture reflects light, making the room visually more spacious and brighter. It pairs well with wooden furniture, textiles in calm tones, and classic decorative elements.
- Ideal for: Living rooms, bedrooms, studies.
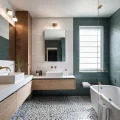
- Modern Kitchen with Geometric Print:
- Description: Wallpaper with a clear geometric pattern – stripes, diamonds, zigzags – in neutral or pastel colors. Vinyl coating is especially relevant here due to its moisture resistance.
- How it Works: Geometry adds dynamism and character to the interior. Vertical stripes can visually increase ceiling height, while horizontal stripes can widen the space.
- Ideal for: Kitchens, dining rooms, hallways.
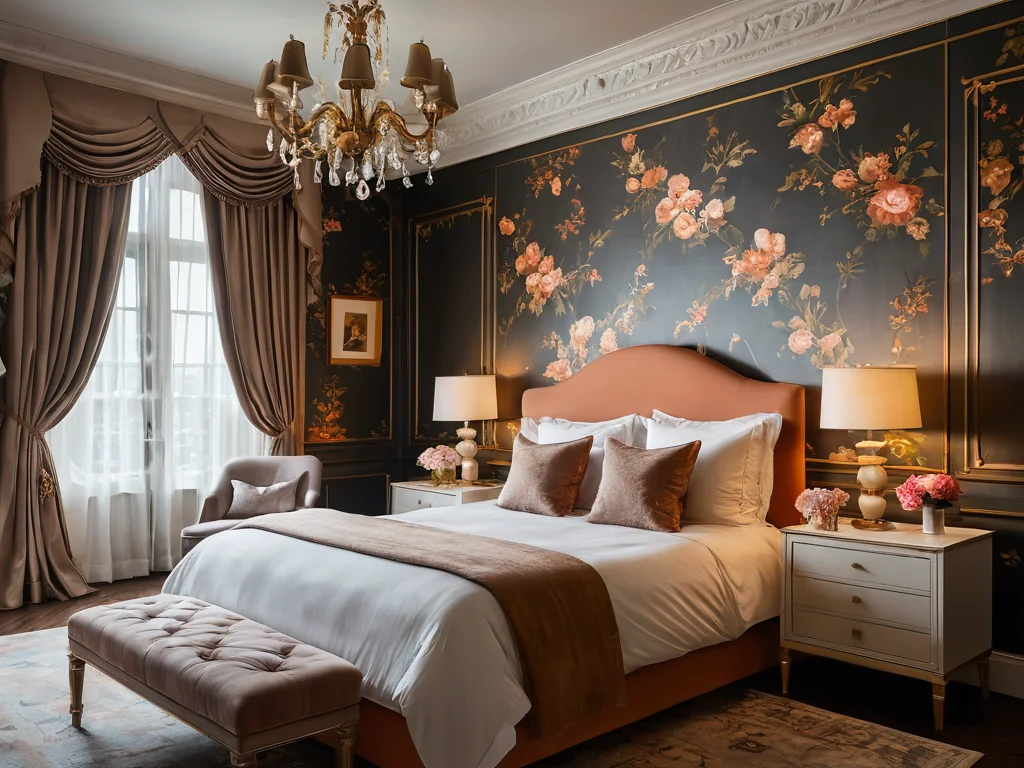
- Cozy Bedroom with Floral Motif:
- Description: Wallpaper with a delicate floral pattern – from small wildflowers to large buds – in pastel or natural shades.
- How it Works: Floral prints create a relaxing and romantic atmosphere, ideal for a bedroom. It is important to choose a pattern that matches the overall style of the room.
- Ideal for: Bedrooms, children’s rooms (for girls), women’s studies.
- Children’s Room with Thematic Pattern:
- Description: Bright or pastel wallpaper with images of animals, fairy-tale characters, cars, or abstract patterns that a child will like.
- How it Works: Thematic wallpaper helps zone the space and makes the children’s room more lively and interesting. The vinyl coating here is a guarantee that the walls can be easily cleaned of the young artist’s creative marks.
- Ideal for: Children’s rooms.
- Accent Wall in the Living Room with Brick or Stone Imitation:
- Description: Wallpaper that realistically imitates the texture and color of natural brick (white, red, gray) or decorative stone.
- How it Works: Such a wall becomes the focal point of the interior, adding brutality, loft, or industrial charm. It is usually used to highlight one wall – for example, behind the sofa or TV.
- Ideal for: Living rooms, hallways, kitchens in loft or industrial style.
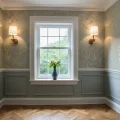
- Elegant Hallway with Vertical Stripes:
- Description: Wallpaper with clear vertical stripes of different widths and shades.
- How it Works: Vertical stripes visually “raise” the ceiling, making a narrow and low hallway more spacious and airy.
- Ideal for: Hallways, narrow entrances, stairwells.
- Provence-Style Bedroom with Damask:
- Description: Wallpaper with an elegant damask pattern (traditional oriental ornament) in light, pastel colors – cream, pale blue, lavender.
- How it Works: Damask adds a touch of sophistication and romance to the interior, characteristic of the French Provence style. In combination with natural materials and aged furniture, it creates a unique atmosphere.
- Ideal for: Bedrooms, living rooms, rooms in Provence or Shabby Chic style.
As you can see, vinyl wallpaper on a paper backing is an incredibly versatile material that can transform any space. The main thing is to choose the right design and color so that it harmonizes with your interior.
How to Choose the Perfect Vinyl Wallpaper: A Practical Guide to Materials and Patterns
Choosing wallpaper is an exciting but responsible process. To avoid mistakes and find that perfect option, let’s go through the key aspects of choosing vinyl wallpaper on a paper backing.
1. Determine the Room’s Purpose:
- For living rooms and bedrooms, wallpaper with calmer, more soothing patterns or imitation of natural textures (silk, linen, velvet) is suitable. A pleasant color scheme and tactile feel are important.
- For kitchens and dining rooms, choose washable wallpaper with increased wear resistance. Both calm and brighter accents are appropriate here, as well as imitation of tiles, mosaics, or even photo wallpapers with a kitchen theme.
- For children’s rooms, it is better to choose wallpaper with bright but not garish patterns, or calm options that are easy to wash. Opt for hypoallergenic materials.
- For hallways and corridors, resistance to abrasion and the possibility of wet cleaning are important. Wallpaper for painting, imitation of stone, brick, or wallpaper with a subtle but textured pattern look good here.
2. Study the Marking on the Roll:
Each roll of wallpaper has a special marking that will help you understand its properties:
- Wave: One wave means the wallpaper can be wiped with a damp cloth, but without strong rubbing.
- Two Waves: Two waves – the wallpaper can be washed with a soft sponge and soapy water.
- Wave with a Brush (or Three Waves): Such wallpaper is resistant to abrasion and allows for wet cleaning with detergents and a brush. This is the most durable type of vinyl wallpaper.
- Arrows: Indicate the method of applying adhesive (to the wallpaper or to the wall) and how to match the panels.
- Sun: Denotes resistance to fading under sunlight.
3. Pay Attention to the Type of Vinyl:
- Heavy Vinyl (Compact Vinyl): Denser and more durable, often has a deep embossed pattern imitating natural materials. Excellently masks wall imperfections.
- Light Vinyl (Foamed Vinyl): Less dense, with a more superficial embossed pattern. Well-suited for creating smoother surfaces or imitating a light texture.
Foamed vinyl is more commonly used for paper backing, but there are exceptions. The denser the vinyl layer, the better it hides wall defects.
4. Color and Pattern: How Do They Affect the Perception of Space?
- Light colors (white, beige, light gray, pastel shades) visually expand the space, making it brighter and airier. Ideal for small rooms and spaces with insufficient natural light.
- Dark colors (deep blue, burgundy, dark green) create a more intimate, cozy atmosphere, but can visually reduce the room. It’s better to use them in spacious rooms or as an accent wall.
- Bright colors (red, orange, yellow) add energy and mood. Use them sparingly, for example, on an accent wall, to avoid overwhelming the interior.
- Vertical stripes visually “raise” the ceiling.
- Horizontal stripes visually “widen” the walls.
- Large patterns can “eat up” space, so it’s better to use them in large rooms or on one accent wall.
- Small or abstract patterns are more versatile and suitable for most rooms.
- Imitation of natural materials (wood, stone, brick, textiles) adds texture and depth to the interior.
5. Buy Wallpaper from the Same Batch:
It is very important that all the rolls of wallpaper you buy are from the same batch (indicated by a code on the label). Wallpaper from different batches may differ slightly in shade, and this will be noticeable on the walls.
6. Check the Integrity of the Rolls:
Inspect the rolls before purchasing. They should be intact, without dents or damage. Make sure the factory packaging is not compromised.
Choosing the right wallpaper is already half the battle. Carefully study these recommendations, and you will be able to select a material that will perfectly fit into your interior and last for many years.
Preparation for Hanging: What You Need to Know Before Starting (Tools, Walls, Calculation)
So, the wallpaper is chosen! Now it’s time to prepare for the hanging process itself. 80% of success depends on proper preparation, so approach this stage with all seriousness.
1. Necessary Tools and Materials:
Gather everything you need in advance so that nothing distracts you during the work.
- Wallpaper: Calculated number of rolls.
- Adhesive: Special adhesive for vinyl wallpaper on a paper backing. Choose a quality adhesive that matches your wallpaper type.
- Container for Adhesive: Plastic bucket or basin.
- Adhesive Applicator (roller or brush): A wide paint roller with medium-length pile or a wide brush for even adhesive application.
- Spatulas:
- Rubber or plastic spatula (smoothing roller): For smoothing wallpaper and removing air bubbles.
- Metal spatula (narrow): For trimming wallpaper at skirting boards, slopes, and ceilings.
- Utility knife or craft knife: With sharp replaceable blades for precise trimming.
- Measuring tape: For measuring and cutting wallpaper.
- Pencil: For marking.
- Level or plumb bob: For drawing a perfectly straight vertical line, which will be your guide for hanging the first panel.
- Clean rags or sponge: For removing excess adhesive from the wallpaper surface and tools.
- Ladder or stable stool: For working at height.
- Plastic sheeting or newspapers: To protect floors and furniture from adhesive drips.
2. Wall Preparation:
This is one of the most important stages. Uneven, dirty, or poorly prepared walls are the key to future problems.
- Removal of Old Coverings: Remove all old wallpaper, paint, whitewash, or other coverings. There should be nothing underneath that can peel off.
- Filling and Leveling: Fill all cracks, nail holes, and chips. If the walls have significant unevenness, they need to be leveled with plaster or drywall. Vinyl wallpaper can hide minor defects, but deep pits and bumps will still be noticeable.
- Priming: After the filler has dried, the walls must be primed. Primer improves adhesive adhesion to the wall, reduces adhesive consumption, and prevents mold. Use a deep-penetrating primer.
- Drying: Allow the wall to dry completely after priming.
- Temperature and Humidity: The room where the work is being done should have a comfortable temperature (18-25°C) and no drafts. High humidity is also undesirable.
3. Calculating the Amount of Wallpaper:
Correct calculation will help avoid shortages or excess material.
- Measure the room perimeter: Add up the length of all walls.
- Find out the roll width: Usually, it is 0.53 m (53 cm) or 1.06 m (106 cm).
- Calculate the number of panels: Divide the room perimeter by the roll width. For example, a room 5 m long and 4 m wide has a perimeter of 18 m. With a roll width of 0.53 m, you will need 18 / 0.53 ≈ 34 panels.
- Consider wall height and pattern repeat: Now measure the height of your walls. Add a margin for trimming (usually 5-10 cm) to each panel and, if the pattern is complex, a margin for matching the repeat. Check the pattern repeat length with the wallpaper manufacturer.
- Calculation example: Ceiling height is 2.7 m. Add 0.1 m for trimming. Total panel length is 2.8 m. If the pattern repeat is 0.64 m, then from one standard roll (usually 10.05 m) you will get 10.05 / 2.8 ≈ 3 panels (if the repeat is not very large). If the repeat is large, you might get 2 panels.
- Total number of rolls: Divide the total number of panels (calculated by perimeter) by the number of panels obtained from one roll. Be sure to add 1-2 extra rolls for potential defects or unforeseen situations.
4. Preparing the Adhesive:
Follow the adhesive manufacturer’s instructions. Usually, this involves:
- Boiling water (amount indicated on the package).
- Slowly pouring the dry mixture into the water while stirring constantly to avoid lumps.
- Letting the adhesive steep for the indicated time (usually 5-10 minutes), then stirring again.
- The adhesive should be uniform, without lumps, and have the consistency of liquid sour cream.
Thorough preparation is the key to a smooth hanging process and a pleasing result. Don’t rush this stage!
Step-by-Step Guide: How to Hang Vinyl Wallpaper on a Paper Backing Without Mistakes
Now that everything is ready, we can move on to the most interesting part – hanging the wallpaper! Follow this step-by-step guide, and you’ll succeed.
Step 1: Marking the Layout
- Determine where to start hanging (usually from a window or a corner).
- Using a level or plumb bob, draw a perfectly straight vertical line from ceiling to floor. This line will be your guide for the first panel. It is important that it is strictly vertical, otherwise all subsequent panels will be hung crookedly.
Step 2: Cutting the Wallpaper
- Unroll the wallpaper on a clean, flat surface (e.g., on the floor covered with plastic sheeting).
- Measure the wall height, adding a 5-10 cm margin for trimming at the top and bottom.
- If the wallpaper has a pattern that needs matching (repeat), align the pattern on the next panel with the first one so that the pattern continues seamlessly. Consider the pattern repeat length when cutting.
- Carefully cut the panel with a utility knife or craft knife.
- Prepare the required number of panels in this way.
Step 3: Applying the Adhesive
- Adhesive is applied to the wallpaper. This is an important feature of vinyl wallpaper on a paper backing.
- Evenly spread the adhesive using a roller or brush over the entire surface of the panel, paying special attention to the edges. The adhesive should not seep through the paper backing, but there should also be no dry spots.
- Fold the glued panel in half (like an accordion), adhesive side in, and let it sit for the time specified by the adhesive manufacturer (usually 5-10 minutes) for impregnation. Do not over-soak, so the wallpaper doesn’t get too wet!
Step 4: Hanging the First Panel
- Apply one folded panel to the wall, aligning it with the previously drawn vertical line.
- Unfold the top part of the panel and gently press it against the wall.
- Smooth the panel from the center towards the edges using a rubber spatula or roller as you unfold it downwards. This will help push out air bubbles and ensure a tight fit.
- Make sure the panel is hanging straight along the marked line.
Step 5: Joining and Trimming
- Hang the next panel butt-jointed to the previous one, without overlap.
- Smooth the seam with a rubber roller or spatula to make it as inconspicuous as possible.
- Once the panel is hung and smoothed, carefully trim the excess at the top and bottom using a narrow metal spatula and a sharp knife. Press the spatula firmly against the slope or skirting board so the knife cuts straight.
Step 6: Working with Corners and Joints
- Internal Corners: Extend the panel onto the adjacent wall by 1-2 cm. Hang the next panel on the new wall, starting from a new vertical line, overlapping the previous panel by 1-2 cm as well.
- External Corners: Extend the panel onto the adjacent wall by 2-3 cm. Hang the next panel on the new wall, starting from the corner, overlapping the previous panel by 1-2 cm.
- Openings (outlets, switches): Be sure to turn off the electricity before hanging! Cut an X-shaped opening in the wallpaper and carefully fold the edges inward. After the adhesive dries, you can trim precisely along the contour.
Step 7: Finishing Touches
- Remove excess adhesive from the wallpaper and surrounding surfaces with a damp sponge or cloth.
- Ensure all panels are well-adhered, with no bubbles or peeling.
- Leave the room to dry, avoiding drafts and sudden temperature changes.
Congratulations! If you followed the instructions, your walls are now adorned with new, perfectly hung wallpaper.
Common Mistakes When Hanging Vinyl Wallpaper and How to Avoid Them: A Beginner’s Checklist
Even the highest quality wallpaper can be ruined if hung incorrectly. Here is a list of the most common mistakes beginners make and how to avoid them to ensure your renovation goes flawlessly.
1. Incorrect Adhesive Choice
- Mistake: Using universal adhesive or adhesive for paper wallpaper.
- Consequences: Wallpaper may not adhere well, peel off, or bubble.
- Solution: Always use special adhesive for vinyl wallpaper on a paper backing. Carefully read the instructions on the packaging.
2. Insufficient Wall Preparation
- Mistake: Hanging over old wallpaper, dusty, dirty, or unprimed walls.
- Consequences: Wallpaper may peel off along with the old covering, stains or mold may appear.
- Solution: Thoroughly remove old coverings, wash the walls, fill in defects, and be sure to prime the walls before hanging.
3. Uneven First Line
- Mistake: Hanging the first panel not plumb.
- Consequences: All subsequent panels will be hung crookedly, disrupting the overall pattern geometry and creating an untidy appearance.
- Solution: Always use a level or plumb bob to draw a perfectly straight vertical line – this is your main guide.
4. Applying Adhesive to the Wall (Instead of the Wallpaper)
- Mistake: Attempting to apply adhesive to the wall, as is done with non-woven wallpaper.
- Consequences: The paper backing may get too wet too quickly, and the wallpaper may tear during application.
- Solution: For vinyl wallpaper on a paper backing, adhesive is applied ONLY to the panel itself.
5. Excessive Adhesive Saturation
- Mistake: Leaving the panel with adhesive for too long.
- Consequences: The paper backing becomes waterlogged, the wallpaper loses strength, may tear during smoothing, or shrink significantly after drying.
- Solution: Strictly adhere to the impregnation time specified by the adhesive manufacturer (usually 5-10 minutes).
6. Smoothing the Wallpaper
- Mistake: Using a too-stiff spatula, excessive pressure, or smoothing from the edge to the center.
- Consequences: You can damage the wallpaper’s texture, press through the pattern, tear the material, or fail to completely remove air bubbles.
- Solution: Use a soft rubber spatula or a special wallpaper roller. Smooth from the center towards the edges with gentle, sweeping motions.
7. Overlapping Panels
- Mistake: Hanging panels with overlap (unless specified by the manufacturer).
- Consequences: Overlapping areas will be visible, may peel, and collect dust and dirt.
- Solution: Hang panels strictly butt-jointed.
8. Lack of Trimming at the Floor and Ceiling
- Mistake: Attempting to hang a panel exactly at the edge, without a margin.
- Consequences: The edge of the wallpaper may not adhere evenly, and with the slightest wall irregularity, an unglued area will be visible.
- Solution: Always leave a 5-10 cm margin at the top and bottom for subsequent neat trimming.
9. Ignoring the Pattern Repeat
- Mistake: Not matching the pattern when joining panels.
- Consequences: The pattern will “jump,” creating a messy appearance.
- Solution: Carefully examine the wallpaper pattern and align the design when cutting the next panel. This will require more material, but the result is worth it.
10. Working in a Cold Room or with Drafts
- Mistake: Hanging at low temperatures or with open windows/doors.
- Consequences: The adhesive may dry unevenly, and the wallpaper may deform and peel off.
- Solution: Ensure a comfortable temperature (18-25°C) in the room and no drafts during hanging and drying.
Beginner’s Checklist:
- [ ] Is the correct adhesive chosen?
- [ ] Are the walls prepared (cleaned, leveled, primed)?
- [ ] Are all necessary tools available?
- [ ] Is the first line drawn perfectly plumb?
- [ ] Is adhesive applied to the wallpaper?
- [ ] Is the impregnation time observed?
- [ ] Are panels smoothed from the center to the edges?
- [ ] Are panels hung butt-jointed?
- [ ] Is there a margin for trimming at the top and bottom?
- [ ] Is the pattern repeat considered (if any)?
- [ ] Are there no drafts and is the temperature normal?
- [ ] Is excess adhesive removed immediately?
By following this checklist, you can avoid most common mistakes and achieve a professional result.
Pro Tips: Secrets to a Perfect Result When Working with Vinyl Wallpaper
Want your walls to look flawless, as if hung by an experienced craftsman? We share secrets and tricks that will help you achieve professional quality when working with vinyl wallpaper on a paper backing.
1. The Art of Cutting:
- Use a Sharp Knife: When cutting wallpaper, use a sharp craft or utility knife. A dull blade will tear the material instead of cutting it. Change blades promptly – it only takes a few seconds, but the result will be strikingly different.
- Cutting on the Floor: For convenience and accuracy, it’s best to cut on a clean, flat floor covered with plastic sheeting. The roll length is usually 10.05 m. Measure the required amount, considering the margin for trimming and pattern repeat.
- Pattern Matching: If you have wallpaper with a pattern, don’t skimp on the repeat. Proper pattern matching is key to a harmonious look. Test fit the panel against the wall before cutting if you are unsure.
2. Adhesive Application Tricks:
- Impregnation: Don’t be afraid to let the wallpaper soak in the adhesive according to the instructions. The paper backing will absorb moisture, and the panel will become more pliable but won’t get too wet if not over-soaked.
- Checking for Evenness: After folding the panel (like an accordion), slightly unfold the edges to ensure the adhesive is applied evenly over the entire area, especially at the edges.
- Convenient Container: Use a wide and shallow bucket or basin for the adhesive. This makes it easier to fully coat the panel with the roller.
3. Hanging Technique:
- Vertical Line is Your Compass: We repeat, but this is critically important. Do not neglect using a level for the first line.
- Working Together: If possible, work with someone. One person holds the top part of the panel, the other holds the bottom, helping to apply and smooth it carefully. This is especially convenient when hanging long panels.
- Smooth Movements: Smooth the wallpaper with a soft roller or plastic spatula from the center to the edges, using smooth, sweeping motions. Do not press too hard, so as not to damage the texture.
- Smoothing Seams: Gently run a rubber roller over the seams. This will help “press” the edges into the adhesive and make the transition between panels as inconspicuous as possible.
- Removing Bubbles: If small air bubbles remain after smoothing, try carefully puncturing them with a thin needle and pressing them down again.
4. Working Around Obstacles:
- Outlets and Switches: MANDATORY turn off the electricity! After hanging the panel over the outlet/switch, find the center of the opening, make an X-shaped cut, and carefully fold the edges inward. After the adhesive dries, you can precisely trim along the contour, after installing the decorative cover.
- Corners: In internal corners, extend the panel onto the adjacent wall by 1-2 cm. External corners require more careful fitting – here you can make a small cut and wrap the wallpaper onto the adjacent wall, ensuring a smooth transition.
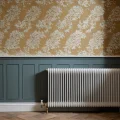
- Radiators: If you need to wallpaper behind a radiator, try to apply adhesive as thoroughly as possible and press the wallpaper firmly. Sometimes a narrow roller or brush is used for hard-to-reach areas.
5. The Final Stage:
- Cleanliness is Key: Immediately remove excess adhesive with a damp sponge or soft cloth. Adhesive that dries on the vinyl surface can leave hard-to-remove stains.
- Don’t Rush Trimming: Before trimming the wallpaper at the ceiling and floor, ensure the panel is well-adhered and smoothed. Use a sharp knife and a metal spatula as a guide.
- Drying Mode: Avoid drafts and sudden temperature changes. It’s best if the room dries gradually.
By applying these simple life hacks, you can not only avoid typical mistakes but also achieve a truly professional result. Your walls will look perfect!
Caring for Vinyl Wallpaper: How to Maintain Their Fresh Look for Years to Come
Vinyl wallpaper on a paper backing is a durable and practical material, but even they require proper care to maintain their appearance for as long as possible. By following these simple recommendations, you can preserve their freshness and newness for years to come.
1. Regular Dry Cleaning:
- Vacuum Cleaner: Periodically vacuum the walls with a soft brush attachment. This will help remove settled dust, which can make the wallpaper dull over time.
- Soft Brush or Cloth: You can use a dry soft microfiber cloth or a special brush for dusting. Move gently, without strong pressure.
2. Wet Cleaning (if permitted by marking):
- Check the Marking: Before proceeding with wet cleaning, be sure to check the marking on the wallpaper roll. One or two waves indicate that the wallpaper can be wiped with a damp cloth.
- Use Cool Water: Dampen a soft sponge or cloth in clean cool water. Wring it out well so that no water drips.
- Gentle Movements: Wipe the wallpaper surface from the wall to the edge of the panel, then move to the next section. Try not to rub too hard, so as not to damage the texture or pattern.
- Soapy Solutions: If the stain is heavy, you can use a weak soapy solution. Take a mild detergent (without abrasives or bleach) and dissolve it in warm water. Dampen the sponge, wring it out well, and wipe the stained area.
- Rinsing: After using a soapy solution, be sure to wipe the surface with a clean damp cloth to remove any residue of the cleaning agent.
- Drying: Let the walls dry naturally. Do not use a hairdryer or other heating devices.
3. What to Do About Stubborn Stains:
- Pencil or Marker Marks: Small marks can be carefully removed with an eraser (white, soft). If this doesn’t help, you can try rubbing alcohol or isopropyl alcohol, applying it to a cotton pad and gently wiping the stain. Do this on an inconspicuous area first to test the wallpaper’s reaction.
- Grease Stains: Grease stains in the kitchen can be removed using talcum powder, baby powder, or chalk. Sprinkle the absorbent on the stain, leave for a few hours (or overnight), then gently brush it off.
- Special Cleaners: Special cleaners for vinyl wallpaper are available for purchase. Use them with caution and only according to the instructions.
4. What to Avoid:
- Abrasive Cleaners: Never use powders, metal scouring pads, or stiff brushes – they will scratch and damage the wallpaper surface.
- Strong Solvents: Acetone, gasoline, and other aggressive solvents can damage the vinyl coating and change the wallpaper’s color.
- Excess Water: Do not wash walls with a stream of water like tiles. Excessive moisture can damage the paper backing and adhesive layer.
- Direct Sunlight: Although many vinyl wallpapers are fade-resistant, prolonged exposure to direct sunlight can eventually lead to a loss of color vibrancy.
- Mechanical Damage: Protect the wallpaper from sharp objects, furniture that rubs against the wall, and pet claws.
5. Prevention:
- Ventilation: Regularly ventilate the room to prevent moisture buildup and mold formation, especially in the kitchen and bathroom.
- Sun Protection: Use curtains or blinds to protect walls from direct sunlight during the hottest hours of the day.
By following these simple care rules, you can preserve the attractive appearance of your vinyl wallpaper on a paper backing for a long time, and they will delight you with their beauty and practicality.
Рекомендуем:
 PVC Wall Panels: Cheap and Cheerful. Installation Guide
 Washable wallpaper for the kitchen: why it’s the best idea for your renovation?
 MDF Panel Wall Finishing: Installation Guide
 How to Wallpaper Behind a Radiator
 Wallpapering Corners: Master Secrets
 How to Tile Walls in a Bathroom: A Detailed Guide
 DIY Decorative Stone Wall Installation: Your Guide to Home Transformation
 How to Make a Brick Wall in an Interior (Imitation)
 What to do if mold or mildew appears on the walls?
 Wall Cladding with Wood Paneling: A Step-by-Step Guide
 How to Update Old Tiles Without Removing Them: 99 Ways to Transform Your Bathroom and Kitchen
Paneles de PVC para paredes: baratos y efectivos. Guía de instalación
How to Update Old Tiles Without Removing Them: 99 Ways to Transform Your Bathroom and Kitchen
Paneles de PVC para paredes: baratos y efectivos. Guía de instalación
 Internal Wall Insulation: Materials and Technology
 Bathroom: Tile or Paint. What Will Everyone Face?
 Joint filler for tiles: how to choose the color and apply it correctly
Grout for tiles: how to choose the color and apply it correctly
Waschbare Tapeten für die Küche: Warum ist das die beste Idee für Ihre Renovierung?
Revestimiento de paredes con paneles de MDF: guía de instalación
Comment rénover du vieux carrelage sans le retirer : 99 façons de transformer votre salle de bain et votre cuisine
Joint filler for tiles: how to choose the color and apply it correctly
Grout for tiles: how to choose the color and apply it correctly
Waschbare Tapeten für die Küche: Warum ist das die beste Idee für Ihre Renovierung?
Revestimiento de paredes con paneles de MDF: guía de instalación
Comment rénover du vieux carrelage sans le retirer : 99 façons de transformer votre salle de bain et votre cuisine
 Comment poser du papier peint vinyle sur support papier ?