Dreaming of a luxurious interior reminiscent of ancient palazzos or cozy Mediterranean villas? Venetian plaster is one of the most striking finishing materials, capable of transforming any room, giving it nobility, depth, and a unique charm. Its glossy, marble-like surface captivates and draws the eye. But do we often think about whether it’s possible to create such beauty with our own hands, without involving expensive specialists? Today we will dispel this myth and prove that Venetian plaster is a completely achievable task even for a beginner, if approached with intelligence and expertise. Get ready to dive into the world of exquisite textures and radiant surfaces!
Venetian Plaster: Myth or Reality for Self-Application?
Many, looking at perfectly smooth, shimmering surfaces covered with Venetian plaster, imagine a complex, almost jewelry-like process accessible only to experienced masters. This is a common misconception. Indeed, achieving the most authentic, professional result requires practice and certain skills, but the basics of application are quite accessible for self-learning. Modern Venetian plaster formulations have become more technological and user-friendly, which significantly simplifies the process. The main thing is proper surface preparation, choosing quality materials, and carefully following the application technology. It’s like baking: with a recipe and love, even the most complex cakes turn out wonderful. Your home is your fortress and your canvas, and creating Venetian finishes with your own hands can be an incredibly fascinating and rewarding process that will bring you immense satisfaction from the result. You will be able to be proud that you created this beauty yourself, putting a piece of your soul into it.
Photo Gallery: 15 Interior Ideas with Venetian Plaster That Will Inspire You
Before you start mastering the technique, let’s get inspired! Venetian plaster is an incredibly versatile material that can be used in a wide variety of styles and rooms. From classic interiors to modern minimalism, from elegant living rooms to luxurious bedrooms – its possibilities are endless. Here are just a few ideas that demonstrate the beauty and versatility of this finish:
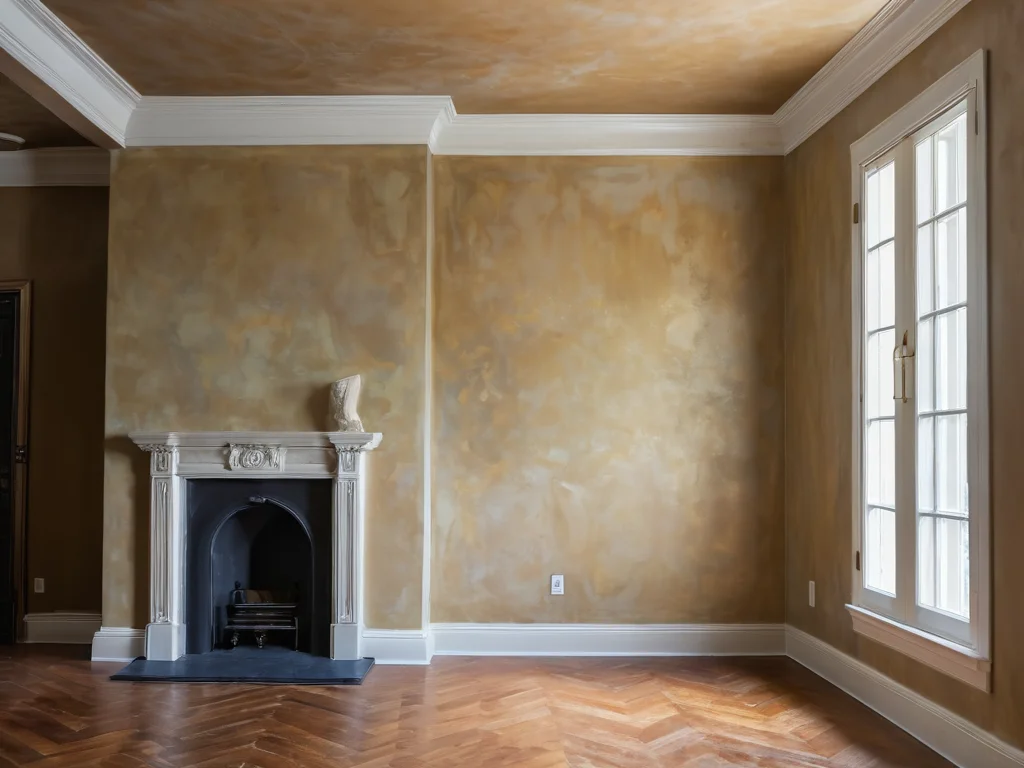
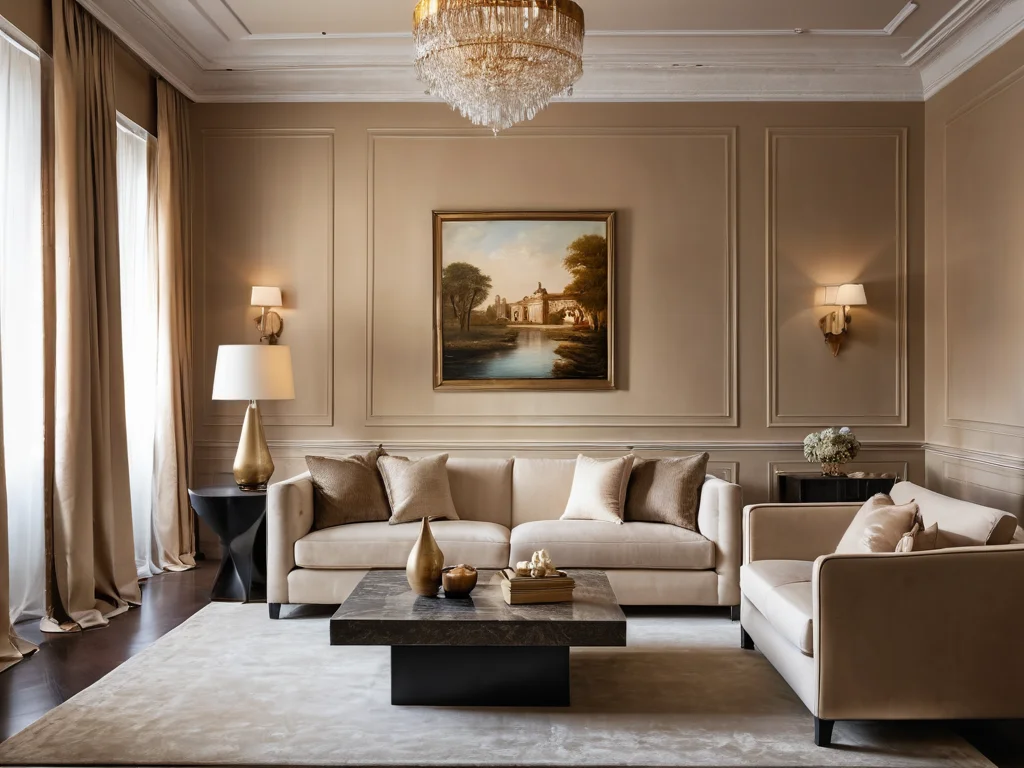
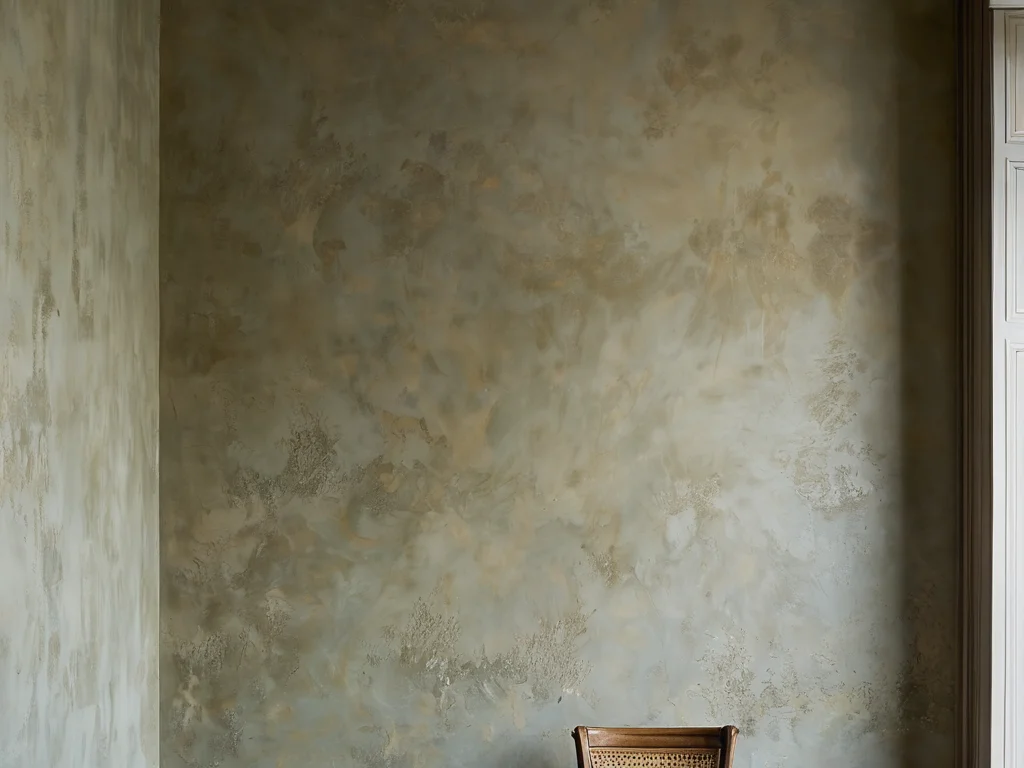
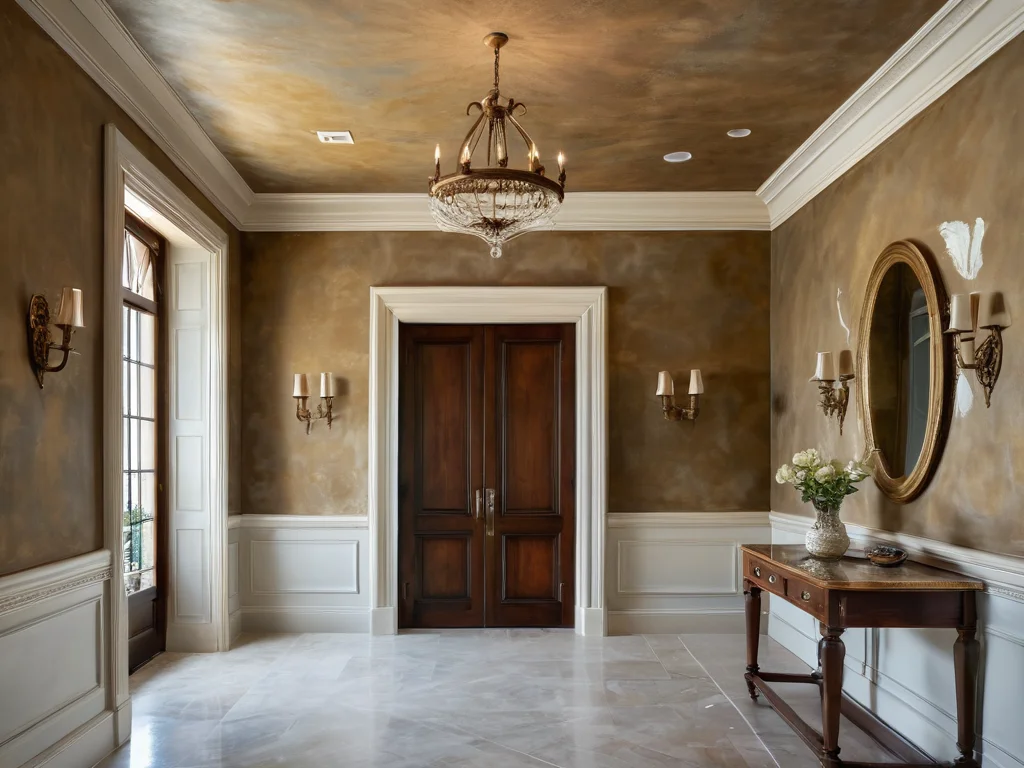
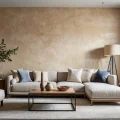
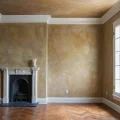
- Classic Elegance: A smooth, glossy surface in warm beige, cream, or gold tones will perfectly complement a living room with stucco molding and antique furniture.
- Modern Chic: Deep gray, graphite, or even black shades with a slight shimmer will create an impressive accent in a minimalist interior or study.
- Luxurious Bedroom: Delicate peach, powder, or light gray tones with a subtle pearlescent sheen will add coziness and romance to a bedroom.
- Marble Imitation: Using special application techniques, you can achieve an almost complete imitation of natural marble, creating unique patterns and veins.
- Accent Wall: Highlight one wall in the room – for example, behind the headboard or in the dining area – and it will become a true work of art.
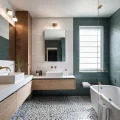
- Bathroom: Many modern Venetian plaster formulations have increased moisture resistance, making them an excellent choice for bathrooms, creating a spa-like effect.
- Children’s Room: Choose light, neutral shades that will create a calm atmosphere. Venetian plaster can be used on one wall as a decorative element.
- Kitchen: The working area in the kitchen, finished with Venetian plaster (especially its moisture-resistant variations), will look stylish and last a long time.
- Hallway: Create a striking first impression by finishing the hallway walls with Venetian plaster.
- Study: The noble shades and texture of Venetian plaster will help create an atmosphere of focus and respectability.
- Travertine Effect: Imitation of natural travertine stone with its characteristic pores and layered structure.
- Old Town Effect: Imitation of walls aged by time with slight roughness and layering.
- Brown and Terracotta Tones: Will create a warm, cozy, and slightly ethnic atmosphere.
- Blue and Turquoise Tones: Will bring freshness and a sense of coolness to the interior, reminiscent of the sea.
- Contrasting Combinations: Using two or more colors to create a more complex and dynamic pattern.
These examples are just a fraction of what Venetian plaster can do. Try, experiment, and find your perfect combinations!
How Venetian Plaster Differs from Ordinary Plaster: Analyzing Compositions and Effects
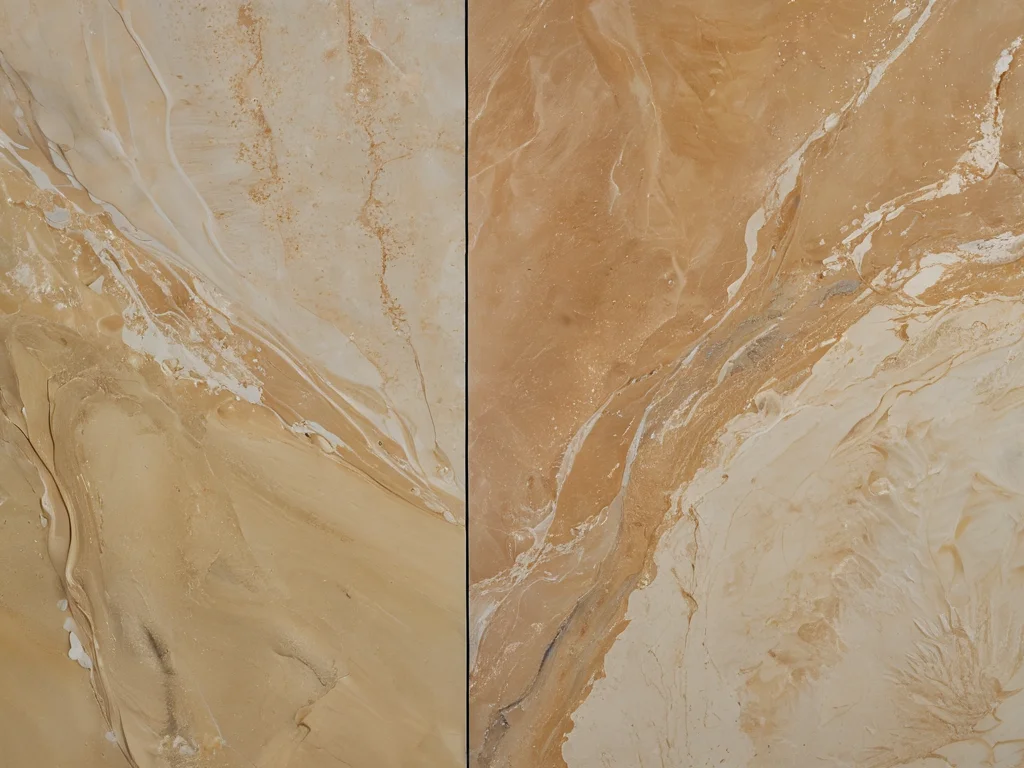
To understand how to work with Venetian plaster, it’s important to recognize its difference from familiar paints and ordinary decorative plasters. The main difference lies in the composition and, consequently, in the achieved effect. Ordinary plaster, whether cement, gypsum, or acrylic, is usually intended for leveling walls, creating a base coat, or simple textures (e.g., “bark beetle” or “fur coat”). It can be painted in any color, but a flat, uniform surface is its limit. Venetian plaster, on the other hand, is a material that, thanks to its composition and application technique, allows for the imitation of natural stone, most often marble, but also granite, malachite, onyx, and other semi-precious materials. Its secret lies in layering and a special polishing technology.
Key Differences:
- Composition: Classic Venetian plaster consists of slaked lime, marble chips (of various fractions), and natural pigments. Modern analogues may have acrylic or silicone binders as a base, making them more elastic and easier to care for, but the application technology remains similar. Ordinary plasters are usually cement, gypsum, or acrylic mixtures with sand, mineral fillers, and additives.
- Effect: Venetian plaster creates an effect of depth, volume, and noble shine, imitating natural stone. It has a characteristic multilayered structure where each layer shines through the previous one, creating the illusion of natural rock. Ordinary plasters provide a flat, textured, or smooth surface, but without the depth and shimmer inherent in “Venetian” plaster.
- Application Technique: Applying Venetian plaster is a multilayered process that requires the use of special tools (trowels, spatulas) and specific movements (light, chaotic strokes, blending). Ordinary plasters are more often applied in one to two layers using spatulas, rollers, or sprayers.
- Polishing: The final stage of applying Venetian plaster is polishing. Special polishing trowels, and sometimes wax, are used for this, which gives the surface that mirror-like shine and protects it. Ordinary plasters are generally not polished to this extent.
- Cost: Materials for Venetian plaster are typically more expensive than ordinary mixtures due to the complexity of the composition and unique properties.
Understanding these differences will help you choose the right material and assess the laboriousness of the process to make an informed decision about DIY application.
Choosing Venetian Plaster for Walls: What to Consider Before Buying?
The decorative coatings market offers a huge variety of “Venetian” plasters. To avoid making a mistake in your choice and get the exact result you dream of, pay attention to several key points. Not every plaster with a shine is real “Venetian.”
Key Selection Criteria:
- Composition: Carefully study the label. Natural (based on slaked lime and marble chips) or modern (acrylic, silicone, silicate)? Natural plaster is more “breathable,” environmentally friendly, and provides a unique, deep effect. Modern formulations are easier to care for, more resistant to moisture and mechanical damage, but may look less authentic. For bathrooms or kitchens, it’s better to choose moisture-resistant acrylic or silicate options.
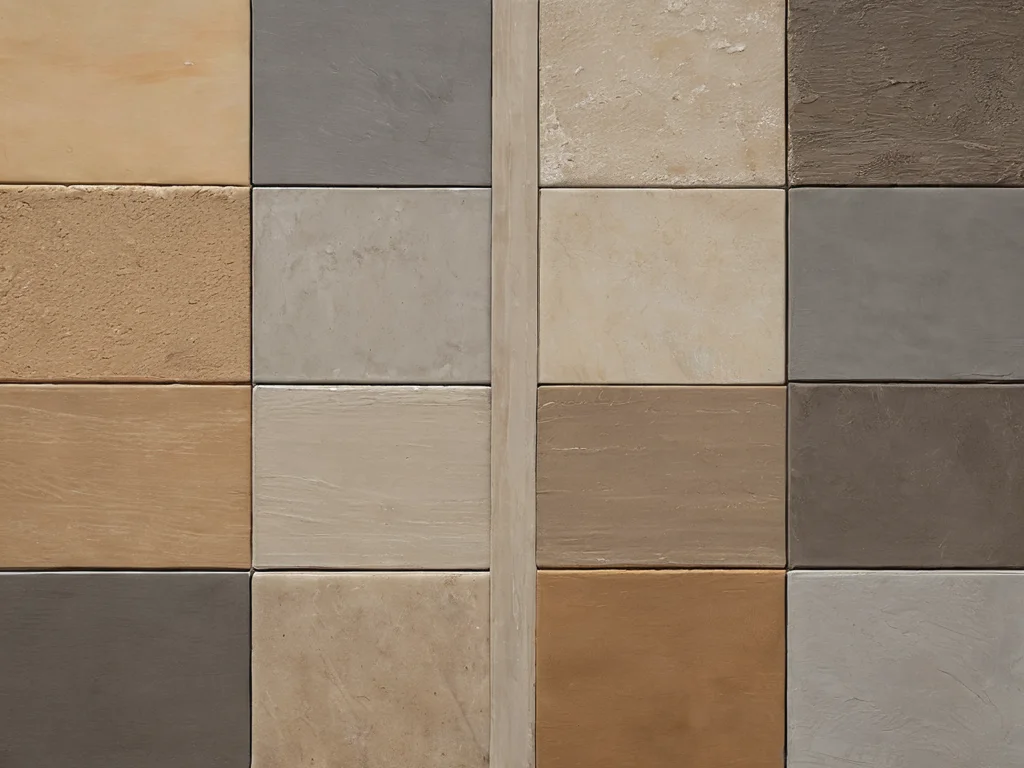
- Marble Chip Fraction: The size of the marble chip particles determines the texture of the finished coating. Fine fraction (dust) gives a smooth, mirror-like surface. Medium fraction creates a slight roughness and imitation of natural stone with visible veins. Coarse fraction is used less often and requires more specific application techniques.
- Color: “Venetian” plaster can be white (for subsequent tinting) or already colored. Manufacturers offer a wide palette of shades – from classic beige and white to bright and saturated. Keep in mind that the color on the sample may differ slightly from the color on the wall after drying and polishing. It’s best to buy a sample and test it on a small section of the wall.
- Surface Type: There are “Venetian” plasters that form a glossy, almost mirror-like surface after drying, and there are those that create a matte or satin texture, imitating velvet or natural stone with a calmer sheen.
- Manufacturer: Prefer trusted brands with a good reputation. This guarantees the quality of the material and the stability of its properties. Study reviews of specific manufacturers and their products.
- Completeness: Some manufacturers sell “Venetian” plaster as a set with finishing wax or protective varnish. This is convenient as it ensures material compatibility and simplifies the finishing process.
- Cost: The price can vary depending on the composition, brand, and package size. Don’t skimp on quality, but don’t overpay for the brand if there are worthy alternatives.
Remember that even the most expensive and high-quality material will not give the desired effect if applied incorrectly. Careful selection is only half the battle.
Preparing Walls for Venetian Plaster: A Detailed Surface Preparation Guide
The success of applying Venetian plaster depends 80% on the quality of the substrate preparation. This is the most important stage, which cannot be skipped or done carelessly. If the surface is uneven, cracked, dusty, or has old paint, even the most skillful application technique will not hide these defects; on the contrary, it will emphasize them. Remember that “Venetian” plaster is a thin-layer coating, and all irregularities will be visible.
Step-by-Step Wall Preparation Instructions:
- Cleaning: Completely clean the walls of old wallpaper, paint, dust, grease stains, and dirt. Use spatulas, scrapers, and damp sponges. If there are signs of mold or mildew on the walls, be sure to treat them with special antiseptic agents.
- Leveling: The walls must be perfectly even and smooth. If there are significant unevennesses, cracks, or holes, they must be puttied. Use a starting putty, carefully filling all defects. After the putty dries, sand these areas with fine-grit sandpaper or a sanding screen until perfectly smooth.
- Priming: After leveling and cleaning, the walls must be primed. Primer performs several important functions: it strengthens the substrate, improves adhesion (grip) of the plaster to the wall, reduces the absorbency of the surface, and prevents staining. Choose a deep-penetrating primer designed for mineral substrates. For a better effect, especially if you plan to use colored plaster, it is recommended to use a primer tinted in a color close to the main color of the plaster. Apply the primer with a roller or brush in 1-2 coats, allowing each coat to dry thoroughly.
- Finishing Putty (if necessary): To achieve perfect smoothness, especially if you plan to imitate marble with a mirror finish, the walls can be coated with a thin layer of finishing polishing putty. After drying, this surface also needs to be thoroughly sanded to perfect smoothness.
- Dust Removal: After sanding, thoroughly remove all dust from the surface with a vacuum cleaner, and then wipe the walls with a slightly damp, clean cloth. The surface must be absolutely clean and dry before applying the plaster.
Quality preparation is the key to ensuring that your “Venetian” plaster lays evenly, without defects, and pleases you for many years. Don’t save time on this stage!
Applying Venetian Plaster Yourself: A Step-by-Step Guide from A to Z
So, the walls are prepared, the material is chosen. It’s time to begin the magic of transforming ordinary walls into a work of art. The process of applying Venetian plaster requires patience, accuracy, and the right tools. But don’t be intimidated; by following this step-by-step guide, you’ll succeed!
Required Tools and Materials:
- Venetian plaster (main color)
- Finishing wax or varnish (optional, for shine and protection)
- Primer
- Trowels (stainless steel, various shapes and sizes)
- Spatulas (stainless steel, narrow and wide)
- Painter’s tape
- Protective film or paper
- Clean soft cloths (cotton, microfiber)
- Buckets for mixing
- Construction mixer (if plaster is dry)
- Fine-grit sandpaper (for sanding between coats)
Step-by-Step Application Process:
- Prepare the Workspace: Tape off baseboards, trim, outlets, and switches with painter’s tape. Cover the floor with protective film or paper.
- Prepare the Mixture: If you have a dry mix, follow the manufacturer’s instructions for preparing the solution. Mix thoroughly until a uniform consistency without lumps is achieved. It is also recommended to mix ready-made mixtures with a mixer at low speed.
- First Coat (Base Coat): Take a small amount of plaster on a clean trowel. Apply a thin, even layer to the wall with light, chaotic movements, making short strokes. Try not to leave visible marks from the trowel. The purpose of this coat is to create a base for subsequent ones. After applying the first coat, let it dry completely (drying time is indicated by the manufacturer, usually 4 to 12 hours).
- Second Coat: After the first coat dries, lightly sand the surface with very fine sandpaper (if necessary) and remove dust. Apply the second coat in the same way, thinly, using shorter and more chaotic strokes. At this stage, you can already start forming the pattern, creating small overlaps of strokes, imitating natural stone veins. Alternate the direction of the strokes.
- Subsequent Coats (3-5): Applying Venetian plaster is typically a multilayered process. The number of coats depends on the desired effect and the manufacturer’s recommendations (usually 3 to 5 coats). Each subsequent coat is applied with thin strokes, slightly overlapping the previous one. It is important to work “wet-on-wet,” trying not to leave clear boundaries between strokes. Hold the tool (trowel) at a sharp angle to the surface.
- Sanding Between Coats (Optional): After each coat dries (except the last one), you can lightly sand with very fine sandpaper (grit 400-600) to remove minor imperfections and create a smoother surface. Be sure to remove dust after each sanding.
- Final Coat and Polishing: The last coat of plaster is applied especially thinly and carefully. After drying (usually after 12-24 hours), the most crucial stage begins – polishing. Take a clean polishing trowel (or a special polishing spatula) and, making strong, energetic, yet careful circular motions, rub the surface. If you are using wax, apply it in a thin layer to the surface with a trowel or soft cloth, and then also polish vigorously to a mirror shine.
Patience and accuracy are your main allies in this process. Don’t rush, and the result will surely please you.
TOP 7 Mistakes When Applying Venetian Plaster and How to Avoid Them
Even when following all instructions, beginners often make typical mistakes that can ruin the entire job. Let’s look at the most common ones so you can avoid them:
- Poor Surface Preparation: As mentioned, this is the most frequent and critical mistake. Unevenness, dust, grease stains – all of this will be visible on the finished smooth surface. Solution: Pay maximum attention to wall preparation, don’t skimp on primer and sanding.
- Applying Too Thick a Layer: “Venetian” plaster is a thin-layer coating. Too thick a layer will lead to cracks, uneven drying, and difficulty in polishing. Solution: Apply the plaster in very thin layers, using a minimal amount of material on the trowel.
- Using Unsuitable Tools: Ordinary spatulas made of regular steel can leave scratches and dark marks on the surface. Solution: Use only high-quality stainless steel trowels and spatulas with rounded corners.
- Too Infrequent Layer Application: If you make long breaks between applying layers, the surface may dry out, making it difficult to create smooth transitions and “depth” of color. Solution: Try to work “wet-on-wet,” observing the manufacturer’s recommendations for drying time between layers.
- Insufficient Polishing: Lack of or weak polishing is the main reason why “Venetian” plaster looks dull and unexpressive. Solution: Polish thoroughly, with pressure, using a clean trowel or polishing spatula. If using wax, apply and polish it correctly.
- Working in Unfavorable Conditions: Too high or low temperature, drafts, high humidity – all of these can negatively affect the drying process and the quality of the coating. Solution: Ensure comfortable conditions in the room: temperature 18-25°C, no drafts.
- Incorrect Color Mixing: If you tint the plaster yourself, it’s important to achieve perfect color uniformity. Insufficient mixing will lead to spots and streaks. Solution: Thoroughly mix the pigment with the base, using a construction mixer if necessary. Make a test swatch.
By avoiding these common mistakes, you will significantly increase your chances of achieving a flawless result.
Master Secrets: Professional Tips for Creating the Perfect Venetian Finish
Want your “Venetian” plaster to look like a true master worked on it? Then take into account these valuable tips from professionals that will help you achieve the best result:
- Practice is Key to Success: Before tackling the walls, practice on small sections of drywall or plywood. Try different application techniques, learn to feel the material and the tool.
- “Marble” and “Depth”: To achieve the effect of natural marble with veins, use two shades of plaster (main and darker or lighter). Apply them alternately, creating “transitions” and “inclusions.”
- Final Polishing: Don’t skimp on polishing time. It is polishing that gives “Venetian” plaster its unique mirror shine. Polish until the surface is smooth to the touch and begins to reflect light well.
- Protective Layer: For additional protection and to enhance shine, use special wax for “Venetian” plaster. Apply it in a thin layer and polish to a shine. Wax also makes the surface more moisture-resistant and easier to care for.
- Lighting: Consider how light will fall on the walls. “Venetian” plaster plays beautifully with light, emphasizing texture and volume. Think about the placement of lighting fixtures to showcase your work in the best possible way.
- Tool Care: Always keep trowels and spatulas clean. Wipe them free of plaster residue immediately after use.
- Color Uniformity: If you are using multiple cans from the same batch, mix their contents together to avoid slight shade differences.
- Working with Corners: Corners are the most challenging areas. Use narrow trowels and spatulas, apply the material carefully, trying to make the transitions as smooth as possible.
- “Aged” Effect: To create an antique wall effect, use special aging techniques, such as light sanding followed by treatment with a patina or dark-colored wax.
- Get Inspired: Study the works of masters, look at photo collections, visit exhibitions. The more beautiful examples you see, the better your own taste and understanding of the material will be.
Creating Venetian plaster with your own hands is a fascinating journey into the world of decor. A little practice, patience, and these professional secrets will help you transform your home, filling it with sophistication and a unique style. Good luck with your creative endeavors!
Рекомендуем:
 Bark Beetle Decorative Plaster: Application Technology
 How to Update Old Tiles Without Removing Them: 99 Ways to Transform Your Bathroom and Kitchen
 How to Make a Brick Wall in an Interior (Imitation)
 Wall Cladding with Wood Paneling: A Step-by-Step Guide
 Liquid Wallpaper: Pros, Cons, and Application Technology
 Washable wallpaper for the kitchen: why it’s the best idea for your renovation?
 DIY Decorative Stone Wall Installation: Your Guide to Home Transformation
 Bathroom: Tile or Paint. What Will Everyone Face?
 How to Hang Vinyl Wallpaper on a Paper Backing?
 Joint filler for tiles: how to choose the color and apply it correctly
Grout for tiles: how to choose the color and apply it correctly
Joint filler for tiles: how to choose the color and apply it correctly
Grout for tiles: how to choose the color and apply it correctly
 New wallpaper over old: is it possible and when should you try it?
 Internal Wall Insulation: Materials and Technology
 MDF Panel Wall Finishing: Installation Guide
 What to do if mold or mildew appears on the walls?
 How to Hang Wallpaper Without Seams: The Technique for Perfect Joints
 PVC Wall Panels: Cheap and Cheerful. Installation Guide
 How to Tile Walls in a Bathroom: A Detailed Guide
 Enduit vénitien fait maison : est-ce possible ?
 How to Wallpaper Behind a Radiator