Greetings, dear readers of design-foto.ru! Today we will delve into the world of textured surfaces and talk about a true hit – “Bark Beetle” decorative plaster. If you are looking for a way to give your interior uniqueness, style, and practicality at the same time, then “Bark Beetle” is exactly what you need. This textured plaster not only looks impressive but also has a number of advantages that make it the number one choice for many. In this article, we will cover all the nuances: from choosing the material to the subtleties of application, so you can create beauty with your own hands.
“Bark Beetle” Decorative Plaster: Why It’s the Season’s Hit for Your Walls?
“Bark Beetle” is a unique mineral or acrylic plaster with a special filler component, usually marble or quartz chips. It is these chips, interacting with the tool during application, that create the characteristic pattern resembling the tracks of a bark beetle, hence the name. But why is it so popular? Let’s find out.
- Unique Texture and Appearance: “Bark Beetle” creates a unique play of light and shadow on the walls, giving the interior depth and volume. This effect can be varied by choosing different grain sizes of the filler and different application techniques.
- Practicality and Durability: Thanks to its strength and resistance to mechanical damage, “Bark Beetle” is an ideal choice for high-traffic areas such as corridors, hallways, or children’s rooms. It is resistant to abrasion and easy to clean, which significantly simplifies wall maintenance.
- Environmental Friendliness: Most “Bark Beetle” formulations are made from natural components, making them safe for health and the environment. This is especially important for those who care about a healthy microclimate in their home.
- Wide Range of Applications: “Bark Beetle” is suitable for finishing both interior and exterior walls. It can be applied to various surfaces: concrete, drywall, brick, cement-sand, and lime plasters.
- Coloring Possibilities: The plaster can be colored in any shade using special pigment pastes. This opens up limitless possibilities for creating individual interior solutions, from delicate pastel shades to bright accents.
- Hides Minor Defects: The dense granular structure of “Bark Beetle” can hide small irregularities and cracks on the surface, which can save you from the need for perfect wall leveling, reducing preparation time and costs.
Taken together, these qualities make “Bark Beetle” a versatile and sought-after material that can transform any space, giving it elegance and a modern look.
“Bark Beetle” DIY: 5 Stylish Ideas for Inspiration
“Bark Beetle” is not just a texture; it’s a canvas for your creativity. With its help, you can realize the boldest design ideas. Let’s look at a few examples of how this plaster can transform your home:
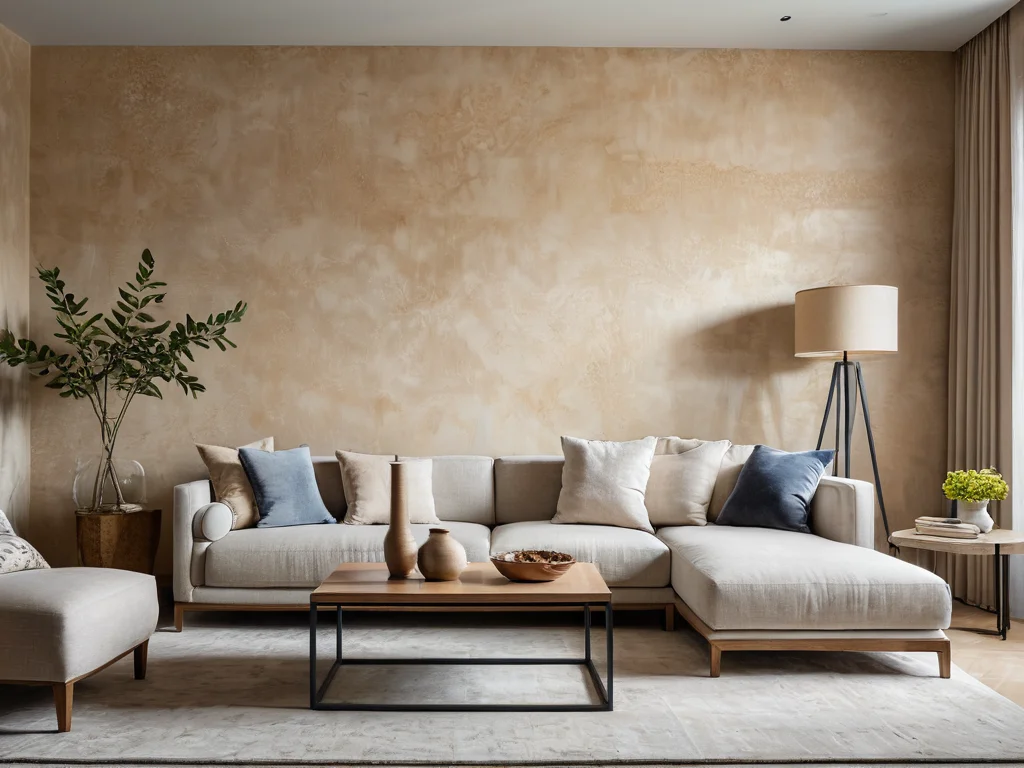
- Minimalist Chic: For modern interiors in minimalist or high-tech styles, walls covered with “Bark Beetle” in neutral shades like white, gray, or beige are perfect. Vertical or horizontal stripes created by the direction of the tool’s movement will add dynamism without overloading the space. Such a finish will be an excellent background for laconic furniture and understated decor.
- Mediterranean Coziness: “Bark Beetle” with its natural texture fits perfectly into the Mediterranean style. Choose warm shades – sand, terracotta, olive. Application with chaotic, smooth movements will create the feeling of an ancient wall weathered by the sea breeze. This finish combines beautifully with natural materials: wood, stone, linen fabrics.
- Loft and Industrial Motifs: “Bark Beetle” is indispensable for loft-style interiors. Gray, graphite, or even black shades of plaster, applied with rough, directional grooves, imitate concrete surfaces or unfinished walls. You can create an accent wall behind the headboard or in the living area, emphasizing the brutality and authenticity of the space.
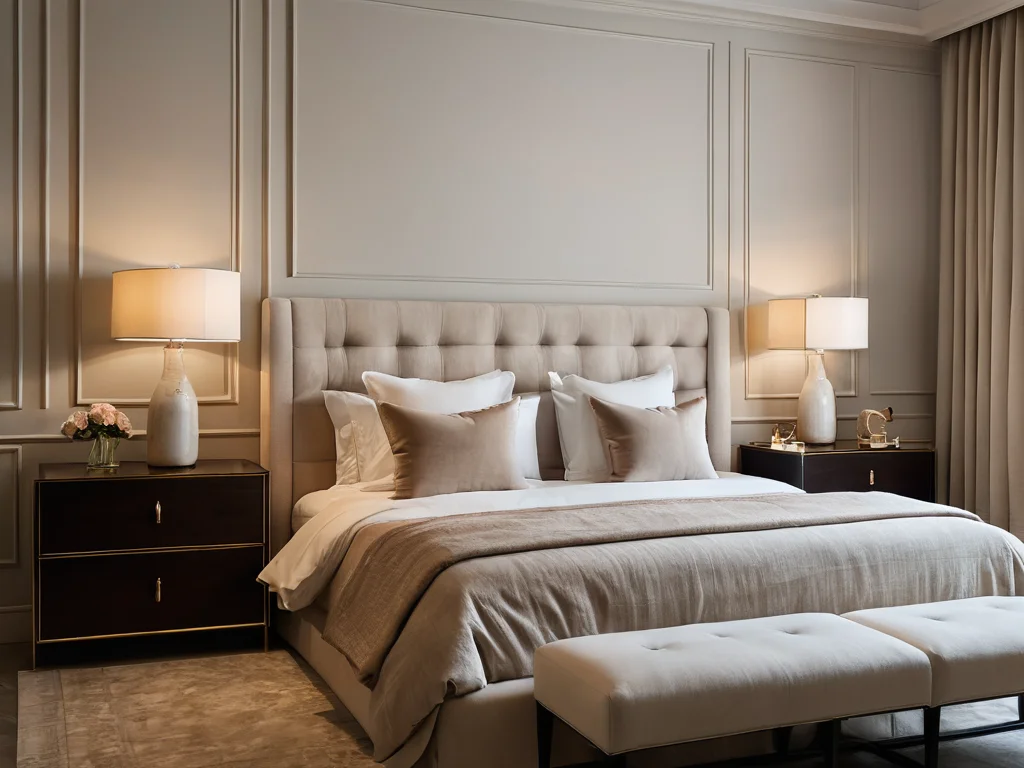
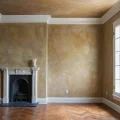
- Classic Elegance: Even in classic interiors, “Bark Beetle” can find its place. Choose delicate, light shades – ivory, cream, light gray. Delicate, even grooves made in one direction will create the effect of noble relief finishing, reminiscent of expensive wallpaper or fabrics. This will add sophistication and refinement to the walls.
- Bright Accent: Don’t be afraid to use “Bark Beetle” to create bright color accents. For example, in a child’s room, you can decorate one wall in a vibrant color – turquoise, sunny yellow, or coral. The “Bark Beetle” texture will help soften the brightness of the color, making it deeper and more interesting.
Remember that the result largely depends on the application technique and color. Experiment, and you will surely find the perfect solution for your home.
Which “Bark Beetle” Decorative Plaster to Choose: An Overview of Popular Types and Textures
The decorative plaster market offers many “Bark Beetle” options, and the choice can seem difficult. To make your task easier, let’s look at the main types and what to pay attention to.
By Binder Type:
- Mineral (cement or lime-based): This is the most environmentally friendly and vapor-permeable option. Such plasters are ideal for bathrooms, kitchens, and other humid rooms, as well as for building facades. They are quite durable and resistant to temperature fluctuations. The downside is that they are harder to color, and they require a final protective varnish or paint coating.
- Acrylic: More elastic and plastic, acrylic “Bark Beetle” plasters are easier to apply and better hide small cracks in the substrate. They have good moisture resistance and are available in a huge palette of colors, as they are easily colored. However, they are less vapor-permeable, so they are not always recommended for humid rooms or facades where wall ventilation is important.
- Silicate: Characterized by high vapor permeability, resistance to UV radiation, and dirt. This is an excellent choice for facades and rooms where durability and fade resistance are important. Requires special primer.
- Silicone: The most elastic and durable. They form a strong, washable coating that is resistant to all weather conditions. High vapor permeability and dirt resistance make them an ideal option for any surface, including facades. However, they are also the most expensive.
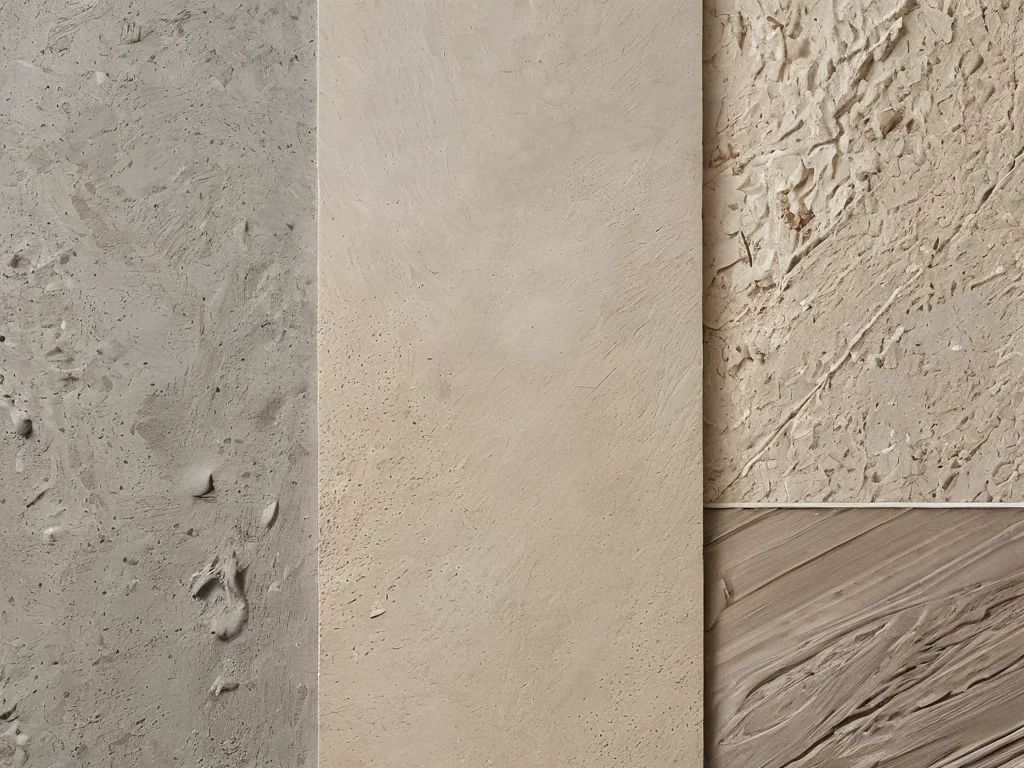
By Filler Grain Size:
- Fine Grain (up to 1 mm): Allows for smoother, more delicate patterns. Ideal for small rooms where you don’t want to overload the space with texture, as well as for ceilings.
- Medium Grain (1.5-2 mm): The most versatile option, allowing for a pronounced but not overly aggressive relief. Ideal for most interior solutions, from classic to modern.
- Coarse Grain (2.5-3 mm and more): Creates a clearly defined, textured relief. Ideal for accent walls, spacious rooms, and creating imitations of natural materials like stone or concrete. Requires more material consumption and some skill in application.
What Else to Consider When Choosing:
- Manufacturer: Choose trusted manufacturers with a good reputation. The quality of raw materials and adherence to production technologies directly affect the final result.
- Consumption: The manufacturer always indicates the approximate material consumption per square meter. Consider this when calculating the required amount of plaster, especially if you choose “Bark Beetle” with coarse grain, as consumption will be higher.
- Ready-mix or Dry Mix: Ready-mixes are more convenient to work with as they don’t require mixing but are more expensive. Dry mixes need to be properly diluted with water, which requires some care.
Before purchasing, always study the technical specifications of the material and the manufacturer’s application recommendations.
Step-by-Step Guide: How to Apply “Bark Beetle” to Walls Without Mistakes (Video + Photos)
Applying “Bark Beetle” is a process that can be mastered independently. The main thing is to follow the instructions and be attentive. Below is a detailed step-by-step guide that will help you achieve a perfect result.
Step 1: Surface Preparation
This is perhaps the most important step, on which the durability and appearance of your coating depend. We will discuss preparation in detail below, but for now, just briefly: the walls must be clean, dry, strong, and primed with a special primer for decorative plasters.
Step 2: Mixture Preparation
If you have purchased a dry mix, carefully read the instructions on the packaging. Usually, you need to gradually pour the dry powder into a container with clean room-temperature water, constantly mixing with a construction mixer at low speeds. It is important to achieve a uniform, paste-like consistency without lumps. After the first mixing, the mixture needs to “mature” – let it sit for 5-10 minutes, then mix thoroughly again. If you are using a ready-mix, simply stir it before starting work.
Step 3: Priming
Before applying decorative plaster, the walls must be primed. Use a special quartz primer that contains fine quartz sand. This improves the adhesion (grip) of the plaster to the surface and creates a uniform base for application, preventing staining. The primer is applied with a roller or brush and allowed to dry completely (usually 12-24 hours).
Step 4: Plaster Application
For applying “Bark Beetle”, you will need:
- Stainless steel trowel (a plastic trowel may be less durable, but will also work).
- Plastic or metal spatula.
- Spatulas of various sizes.
- Container for plaster.
- Gloves, safety glasses.
Application Technique:
- Applying the First Layer (Primer Layer): Take a small amount of plaster on the spatula and spread it evenly over the wall using the trowel. Holding the trowel at an angle of approximately 45 degrees to the surface, apply a thin, even layer, overlapping previous strokes. The goal of this layer is to create a smooth coating without gaps, which will serve as the basis for forming the pattern. Work in sections, trying not to leave obvious seams.
- Creating Relief (Forming the Pattern): This is where the most interesting part begins – creating the characteristic grooves. “Bark Beetle” is applied using the “wet-on-wet” technique, meaning the next layer is applied to the previous one before it dries. After you have evenly spread the plaster with the trowel, start forming the pattern. Take a clean trowel, hold it at a 90-degree angle to the wall, and with light, even movements, without strong pressure, move it over the surface. This movement presses the filler (chips) into the plaster layer, leaving grooves.
Important:
- Direction of Grooves: The “Bark Beetle” pattern is formed by the direction of the trowel’s movement. You can make the grooves horizontal, vertical, diagonal, or chaotic. The overall appearance of the coating depends on this. Try to maintain a consistent direction of trowel movement within one wall or element for a harmonious pattern.
- Even Pressure: Too much pressure can cause the filler to be pressed too deeply, resulting in uneven relief. Light, confident movements are the key to success.
- Working “From Corner to Corner”: Try to work on one wall continuously, from one corner to another, to avoid visible seams. If you need to take a break, do so at a natural indentation or a break line.
- Layer Thickness: The thickness of the filler (chips) determines the thickness of the plaster layer. Ensure that the layer thickness is uniform across the entire surface.
Step 5: Drying and Finishing
After application, the “Bark Beetle” must dry. Drying time is usually 24-48 hours, depending on the temperature and humidity in the room. After complete drying, the plaster can be painted. Acrylic, latex, or silicone paints are often used for “Bark Beetle”. Painting can be done with a roller, brush, or spray gun. Often, to enhance the “Bark Beetle” effect, two-tone painting is used, where the first coat of paint is applied to the entire surface, and the second, contrasting or lighter coat, is applied with a dry brush or sponge, collecting paint from the raised parts of the relief.
Preparing Walls for “Bark Beetle”: How to Achieve a Perfect Result?
The quality of wall preparation is 80% of success when working with any decorative plaster, and “Bark Beetle” is no exception. Proper preparation ensures the durability of the coating, its even appearance, and facilitates the application process.
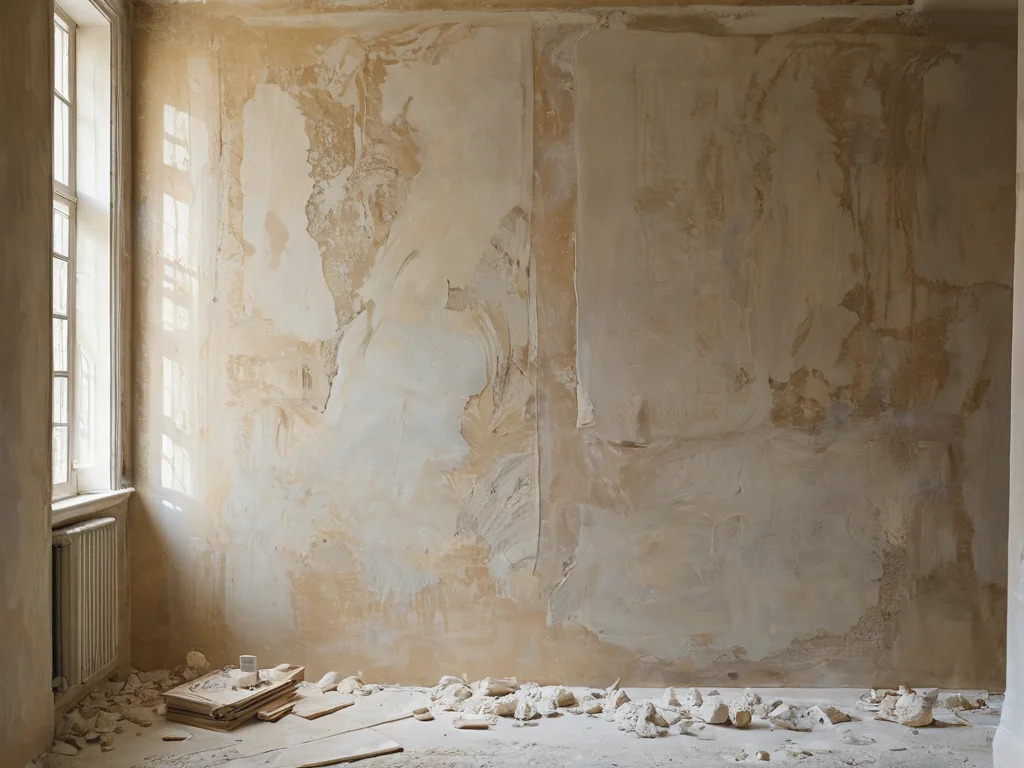
Step 1: Surface Cleaning
- Removing Old Coatings: Old wallpaper, paint, whitewash, and oil stains must be completely removed. Use spatulas, scrapers, and if necessary, special removers.
- Cleaning Dust and Dirt: Thoroughly vacuum or wipe the walls with a damp cloth to remove all dust and dirt.
Step 2: Leveling (If Necessary)
- Addressing Large Defects: If there are deep cracks, holes, or delaminations on the walls, they must be puttied. Use gypsum or cement putty for this, depending on the type of substrate.
- Sanding: After the putty dries, sand the puttied areas with sandpaper until smooth.
- Minor Irregularities: “Bark Beetle” with coarse grain can hide small irregularities (up to 1-2 mm). However, if you have the opportunity, it is better to achieve a smoother base so that the plaster pattern lies evenly.
Step 3: Priming
- Purpose of Primer: Primer performs several important functions: it reduces the absorbency of the substrate, improves adhesion of subsequent layers, strengthens the surface, and prevents staining.
- Type of Primer: For “Bark Beetle”, it is essential to use a special quartz primer. It contains quartz sand, which creates a rough surface ideal for applying decorative plasters. Ordinary primers can lead to “Bark Beetle” not adhering well or appearing patchy.
- Application: Apply the primer evenly with a roller or brush. Ensure the entire surface is covered without gaps.
- Drying Time: Allow the primer to dry completely. This usually takes from 12 to 24 hours, depending on the type of primer and room conditions (temperature, humidity). Do not start applying plaster to a wet surface.
Important Points During Preparation:
- Drywall: If you are working with drywall, be sure to putty the seams between the sheets and the screw heads, and prime the entire surface.
- New Buildings: In new buildings, walls may settle, leading to microcracks. “Bark Beetle” with an acrylic base and small grain size masks these defects well.
- Humid Rooms: For bathrooms and kitchens, in addition to quartz primer, it is recommended to use moisture-resistant putty and possibly a moisture-resistant varnish finish.
Thorough preparation is the key to ensuring your “Bark Beetle” looks flawless and lasts for many years.
Main Mistakes When Applying “Bark Beetle” and How to Avoid Them?
Even the most beautiful material can be ruined by improper application. “Bark Beetle” is a plaster that requires a specific technique, and even experienced craftsmen sometimes make mistakes. Let’s look at the most common ones so you can avoid them.
- Mistake 1: Improper Surface Preparation.
- Problem: Applying “Bark Beetle” to an unprepared, dusty, greasy, or unprimed surface.
- Consequences: Poor adhesion, plaster peeling, stains, uneven color after painting.
- Solution: Strictly follow the preparation steps: cleaning, leveling (if necessary), using quartz primer, and allowing it to dry completely.
- Mistake 2: Too Thick a Layer.
- Problem: Applying plaster in a layer exceeding the size of the filler grain.
- Consequences: Difficulty in forming the pattern, “smearing” the texture, increased material consumption, possible peeling due to excess weight.
- Solution: Apply the plaster in a layer equal to the grain thickness. The trowel should be parallel to the wall, spreading the material evenly.
- Mistake 3: Uneven or Too Strong Pressure of the Trowel When Forming the Pattern.
- Problem: Grooves are deep and frequent in some places, and indistinct or absent elsewhere.
- Consequences: Messy, “torn” pattern, loss of aesthetics.
- Solution: Use light, even movements. Hold the trowel at a 90-degree angle to the wall. Practice on a small area to feel the right pressure.
- Mistake 4: Different Directions of Grooves on the Same Plane.
- Problem: Chaotic trowel movements, resulting in grooves going in different directions.
- Consequences: Visual chaos, lack of harmony in the pattern.
- Solution: Before starting work, determine the desired direction of the pattern (vertical, horizontal, diagonal) and try to adhere to it on the entire wall.
- Mistake 5: Working “Dry” or “Wet” with Interruptions.
- Problem: Applying a new layer to a partially dried previous one, or interrupting work halfway and then resuming on an already started wet area.
- Consequences: Formation of obvious seams, “spots” on the wall, loss of pattern integrity.
- Solution: Work “wet-on-wet”. If you need to take a break, do so at a natural indentation in the wall (e.g., a corner of the room), and when resuming work, start with a clean slate.
- Mistake 6: Using Inappropriate Tools.
- Problem: Using dirty or rusty trowels, tools with sharp edges.
- Consequences: The pattern turns out dirty, uneven, with unwanted scratches.
- Solution: Use only clean tools made of stainless steel or high-quality plastic.
- Mistake 7: Incorrect Painting.
- Problem: Using the wrong paint, too thick a coat of paint, covering all the recesses.
- Consequences: Loss of relief, “washed-out” appearance, rapid wear.
- Solution: Use acrylic or latex paints. For two-tone painting, use a dry brush or sponge so that the paint only adheres to the raised parts of the relief.
By avoiding these common mistakes, you can independently create an impressive and durable “Bark Beetle” coating.
Master Secrets: 7 Professional Tips for Working with “Bark Beetle”
Want to achieve a truly professional result, like in glossy magazine pages? We share the secrets that experienced masters use when working with “Bark Beetle”.
- Secret 1: Test Area. Before tackling the main area, be sure to create a test area on a small, inconspicuous part of the wall (e.g., behind furniture or in a corner). This will allow you to assess how the plaster applies, what pattern is achieved with different trowel movements, and to adjust the technique if necessary. It will also help you understand how the material behaves in your specific case.
- Secret 2: Work as a Team. If the area is large, get a helper. One person can prepare and supply the plaster while the other applies it to the wall. This will significantly speed up the process and allow you to work “wet-on-wet” without interruptions, ensuring an even coating without seams.
- Secret 3: Vary the Direction of Grooves. Although it’s best to stick to one direction on a single wall, within a room or apartment, you can create different patterns. For example, make vertical grooves on one wall, horizontal on another, and diagonal on a third. This will add dynamism and visually correct the proportions of the room.
- Secret 4: Use “Two-Tone” Painting. This is one of the most impressive techniques. After the plaster dries, cover it with a base color (most often light). When the paint has slightly dried (but not completely!), take a slightly damp dry brush or sponge and gently go over the raised parts of the relief. The paint will only remain on the grooves, and the recesses will remain clean or show the base color. This creates an incredibly deep and expressive effect.
- Secret 5: Don’t Be Afraid to Experiment with Tools. In addition to the standard trowel, you can use spatulas of different shapes, sponges, and stiff-bristled brushes to create unique patterns. Each tool will leave its own unique mark. For example, a spatula can create smoother, wavy lines.
- Secret 6: Create “Borders” for the Pattern. If you want the pattern on different walls to differ, or plan to combine “Bark Beetle” with other materials, create clear borders. To do this, use masking tape along the edge of the future area before applying the plaster. After application and pattern formation, the tape is carefully removed, leaving a straight line.
- Secret 7: Proper Tool Care. Immediately after finishing work, thoroughly wash all tools with water. Dried plaster is very difficult to remove and can ruin your trowels and spatulas. Clean tools are the key to successful future work.
By applying these professional tricks, you can not only avoid mistakes but also create a truly unique and stylish coating.
“Bark Beetle” in the Interior: Combining with Furniture, Decor, and Other Materials
“Bark Beetle” is a self-sufficient texture that can become the central element of an interior. However, to achieve a harmonious and cohesive look, it is important to combine it correctly with other elements of the space. Let’s figure out how to do this.
Combining “Bark Beetle” with Furniture:
- Minimalism and Modern Style: For such interiors, choose “Bark Beetle” in neutral, calm tones. It will serve as an ideal background for laconic furniture made of natural materials – wood, metal, glass. Smooth furniture facades will contrast with the textured walls, creating an interesting play of textures.
- Classic and Neoclassical: Here, “Bark Beetle” in light, pastel shades with even, unobtrusive grooves combines perfectly with elegant solid wood furniture, carved elements, and soft upholstery.
- Loft and Industrial: The rough texture of “Bark Beetle” in gray, graphite shades harmonizes with massive wooden furniture, metal elements (shelving, table legs), and vintage details.
- Country and Provence: “Bark Beetle” in warm, natural shades (sand, terracotta) with a soft, natural texture will perfectly complement distressed wood furniture, wicker furniture, and textiles made from natural fibers.
Combining “Bark Beetle” with Decor:
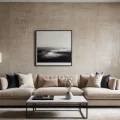
- Paintings and Posters: Textured “Bark Beetle” walls perfectly frame works of art. Choose frames that harmonize with the overall interior style. For minimalism, simple metal or wooden frames are suitable; for classics, more massive and decorative ones.
- Mirrors: A large mirror in an interesting frame against a “Bark Beetle” background can become a real art object, visually expanding the space and adding light.
- Textiles: Choose textiles (curtains, pillows, carpets) with a texture that echoes or contrasts with the walls. For example, velvet, linen, rough cotton, and wool are suitable for “Bark Beetle”.
- Lighting: Properly selected lighting will emphasize the “Bark Beetle” relief. Directed light falling at an angle will create a play of shadows, making the texture even more expressive.
Combining “Bark Beetle” with Other Materials:
- Natural Stone and Brick: “Bark Beetle” harmonizes perfectly with the rough textures of natural stone or decorative brick. Their combination creates a brutal but cozy loft interior.
- Wood: Wooden elements (panels, beams, furniture) always look good with “Bark Beetle”, adding warmth and coziness.
- Metal: Metal inserts, decorative elements, or furniture will emphasize the modern or industrial style of “Bark Beetle”.
- Smooth Surfaces: The contrast between textured “Bark Beetle” walls and smooth glossy surfaces (e.g., kitchen cabinet fronts, glass tabletops) creates an interesting visual effect.
- Wallpaper: “Bark Beetle” can be effectively combined with wallpaper. For example, an accent wall with “Bark Beetle” behind the headboard, and the other walls covered with wallpaper. Or vice versa. The main thing is that the color scheme and style of the materials match.
Remember that “Bark Beetle” is a versatile material that, with the right approach, can become the highlight of any interior. Don’t be afraid to experiment and find your unique combinations!
Рекомендуем:
 DIY Venetian Plaster: Is It Possible?
 DIY Decorative Stone Wall Installation: Your Guide to Home Transformation
 How to Update Old Tiles Without Removing Them: 99 Ways to Transform Your Bathroom and Kitchen
 Liquid Wallpaper: Pros, Cons, and Application Technology
 Washable wallpaper for the kitchen: why it’s the best idea for your renovation?
 How to Hang Vinyl Wallpaper on a Paper Backing?
 How to Make a Brick Wall in an Interior (Imitation)
 Wall Cladding with Wood Paneling: A Step-by-Step Guide
 New wallpaper over old: is it possible and when should you try it?
 How to Hang Wallpaper Without Seams: The Technique for Perfect Joints
 Joint filler for tiles: how to choose the color and apply it correctly
Grout for tiles: how to choose the color and apply it correctly
Joint filler for tiles: how to choose the color and apply it correctly
Grout for tiles: how to choose the color and apply it correctly
 What to do if mold or mildew appears on the walls?
 How many rolls of wallpaper do you need for a room? A simple way to know in advance
 Internal Wall Insulation: Materials and Technology
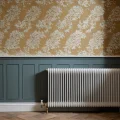 How to Wallpaper Behind a Radiator
 How to Tile Walls in a Bathroom: A Detailed Guide
 What to do if wallpaper is peeling at the seams?
 PVC Wall Panels: Cheap and Cheerful. Installation Guide
 MDF Panel Wall Finishing: Installation Guide