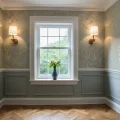
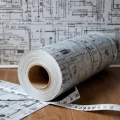
Greetings, dear readers of design-foto.ru! Today we will discuss a seemingly simple, but very relevant question that often arises during renovations: can you paste new wallpaper over old? Often, people lose heart at the thought of removing old coverings, as it is a laborious, dusty process, and often associated with disappointment from poorly removable backing. Many ask themselves: can’t we somehow simplify our lives and just re-paste new wallpaper over the existing ones? Let’s figure out together how realistic this is, when such an approach is permissible, and when it is strictly contraindicated, and how to carry out such work if you decide to do it.
- Saving time and effort: The main motive is to avoid the laborious process of removing old wallpaper.
- Less waste: No need to dispose of old coverings.
- Faster renovation: The ability to speed up the wall update process.
I’ll say right away that there is no perfect answer to the question “can you?”. It all depends on many factors: the type of old wallpaper, their condition, the quality of the new wallpaper, and, of course, your desire to get a truly flawless result.
In this article, we will examine all the nuances in detail so that you can make an informed decision and avoid common mistakes. We will discuss why in most cases it is better not to risk it, but at the same time, we will find out when such a decision can be justified. Stock up on patience, we are starting our dive into the world of wall covering!
New wallpaper over old: is it possible and when should you try it?
So, let’s get to the heart of the matter. The possibility of pasting new wallpaper over old is not a myth, but it is not a universal solution either. There are certain conditions under which this approach can be acceptable. The main thing is to clearly understand what we are dealing with.
What should be considered first?
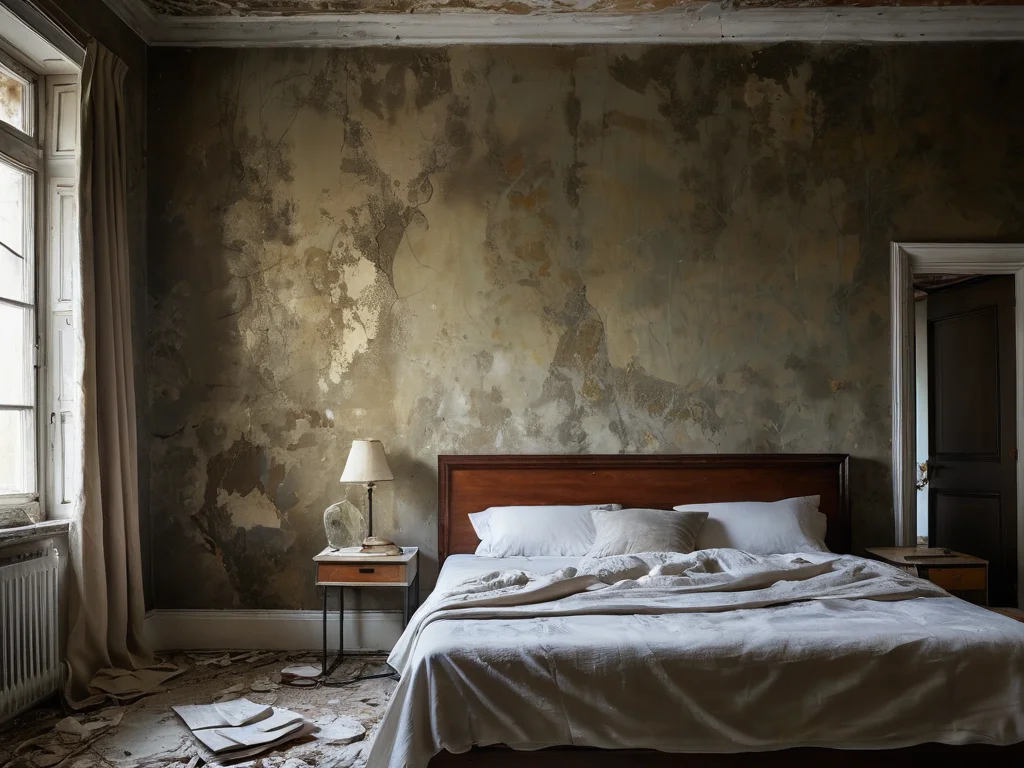
- Type of old wallpaper: Some types of wallpaper (e.g., vinyl on non-woven backing) have a sufficiently dense structure and can be a good base for new ones. However, if the old wallpaper is paper, worn out, with a pronounced texture, or peeling off, then pasting anything over it is almost a guaranteed failure.
- Condition of old wallpaper: The wallpaper must be dry, clean, tightly adhered to the wall over the entire surface, without swelling, bubbles, peeling, or mold. Any defects in the old covering will inevitably show through under the new wallpaper.
- Type of new wallpaper: Light, thin paper wallpaper will likely not be able to hide the defects of the old ones and may show through. Denser, textured, or vinyl wallpaper has a better chance of handling this task, but they are not all-powerful either.
- Wall base: It is important that the wall itself under the old wallpaper is even and strong. If there are problems with the wall itself (e.g., crumbling plaster), then no wallpapering, neither old nor new, will help.
When can you try?
If you are the lucky owner of perfectly even, smooth, vinyl or non-woven wallpaper that is tightly adhered to the wall and has no defects, and you plan to paste similar or similar density new wallpaper, then theoretically it is possible. But even in this case, as a designer, I strongly recommend conducting a small experiment on an inconspicuous area of the wall. Paste a small piece of new wallpaper over the old one and observe it for a few days. If there are no manifestations (bubbles, peeling, show-through), then you might be lucky.
Why is it better to avoid this in most cases?
Even if old wallpaper looks good at first glance, problems can be hidden underneath: old glue, dust, unevenness, micro-cracks. All of this can interfere with the adhesion of the new covering to the wall. As a result, you will get bubbles, peeling, and unevenness that will be visible to the naked eye and spoil the entire look of the room.
6 reasons why pasting new wallpaper over old is a bad idea
Although the temptation to save time and effort is great, it is important to understand why most professionals and experienced craftsmen strongly advise against this method. There are several reasons for this, and each of them can lead to very regrettable results.
- Violation of adhesion: Old wallpaper, even if it seems firmly glued, may have weakened adhesion to the wall. The glue for new wallpaper is designed to be applied to a prepared, clean, and strong surface. By pasting new wallpaper over old, you create an intermediate layer that may be unstable. This significantly reduces the adhesion between the new covering and the wall, leading to peeling.
- Manifestation of old surface defects: Any unevenness, bumps, cracks, remnants of old glue, stains, or even small bubbles under the old wallpaper will inevitably show through on the surface of the new ones, especially if they are thin or have a smooth texture. This will spoil the appearance of the entire room.
- Risk of mold and mildew: Old wallpaper can retain moisture. If condensation accumulates underneath or there are microscopic leaks that you don’t see, then re-pasting will create an additional barrier that prevents the wall from “breathing.” This is an ideal environment for the development of mold and mildew, which is dangerous to health and destroys walls.
- Short lifespan: Even if everything looks normal for the first few days, over time, under the weight of the new wallpaper and due to insufficient adhesion, the old covering may begin to peel off, taking the new one with it. The result is a repeated renovation that will cost more than initially removing the old wallpaper.
- Problems with future renovations: When you decide to update the interior next time, removing several layers of wallpaper (old + new) will be much more difficult than removing one. This can turn the demolition into a real nightmare.
- Visual distortions: If the old wallpaper had a pronounced relief or pattern, it may show through the new ones, especially with side lighting. This distorts the pattern of the new wallpaper and creates an unaesthetic appearance.
Conclusion: Although the temptation to save is great, the long-term perspective and the quality of the result are not in favor of pasting new wallpaper over old. It is better to do it right once than to redo it later.
When you can paste wallpaper over wallpaper: 3 exceptions to the rules
Despite all of the above, there are rare, but quite real situations where pasting new wallpaper over old can be justified. These exceptions are based on the specifics of materials and surface conditions. Let’s look at them in more detail:
- Pasting dense vinyl wallpaper over perfectly even, strong, and smooth vinyl or non-woven wallpaper. This is perhaps the most common “exception.” If your old wallpaper is thick, well-adhered vinyl on a non-woven backing, without relief, peeling, or other defects, and you plan to paste new wallpaper of similar density and texture (e.g., similar vinyl or dense non-woven), then there is a chance of success. In this case, the new, heavier wallpaper can “seal” the old ones, creating a single, strong covering. But even here, perfect preparation of the old wallpaper surface is important: it must be absolutely clean, dry, and without the slightest sign of peeling.
- Temporary measure before major renovation: Sometimes, for example, in a rented apartment or in a room where a major renovation with complete redevelopment and replacement of finishes is planned soon, you may want to quickly refresh the walls. In such a situation, if the old wallpaper is in acceptable condition (clean, even, without obvious defects), and the budget or time is extremely limited, you can take a risk and paste light, inexpensive paper or vinyl wallpaper over it. It is important to understand that this is a temporary solution, and in a year or two, when the major renovation begins, you will still have to remove both layers. This approach is justified only if you need to “look good” right now, and the future does not concern you much.
- Special types of wallpaper designed for pasting over old ones. Sometimes you can find wallpaper on the market whose manufacturers claim they can be pasted over old coverings. As a rule, these are very dense, often textured vinyl wallpapers that have high opacity and the ability to mask minor defects. Manufacturers of such wallpaper usually recommend treating the old wallpaper with a special primer-glue or a weak solution of wallpaper paste before pasting to ensure additional adhesion. Nevertheless, even in this case, I would recommend testing on a small area.
Important note: Even in these exceptional cases, you must ensure that the old wallpaper has no signs of mold, is not peeling at the seams, and does not contain harmful substances. If in doubt, it is better not to risk your health and the quality of the finish.
How to prepare old wallpaper for new: a step-by-step guide for a perfect result
If you have decided on a risky, but possibly necessary step – pasting new wallpaper over old – then you need to approach surface preparation with maximum responsibility. The success of the entire procedure and how long the new covering will last directly depends on this step. Forget about simply “pasting over”; in this case, even the most expensive wallpaper can “bubble up” or peel off.
Here is a step-by-step guide to help you minimize risks:
- Surface cleaning:
- Remove dust and dirt: Thoroughly wipe the walls with a dry, clean cloth or a soft-bristled brush to remove all dust, cobwebs, and small debris.
- Wash the walls: If the old wallpaper is vinyl or washable, it can be carefully wiped with a damp sponge and a mild detergent. Then, be sure to wipe with a clean damp sponge to remove any detergent residue, and let the walls dry completely. Paper wallpaper cannot be washed – it will get wet and lose its strength.
- Checking and repairing old wallpaper:
- Inspect the walls: Carefully go over the entire surface. Find all bulges, bubbles, peeling at the seams or corners.
- Eliminate defects: All peeling areas must be carefully re-glued. Use glue suitable for the type of old wallpaper for this. Apply a thin layer of glue under the peeled area with a brush or roller, press the wallpaper to the wall, and remove excess glue with a clean damp cloth. Make sure the re-glued areas are completely dry.
- Removing gloss (if necessary): If the old wallpaper has a glossy or semi-gloss surface, it is advisable to make it more matte and rough. This can be done using fine-grit sandpaper (sanding mesh) or a special tool – a scraper with a fine-grit abrasive. Carefully go over the entire surface, removing the top layer of varnish or gloss. This will improve glue adhesion. After sanding, be sure to remove all dust.
- Priming:
- Primer selection: Use a special deep-penetrating primer for wallpaper or a universal acrylic primer. It will strengthen the surface of the old wallpaper, reduce its absorbency (so that the glue does not go into the old covering too quickly), and improve the adhesion of the new layer.
- Applying primer: Apply the primer in an even, thin layer with a roller or brush. Pay special attention to seams and corners.
- Drying time: Let the primer dry completely according to the manufacturer’s instructions (usually a few hours).
- Testing:
- Test area: Before wallpapering the entire room, be sure to paste a small piece of new wallpaper onto a pre-prepared, primed section of the wall. Leave it for a few days.
- Evaluating the result: Make sure the new covering holds well, does not bubble, does not show through the old pattern, and does not peel off.
Key principle: The more thoroughly you prepare the old surface, the greater the chance that the new wallpaper will lie flat and hold for a long time. Do not skip any steps!
Choosing the right wallpaper for pasting over old ones: what to consider?
Choosing the right wallpaper is half the battle, especially if you decide to take a risk and paste a new covering over an old one. Not all wallpapers are equally suitable for this task. Here you need to consider their structure, density, texture, and even pattern. Let’s look at what to pay attention to when choosing:
- Density and thickness: This is perhaps the most important criterion. Choose dense, heavy wallpaper. They better hide minor imperfections of the old surface and are more resistant to show-through. Thin paper wallpaper will not work in most cases, as they can show through, repeat the texture of old wallpaper, and peel off quickly.
- Type of wallpaper:
- Vinyl wallpaper on non-woven backing: This is usually the most successful choice. They are dense enough, have a pronounced texture that helps mask defects, and adhere well to the backing. The non-woven backing provides dimensional stability and better adhesion.
- Textured wallpaper: Wallpaper with a pronounced texture, embossing, or relief pattern is excellent at masking. Minor unevenness, seams of old wallpaper, or small surface defects will be less noticeable under such a covering.
- Dark or rich colors: Wallpaper in dark, deep colors or with a small, unobtrusive pattern also hides defects better than light and plain ones.
- Avoid:
- Thin paper wallpaper: They are too delicate, tear easily, show through, and cannot hide even the slightest imperfections of the old covering.
- Wallpaper with a smooth, glossy surface: Any unevenness and seams will be particularly visible on them.
- Wallpaper with a large, clear pattern: If the old wallpaper has any relief or unevenness, the large pattern of the new wallpaper may “drift” or distort.
- Opacity: Pay attention to the opacity indicator if it is indicated by the manufacturer. The higher this indicator, the better the wallpaper will hide the surface underneath.
- Glue: Choose high-quality wallpaper paste that matches the type of new wallpaper. For dense vinyl or non-woven wallpaper, it is better to use special glue for heavy wallpaper. It may be worth considering glue with increased adhesion.
Important tip: Before buying a large roll, be sure to take a sample and paste it onto a prepared section of the wall with already pasted old wallpaper. Let it dry and evaluate the result under different lighting conditions. This will help avoid unpleasant surprises.
Tools and materials: what you will need for working with wallpaper?
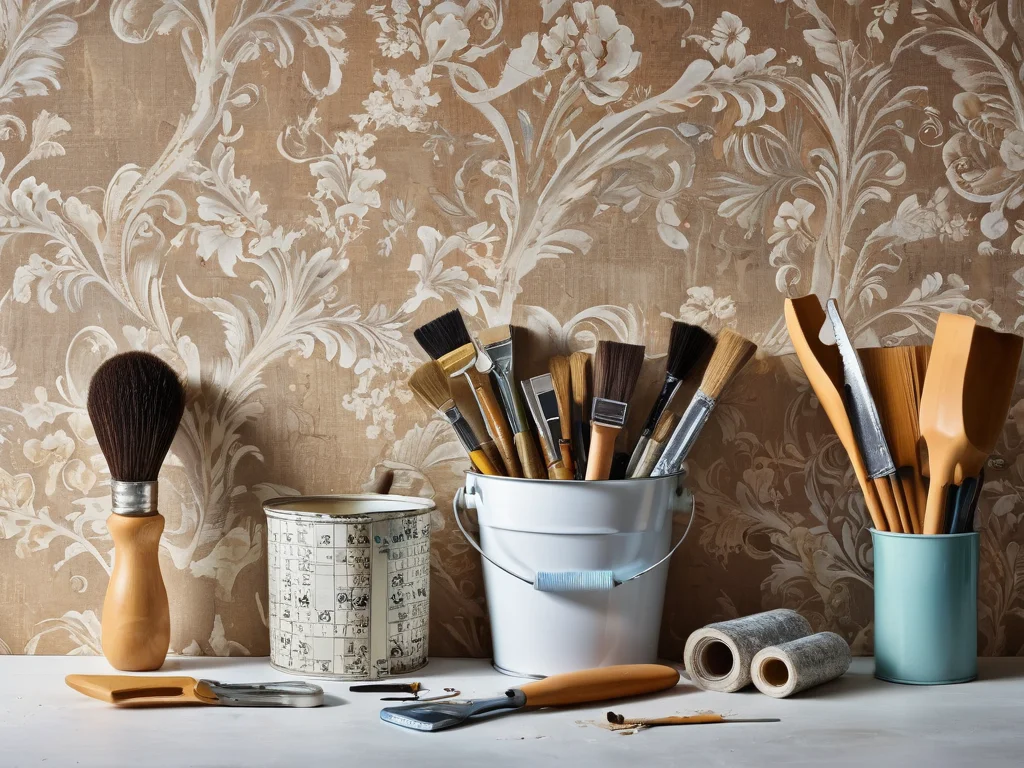
To make the process of wallpapering walls with new wallpaper over old as smooth as possible, you will need a specific set of tools and materials. Even if you decide to save on demolition, do not save on the quality of tools – the neatness and durability of the result directly depend on them. Here is a list of what you will need:
Main materials:
- New wallpaper: Your chosen wallpaper, suitable for pasting over old ones (dense, textured, vinyl, or non-woven).
- Wallpaper paste: High-quality paste that matches the type of chosen wallpaper. It’s better to buy a little extra.
- Primer: Deep-penetrating primer for surface preparation.
- Spackle (optional): If there are small cracks or dents on the old wallpaper, they can be carefully spackled and then sanded.
- Fine-grit sandpaper or sanding mesh: For matting the glossy surface of old wallpaper (if required).
- Clean rags and sponges: For removing dust, glue residue, and washing walls.
- Water: Clean water for diluting glue and washing tools.
Tools:
- Bucket for glue: Container for mixing wallpaper paste.
- Glue mixer or long stick: For uniform mixing of glue to a homogeneous consistency.
- Brushes:
- Wide paint brush: For applying primer, glue to seams and corners.
- Narrow brush (mop brush): For applying glue in hard-to-reach places.
- Paint roller:
- Long-pile roller: For applying primer to large areas.
- Short or medium-pile roller: For applying glue to the wallpaper sheet (if required by the technology).
- Wallpaper spatula or plastic spatula: For smoothing wallpaper from the center to the edges, removing air bubbles and excess glue.
- Wallpaper brush: A soft brush for smoothing wallpaper, especially suitable for delicate textures.
- Wallpaper knife or utility knife: A sharp knife for trimming wallpaper edges.
- Metal ruler or long spatula: For straight cutting of wallpaper along seams with the ceiling, baseboard, or corner.
- Step ladder or stable stool: For comfortable work at height.
- Tape measure or meter: For measuring and cutting wallpaper.
- Pencil: For marking.
- Level or plumb bob: For checking the verticality of the first sheet.
- Container for water: For washing tools.
Tip: Before starting work, make sure all tools are clean. This will help avoid stains on the new wallpaper.
5 common mistakes when pasting wallpaper over old ones and how to avoid them
As we have already found out, pasting new wallpaper over old is a procedure full of potential pitfalls. Even with careful preparation, there is a risk of making a mistake that will nullify all your efforts. Here are 5 of the most common mistakes made in this case, and tips on how to avoid them:
-
- Ignoring the preparation of the old surface:
- Mistake: Deciding that since you are pasting over, just wiping with a cloth is enough. Not cleaning, not re-gluing peeling areas, not sanding the gloss, not priming.
- Consequences: Peeling of new wallpaper, appearance of bubbles, show-through of old defects, poor adhesion.
- How to avoid: Strictly follow the step-by-step surface preparation instructions described above. Every step is important.
- Choosing unsuitable wallpaper:
- Mistake: Using thin, light, smooth, or paper wallpaper, believing they are “lighter” and easier to work with.
- Consequences: Show-through of the old pattern, appearance of bumps and unevenness, peeling due to insufficient density.
- How to avoid: Prefer dense, textured, vinyl, or non-woven wallpaper. Dark or busy colors mask better.
- Incorrect choice or preparation of glue:
- Mistake: Using glue that does not match the type of new wallpaper, or mixing it incorrectly (too thick or too thin).
- Consequences: Poor adhesion, rapid drying of glue, formation of stains, peeling.
- How to avoid: Read the instructions on the wallpaper and glue packaging. Use the glue recommended by the manufacturer. Accurately observe the water proportions when mixing.
- Incorrect wallpaper smoothing:
- Mistake: Leaving air bubbles under the wallpaper, pressing too hard on delicate wallpaper, not smoothing the seams.
- Mistake: Not smoothing the seams between sheets, leaving them unglued or with excess glue.
- Consequences: Air bubbles that will enlarge over time; deformation of wallpaper; peeling of seams; visible glue marks.
- How to avoid: Smooth the wallpaper from the center to the edges, moving from top to bottom, using a wallpaper brush or a rubber spatula. Pay special attention to the seams, carefully smoothing them. If there are small bubbles, try to carefully remove them by piercing the wallpaper with a thin needle and releasing the air.
- Neglecting testing:
- Mistake: Immediately starting to wallpaper the entire room without checking the result on a small, inconspicuous area.
- Consequences: Discovering a problem (e.g., pattern show-through or peeling) already at the stage of wallpapering the entire room, which leads to the need to redo the work, remove the wallpaper, and spend additional funds.
- How to avoid: Be sure to do a test pasting on a small, inconspicuous area of the wall (e.g., behind furniture or in a corner). Evaluate the result after a few days.
- Ignoring the preparation of the old surface:
Remember: Mistakes in such work are much more costly than the extra time and money spent on proper preparation and testing.
Expert opinion: when is it better to remove old wallpaper, and when can you save time?
So, to summarize our discussion, let’s turn again to the opinion of professionals. Interior designers and experienced renovation masters agree: the ideal result and durability of the finish are achieved only with complete removal of old wallpaper. Why do they so persistently recommend this path, even if it is more laborious?
When it is absolutely necessary to remove old wallpaper:
-
-
- Any defects in old wallpaper: If old wallpaper is peeling, has bubbles, stains, mold marks, cracks, or was pasted on an uneven surface, remove it mercilessly. These defects will not disappear under the new wallpaper, but will only worsen.
- Paper or thin vinyl wallpaper: These coverings themselves do not have sufficient density and opacity to hide the defects of the old layer. Moreover, they can cause poor adhesion to the surface.
- Pasting with light, plain wallpaper: On a light surface, any defect, any unevenness, or showing through of the old pattern will be particularly noticeable.
- High quality requirements: If you strive for an ideal, flawless renovation, where every detail matters, and you are willing to invest in quality finishing, then saving on removing old wallpaper means deliberately lowering the quality bar.
- Planning a durable renovation: If you are doing a renovation for many years, then multi-layer wallpapering will likely not stand the test of time.
-
When you can try to save time (with great caution!):
As we have already found out, there are a few exceptions, but they require ideal conditions:
-
-
- Perfectly even, dense, smooth vinyl or non-woven wallpaper: Old wallpaper should be like a new covering – without a single defect, firmly adhered to the wall, with a smooth or evenly textured surface.
- Dense, textured, dark or busy new wallpaper: They should be able to mask minor imperfections and provide good adhesion.
- Short-term perspective: If you need to quickly refresh the room, and you do not plan to live in it for long or are planning a major renovation soon.
-
The main conclusion from experts:
Removing old wallpaper is always a more reliable and correct path. Yes, it requires time and effort, but the result is worth it. You get perfectly even walls, excellent glue adhesion, no risk of mold, and a guarantee of the durability of your renovation. Trying to save at this stage can lead to double costs and future disappointment.
Choose the right approach, and your home will delight you with beauty and coziness for many years to come!
Рекомендуем:
 What to do if wallpaper is peeling at the seams?
 Washable wallpaper for the kitchen: why it’s the best idea for your renovation?
 How to Hang Vinyl Wallpaper on a Paper Backing?
 How to Hang Wallpaper Without Seams: The Technique for Perfect Joints
 Wallpapering Corners: Master Secrets
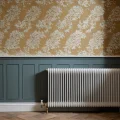 How to Wallpaper Behind a Radiator
 How to Update Old Tiles Without Removing Them: 99 Ways to Transform Your Bathroom and Kitchen
 Liquid Wallpaper: Pros, Cons, and Application Technology
 DIY Decorative Stone Wall Installation: Your Guide to Home Transformation
 How many rolls of wallpaper do you need for a room? A simple way to know in advance
 Wall Cladding with Wood Paneling: A Step-by-Step Guide
 Grout for tiles: how to choose the color and apply it correctly
 PVC Wall Panels: Cheap and Cheerful. Installation Guide
 How to Make a Brick Wall in an Interior (Imitation)
Joint filler for tiles: how to choose the color and apply it correctly
How to Make a Brick Wall in an Interior (Imitation)
Joint filler for tiles: how to choose the color and apply it correctly
 What to do if mold or mildew appears on the walls?
 How to Tile Walls in a Bathroom: A Detailed Guide
 Bark Beetle Decorative Plaster: Application Technology
 DIY Venetian Plaster: Is It Possible?
Comment rénover du vieux carrelage sans le retirer : 99 façons de transformer votre salle de bain et votre cuisine
DIY Venetian Plaster: Is It Possible?
Comment rénover du vieux carrelage sans le retirer : 99 façons de transformer votre salle de bain et votre cuisine