Hello, dear readers of design-foto.ru! Today we will dive into the world of perfect walls and talk about how to achieve perfection in wallpapering so that every joint is practically invisible. Many of you have probably encountered situations where, after renovation, unsightly seams appear on the walls, spoiling the overall impression of the interior. This is not only unaesthetic but can also lead to more serious problems in the future. But don’t worry! In this article, as an experienced designer and author of this blog, I will share with you all the secrets and techniques that will help you make your wallpaper lie perfectly on the walls, without a single visible seam. We will cover everything – from choosing the right materials to the subtleties of wall preparation and the wallpapering process itself. Ready to transform your home beyond recognition?
Why Butt-Jointed Wallpaper is a Trend and How to Avoid Visible Seams?
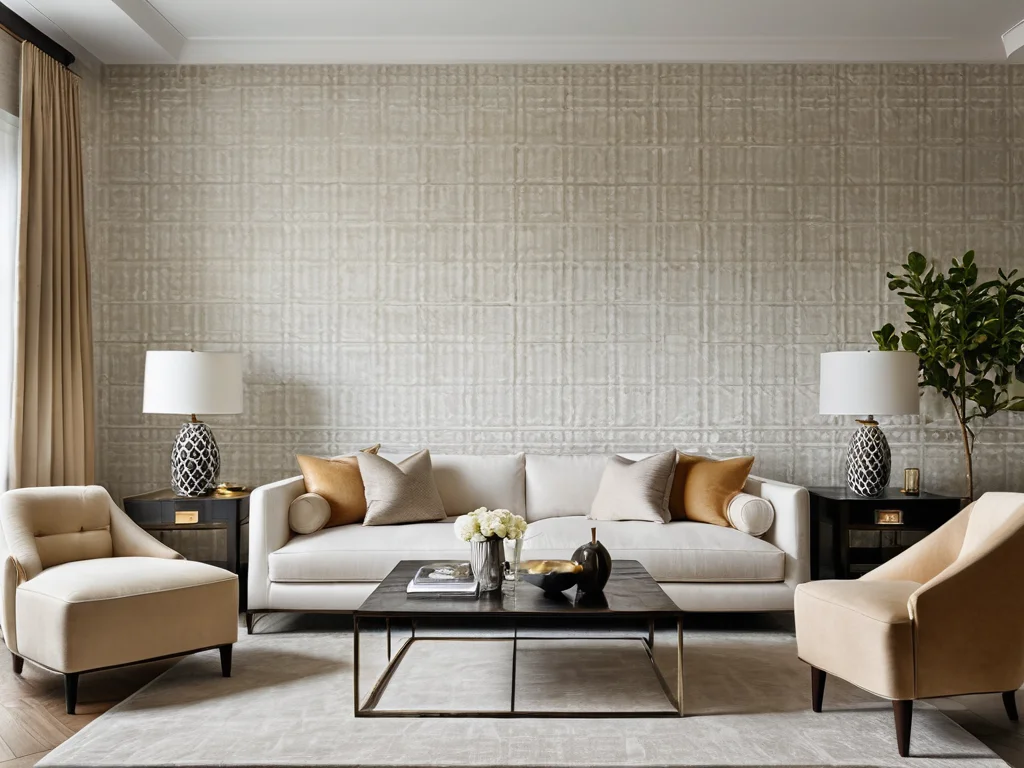
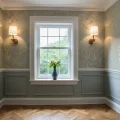
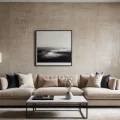
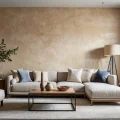
In modern interior design, the pursuit of minimalism and a unified space is gaining momentum. That’s why wallpaper that is hung butt-jointed is becoming increasingly popular. It creates the effect of a monolithic coating, visually expands the space, and adds elegance to the walls. Unlike older technologies where seams were often an unavoidable problem, modern materials and hanging methods allow for an almost perfect result. This is especially relevant for rooms where every detail matters: bedrooms, living rooms, children’s rooms. When the seams are invisible, the wall looks solid, as if it were a single canvas, not a collection of separate strips. This gives the interior completeness and a sense of luxury.
Why do seams become visible? There are several reasons:
- Improper Wall Preparation: Unevenness, cracks, remnants of old wallpaper or paint can lead to new sheets lying unevenly, and the seams showing through or peeling off.
- Incorrect Wallpaper Choice: Some types of wallpaper (especially with large, repeating patterns) are more prone to visible seams if hung incorrectly.
- Jointing Error: If the sheets do not match perfectly in pattern or overlap each other, the seams become obvious.
- Incorrect Adhesive: Using the wrong or poor-quality adhesive can lead to wallpaper peeling at the seams.
- Humidity and Temperature: Sharp fluctuations in humidity and temperature in the room can cause wallpaper deformation and the appearance of seams.
It is quite possible to avoid these problems by following certain rules and using the right techniques. The main thing is attention to detail at every stage of the work.
What Wallpaper to Choose for Invisible Seams: A Review of the Best Materials
Choosing the right wallpaper is already half the battle in creating a seamless finish. Different materials behave differently, and some of them significantly simplify the task of achieving a perfect joint.
Non-woven Wallpaper:
This is perhaps one of the best options for those who want to achieve a seamless effect. Non-woven wallpaper has several advantages:
- Dense Structure: Non-woven material makes the wallpaper dense and resistant to deformation. It does not stretch or shrink after drying, which is critically important for a perfect joint.
- Ease of Use: Adhesive is applied directly to the wall, not to the sheet itself. This simplifies the process and prevents bubbles.
- Masking Minor Wall Imperfections: Due to their density, non-woven wallpaper can hide minor wall defects, which also contributes to the invisibility of seams.
- Variety of Textures and Patterns: The non-woven base allows for the creation of diverse textures imitating plaster, fabric, stone, as well as printing clear and beautiful patterns.
Vinyl Wallpaper on a Non-woven Base:
This is a combination of two materials, where the top layer is vinyl and the bottom layer is non-woven. They are also excellent for butt-jointing:
- Durability and Wear Resistance: The vinyl coating makes the wallpaper more durable and resistant to abrasion.
- Easy Care: Such wallpaper can be washed, making it ideal for kitchens or children’s rooms.
- Good Jointing: The non-woven base ensures dimensional stability, and the dense vinyl effectively masks minor imperfections.
Textile Wallpaper:
Wallpaper made from natural or artificial fibers (linen, cotton, silk, jute) gives the interior a luxurious look. They are hung butt-jointed and create the impression of a single canvas. However, it’s worth considering:
- Price: Textile wallpaper is one of the most expensive options.
- Care Requirements: They are more demanding to care for and can accumulate dust.
- Tendency to Absorb Odors: Some types of textile wallpaper can absorb odors, making them less suitable for kitchens.
Paper Wallpaper:
Although paper wallpaper is a classic option, it can be more difficult to work with if your goal is a seamless finish. They:
- Stretch when wet: This can lead to incorrect jointing if the sheets are not allowed to dry properly.
- More prone to deformation: After drying, they can shrink slightly, revealing seams.
- Do not mask imperfections: Require very thorough wall preparation.
Designer Recommendation: If you are a beginner or aim for a perfect result without unnecessary hassle, choose non-woven wallpaper. They forgive many minor mistakes and greatly simplify the process of creating a seamless surface.
Tools and Materials for Perfect Seamless Wallpapering: A Complete List
To ensure the work goes smoothly and the result is pleasing to the eye, you will need the right tools and quality materials. Don’t skimp at this stage, as much depends on them.
Essential Materials:
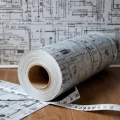
- Wallpaper: Choose non-woven or vinyl on a non-woven base, as we discussed. Make sure the entire batch of wallpaper has the same article number and batch number to avoid shade differences.
- Wallpaper Adhesive: It is crucial to choose an adhesive that matches your wallpaper type. Special adhesive for non-woven wallpaper is used for non-woven wallpaper. It ensures reliable adhesion and durability. Read the instructions on the adhesive packaging carefully.
- Primer: Special wall primer for wallpaper. It improves adhesive adhesion, reduces adhesive consumption, and facilitates future wallpaper removal.
- Spackle: For filling cracks, holes, and leveling walls.
- Painter’s Tape: For protecting baseboards, doorways, and ceiling moldings from adhesive.
Necessary Tools:
- Bucket for Adhesive: It’s best to use a plastic bucket with smooth walls so that the adhesive mixes and washes off easily.
- Construction Mixer or Drill with Mixer Attachment: For even and lump-free adhesive mixing.
- Roller or Brush for Primer: For applying primer to the walls.
- Paint Tray: Convenient for working with a roller.
- Sharp Knife or Utility Knife with Replaceable Blades: For trimming wallpaper. Don’t skimp on blades; a dull blade will tear wallpaper instead of cutting it.
- Measuring Tape: For accurate measurements.
- Level (Laser or Spirit): For perfectly straight vertical marking.
- Pencil: For marking.
- Metal Ruler or Straightedge: For straight wallpaper trimming along a ruler.
- Rubber or Plastic Wallpaper Smoothing Tool (Roller): For removing air bubbles and smoothing seams. Use a wide tool to avoid damaging the wallpaper.
- Clean Cloth or Sponge: For removing excess adhesive from walls and wallpaper.
- Ladder or Scaffolding: For working at height. Ensure it is stable.
- Rags or Old Newspapers: For protecting the floor from adhesive.
Tip: Before purchasing tools, familiarize yourself with their functionality. For example, a laser level significantly speeds up the marking process and guarantees perfect verticality.
Preparing Walls for Wallpapering: Step-by-Step to a Perfect Result
Quality wall preparation is the foundation for perfect wallpapering. Don’t neglect this stage, even if your walls are smooth. The better the preparation, the easier it will be to hang wallpaper, and the longer it will last.
Step 1: Cleaning the Walls
Completely remove old coatings: old wallpaper, paint, whitewash. If there is mold on the walls, be sure to treat them with an antiseptic. Vacuum the walls to remove dust.
Step 2: Leveling the Walls
This is the most important stage for creating a seamless finish. Run your hand over the wall: all unevenness, cracks, holes, bumps must be eliminated. Use spackle to fill all defects. For large unevenness, several layers of spackle may be required with intermediate sanding.
- Small cracks and holes: Fill with spackle, let dry, and sand with sandpaper until smooth.
- Unevenness: Use a spirit level or straightedge to identify the most protruding areas. These can be carefully sanded down.
- Old oil paints: If there is old oil paint on the walls that is holding firm, it can be left, but it must be sanded with sandpaper for better adhesion.
Step 3: Sanding
After the spackle has dried, be sure to sand all spackled areas with fine-grit sandpaper or sanding mesh. The goal is to achieve a perfectly smooth surface without any transitions.
Step 4: Dust Removal
After sanding, the walls will be covered in dust. Thoroughly remove it with a dry brush, vacuum cleaner, or a slightly damp sponge (but the wall should remain dry). Any dust on the wall will prevent the adhesive from adhering well to the wallpaper.
Step 5: Priming the Walls
Apply wallpaper primer. This is done to:
- Improve Adhesion: Adhesive will hold better on a primed surface.
- Reduce Adhesive Consumption: The wall will not absorb as much adhesive.
- Prevent Stains: Primer creates an even background.
- Facilitate Removal: It will be easier to remove wallpaper in the future.
Use a roller or brush to apply the primer evenly. Let it dry completely according to the manufacturer’s instructions (usually 2-4 hours).
Tip: If the walls are painted with glossy paint, they must be matted with sandpaper before priming. Otherwise, the adhesive will simply not hold.
Wallpapering Technique for Seamless Results: How to Achieve Perfect Joints
When the walls are ready, you can move on to the most interesting part – wallpapering! Adhering to the technique is the key to success, especially when it comes to invisible seams.
Step 1: Marking
Start hanging wallpaper from a window or a corner. These are the most even surfaces. Use a level to draw a perfectly straight vertical line. This line will be the guide for the first sheet. It is important that the first strip is hung strictly vertically, otherwise all subsequent strips will be hung crookedly, and the seams will inevitably be visible.
Step 2: Cutting Wallpaper
Before starting, cut the roll into sheets of the required length. Cut the sheet slightly longer than the wall height (approximately 5-10 cm extra at the top and bottom) for trimming. If the wallpaper has a repeat (repeating pattern), account for it when cutting so that the pattern on adjacent sheets matches.
Step 3: Applying Adhesive
For Non-woven Wallpaper: Adhesive is applied directly to the wall. Spread it evenly over the entire surface that one sheet will cover, extending slightly into the adjacent area. Ensure there are no gaps, especially at the edges.
For Vinyl and Paper Wallpaper: Adhesive is applied to the back of the sheet. Spread the adhesive evenly, avoiding excess. If you are hanging paper wallpaper, let it soak in the adhesive for a bit (usually 5-10 minutes, according to instructions). Non-woven wallpaper usually does not require soaking.
Step 4: Hanging the First Sheet
Place the sheet on the wall, aligning the edge with the previously drawn vertical line. Carefully smooth the wallpaper from the center to the edges using a roller or spatula, pushing out air and excess adhesive. Move from top to bottom and from the middle to the edges. Ensure the sheet lies flat, without bubbles or creases. A little adhesive should slightly protrude at the edges of the sheet – this is normal.
Step 5: Joining the Next Sheet
The next sheet is hung butt-jointed to the previous one. Do not overlap! The edge of one sheet should fit snugly against the edge of the other. Carefully smooth the joint with a special roller or spatula to make it as flat and invisible as possible. If the wallpaper has a complex pattern, make sure it matches on adjacent sheets.
Step 6: Trimming
After the sheet is hung and smoothed, carefully trim the excess wallpaper at the top and bottom using a sharp knife and a metal ruler. Do this while the adhesive is still wet, but the wallpaper is already lying flat.
Step 7: Removing Excess Adhesive
Immediately remove any excess adhesive that has squeezed out at the edges and seams with a clean, damp sponge or cloth. If the adhesive dries, it can leave stains or shiny streaks.
Step 8: Ventilation
After hanging the first sheet, do not close windows and doors to ensure air circulation. However, avoid drafts, which can lead to uneven drying of the wallpaper and deformation.
Important: Work sequentially, sheet by sheet, checking for straightness and absence of bubbles after each one.
How to Hang Seamless Wallpaper: Special Considerations and Life Hacks
Seamless wallpaper is a separate category that can truly transform an interior, creating the effect of a single canvas. Often, this is wallpaper with a printed pattern, where each roll is designed to be hung without pattern matching, creating a continuous image across the entire wall. But even here, there are nuances.
Features of Seamless Wallpaper:
- Single Canvas: Such wallpaper usually has a width equal to the wall width or is sold by the meter according to the wall size. This eliminates the need for vertical pattern matching.
- Material Type: Most often, it is non-woven wallpaper, which already simplifies the hanging process.
- Durability: The material is dense enough to withstand the hanging process without tearing.
Seamless Wallpaper Hanging Technique:
- Preparation: As always, the walls must be perfectly prepared – smooth, dry, primed.
- Marking: Draw the first vertical line using a level. It must be perfectly straight.
- Applying Adhesive: Adhesive is applied to the wall, as for regular non-woven wallpaper. It is important to apply enough adhesive to ensure reliable adhesion across the entire width of the sheet.
- Hanging: Place the sheet on the wall, aligning the edge with the marked line. Carefully smooth from the center to the edges, pushing out air.
- Jointing: Since this is seamless wallpaper, there is no jointing of sheets in the usual sense. The main thing is to hang each sheet straight, avoiding overlaps or gaps.
- Trimming: Carefully trim the excess at the top and bottom.
Professional Life Hacks:
- Using Painter’s Tape: Tape the edges of adjacent walls, ceiling, floor, doorways, and window openings with painter’s tape. This will protect them from accidental adhesive drips.
- Working Together: If you are hanging large seamless sheets, working with a partner will significantly ease the process. One person can carefully guide and hold the top part of the sheet while the other smooths the bottom.
- Clean Hands and Tools: Before starting, make sure your hands are clean. Avoid getting adhesive on the face of the wallpaper. If this happens, carefully remove it with a damp sponge before it dries.
- Checking for Bubbles: After smoothing, carefully check for any remaining air bubbles under the wallpaper. You can gently lift the sheet and smooth it again.
- Caution with Corners: When wallpapering corners, there is a risk of creases. It’s best, if the corner is not perfectly straight, to allow a small overlap of the sheet onto the adjacent wall (2-3 cm) and then carefully trim it along the corner line.
- Watch the Pattern (if any): Even if the wallpaper is seamless but has a pattern, ensure its continuity.
- Don’t Skimp on Adhesive: Insufficient adhesive is one of the main reasons for wallpaper peeling.
By following these simple but important tips, you can handle even the most challenging wallpaper and achieve a perfect result!
TOP 5 Wallpaper Hanging Mistakes That Will Ruin the Entire Job (and How to Avoid Them)

Even when following instructions, beginners often make the same mistakes that negate all their efforts. Let’s look at the most common ones and learn how to avoid them so your walls look flawless.
- Improper Wall Preparation:
- Mistake: Hanging wallpaper on unprepared, uneven, dusty, or unprimed walls.
- Consequences: Poor adhesion, wallpaper peeling, wall defects showing through, bubbles, visible seams.
- How to Avoid: Always thoroughly clean, level, sand, and prime walls. This is the most important stage!
- Using the Wrong Adhesive:
- Mistake: Choosing an adhesive that is not suitable for the wallpaper type. For example, using a universal adhesive for non-woven wallpaper.
- Consequences: Wallpaper may not adhere well, peel at the seams, lose its structure.
- How to Avoid: Always read the instructions on the wallpaper packaging and choose an adhesive recommended by the manufacturer for that type of covering.
- Overlap or Gap Between Sheets:
- Mistake: Hanging wallpaper with an overlap or leaving a gap between them.
- Consequences: Overlap creates unevenness and a visible seam; a gap also makes the joint noticeable and can lead to wallpaper sagging.
- How to Avoid: Hang wallpaper strictly butt-jointed, using the vertical line as a guide. Use a spatula to firmly press the edges.
- Incorrect Trimming:
- Mistake: Using a dull knife or trying to trim wallpaper when the adhesive has already dried significantly.
- Consequences: Torn edges, uneven cuts, making seams more noticeable.
- How to Avoid: Use a sharp knife with replaceable blades and a metal ruler. Trim excess while the wallpaper is still wet but already well-adhered.
- Drafts and Sharp Temperature Changes:
- Mistake: Creating drafts or sharp temperature changes in the room during and after wallpapering.
- Consequences: Wallpaper may dry unevenly, deform, peel at the seams.
- How to Avoid: Ensure moderate temperature and no drafts. Close windows for 24-48 hours after hanging.
- Improper Wall Preparation:
Additional Tip: Never rush! Wallpapering is meticulous work that requires attention and patience.
Professional Secrets: How to Make Wallpaper Joints Invisible Forever
Now that we’ve covered the basics, let’s delve into the “secret” techniques that professionals use to achieve a truly flawless result and make wallpaper joints absolutely invisible.
1. Perfect Vertical Line:
This is the foundation of everything. Professionals always use a laser level or plumb bob to create a perfect vertical line from which the first sheet is hung. Even the slightest deviation will accumulate with each subsequent sheet, and by the end of the wall, you will have a noticeable slant.
2. The “Overlap and Cut” Method (for the experienced):
This method allows for perfect jointing where the edges of the sheets align precisely. It is used rarely but yields excellent results. Two sheets are hung with a slight overlap (about 1-2 cm) at the joint. Then, using a sharp knife and a metal ruler, a straight cut is made through both sheets directly in the center of the overlap. The top sheet is carefully removed, and the bottom sheet is trimmed, leaving a perfect, invisible seam.
3. Using Special Joint Smoothing Tools:
There are special narrow and wide rubber or plastic spatulas designed for smoothing joints. They help to firmly press the wallpaper edges together, push out adhesive and air, and make the joint as flat and invisible as possible.
4. Careful Trimming:
We’ll repeat this, but it’s critically important: use only sharp blades! A dull blade will tear or crush the edge of the wallpaper, making the seam rough and visible. It’s better to change the blade after every 5-7 sheets.
5. Considering Lighting:
Think about how light falls on the walls. If light comes from the side, even small imperfections in the joints can become more noticeable. Therefore, try to hang the sheets so that the joints are parallel to the main light source.
6. Wallpaper with a Small, Subtle Pattern:
If you are not confident in your abilities, choose wallpaper with a small, unobtrusive pattern or texture. They better mask any minor defects and unevenness in the joints.
7. Final Seam Pressing:
After the wallpaper is hung and trimmed, go over all the joints again with a clean, dry roller or spatula. This will help to finally press them down and eliminate minor imperfections.
8. Work in Comfortable Conditions:
Maintain a stable temperature in the room, avoid drafts. Good lighting will also help you see all the nuances and work more carefully.
Remember that a perfect result is a combination of the right materials, quality tools, thorough preparation, and careful work. By following these tips, you can turn the process of wallpapering into a pleasant creative activity and achieve that very, flawless wall look you’ve always dreamed of!
Рекомендуем:
 How to Hang Vinyl Wallpaper on a Paper Backing?
 Wallpapering Corners: Master Secrets
 Washable wallpaper for the kitchen: why it’s the best idea for your renovation?
 New wallpaper over old: is it possible and when should you try it?
 How to Wallpaper Behind a Radiator
 What to do if wallpaper is peeling at the seams?
 How many rolls of wallpaper do you need for a room? A simple way to know in advance
 DIY Decorative Stone Wall Installation: Your Guide to Home Transformation
 Grout for tiles: how to choose the color and apply it correctly
 How to Tile Walls in a Bathroom: A Detailed Guide
Joint filler for tiles: how to choose the color and apply it correctly
How to Tile Walls in a Bathroom: A Detailed Guide
Joint filler for tiles: how to choose the color and apply it correctly
 MDF Panel Wall Finishing: Installation Guide
 How to Make a Brick Wall in an Interior (Imitation)
 Liquid Wallpaper: Pros, Cons, and Application Technology
 Bark Beetle Decorative Plaster: Application Technology
 PVC Wall Panels: Cheap and Cheerful. Installation Guide
 Internal Wall Insulation: Materials and Technology
 How to Update Old Tiles Without Removing Them: 99 Ways to Transform Your Bathroom and Kitchen
 Wall Cladding with Wood Paneling: A Step-by-Step Guide
 What to do if mold or mildew appears on the walls?