The kitchen is not just a place for cooking, but also the center of family life, where loved ones gather. That is why it is so important for coziness, cleanliness, and aesthetics to reign here. But the reality is that the kitchen is one of the most “difficult” rooms in the house. Grease, steam, food splashes, accidental stains – all of this inevitably leaves marks on the walls. That is why choosing the right wallpaper for the kitchen becomes a real challenge. And today, as your guide to the world of interior design, I want to tell you why washable wallpaper is not just a practical, but often the most correct solution for your kitchen.
Washable wallpaper for the kitchen: why it’s the best idea for your renovation?
Anyone who has ever renovated a kitchen knows that ordinary paper or fabric wallpaper is an extremely impractical solution here. Humidity, temperature fluctuations, odors, and, of course, cooking stains – all of this quickly leads to a loss of attractive appearance. Washable wallpaper is designed to solve these problems, offering a compromise between beauty and functionality. Let’s figure out why they are so well suited for kitchen conditions.
Practicality first
The main advantage of washable wallpaper is its moisture resistance and ease of cleaning. Stains from sauce, greasy splashes, tea or coffee marks – all of this can be easily removed with a damp sponge, and sometimes with the use of mild detergents. This significantly simplifies maintaining cleanliness and order in the kitchen, which is especially valuable when it comes to a room that is used daily and actively.
Durability and protection
The surface layer of washable wallpaper usually has a special treatment that protects it from moisture and mechanical damage. This extends the life of the finish, preserving its original appearance for many years. You won’t have to re-paste the wallpaper in the kitchen every year due to stains or loss of color, which, you must admit, saves both time and money.
Wide selection of designs
Many mistakenly believe that washable wallpaper is a boring and monotonous choice. Modern manufacturers offer a huge range of textures, colors, and patterns. You can find imitations of natural materials, geometric patterns, floral prints, photo wallpapers – anything your heart desires. This allows you to create a stylish and cozy interior that matches your tastes and preferences, without sacrificing practicality.
Breathability
It is important to note that many modern washable wallpapers have good breathability. This means that they do not impede air circulation, which prevents the formation of mold and mildew under the wallpaper. This is especially relevant for the kitchen, where the humidity level can be higher than in other rooms.
Safety
High-quality washable wallpapers are made from environmentally friendly materials and often have relevant certificates. This guarantees that they are safe for your health and the health of your loved ones, which is important, as the kitchen is where we spend a lot of time and prepare food.
Overall, washable wallpaper for the kitchen is a smart and practical solution that will allow you to enjoy a beautiful interior without the hassle of maintaining it. In the following sections, we will analyze in detail what types of such wallpaper exist and how to choose them correctly.
What wallpaper can be washed: types and their features for the kitchen
When we talk about “washable” wallpaper, it’s important to understand that a whole range of materials with different properties are hidden under this term. Manufacturers use different technologies and coatings to make wallpaper resistant to moisture and cleanable. Let’s analyze in detail the main types that are ideal for kitchen walls.
Vinyl wallpaper
This is perhaps the most popular and common type of washable wallpaper. Vinyl wallpaper consists of two layers: a base (usually paper or non-woven fabric) and an upper layer of polyvinyl chloride (PVC). It is the PVC coating that makes them durable, moisture-resistant, and abrasion-resistant.
- Pros: High moisture resistance, easy care, durability, longevity, wide selection of designs (from smooth to textured, imitating plaster, textiles, or wood). Often have a relief structure that helps hide minor wall imperfections.
- Cons: Some types of vinyl wallpaper may not breathe well, creating a risk of condensation and mold. It is also important to choose wallpaper from trusted manufacturers, as cheap options may release harmful substances when heated (although this is rare for quality products).
Non-woven wallpaper
Non-woven fabric is a non-woven material made from cellulose fibers mixed with synthetic binders. Wallpaper with a non-woven base is often coated with vinyl or acrylic, which makes it washable.
- Pros: Durability, resistance to mechanical damage, good breathability (if the top layer is not solid and dense), hides minor wall defects, easy to apply (glue is applied only to the wall), resistant to fading in the sun.
- Cons: Can be more expensive than vinyl wallpaper on a paper base. Requires care during cleaning, as some types with acrylic coating may be less abrasion-resistant than vinyl.
Paintable wallpaper (fiberglass wallpaper)
Fiberglass wallpaper is a very durable and long-lasting material made from fiberglass. They are completely eco-friendly, non-combustible, and have high mechanical strength. Fiberglass wallpaper can be repainted several times, which allows for easy interior updates. The surface of fiberglass wallpaper after painting becomes smooth or textured, and it tolerates wet cleaning well.
- Pros: Extreme durability, longevity, eco-friendliness, fire safety, possibility of multiple repainting, good breathability, resistance to mold and mildew. Perfectly hides wall defects.
- Cons: High cost compared to vinyl or non-woven wallpaper. Requires the use of special glue for fiberglass wallpaper. Limited design options without painting (main emphasis on texture).
Acrylic wallpaper
These are vinyl wallpapers where the top layer is applied point-wise (in a “bubble” pattern). They are lighter than vinyl and breathe better, while maintaining moisture resistance. They are often used for kitchens where a combination of moisture resistance and breathability is important.
- Pros: Good moisture resistance, better breathability compared to dense vinyl, lighter weight, attractive appearance.
- Cons: Less durable and wear-resistant than dense vinyl or fiberglass wallpaper. May be sensitive to harsh cleaning agents.
Foam vinyl wallpaper
These are vinyl wallpapers with a voluminous, textured surface. Foam vinyl creates the effect of plaster or a relief pattern. They are washable, but may be less durable with intense exposure to moisture and abrasive cleaning agents.
- Pros: Create a pleasant texture, hide wall irregularities well, have decent moisture resistance.
- Cons: The relief structure can accumulate dust and dirt, making cleaning difficult. Less wear-resistant than smooth vinyl or non-woven wallpaper.
When choosing washable wallpaper for the kitchen, pay attention to the markings on the roll. Special icons (e.g., a wave, two waves, a brush) indicate the degree of moisture resistance and washability.
Kitchen wallpaper that is easy to wash: TOP-5 practical materials with photo examples
So, we have discussed the main types of washable wallpaper. Now let’s look at which ones have proven themselves best in the kitchen and how they look in interiors. My choice, based on years of experience and thousands of completed projects, falls on the following options, combining practicality, aesthetics, and durability.
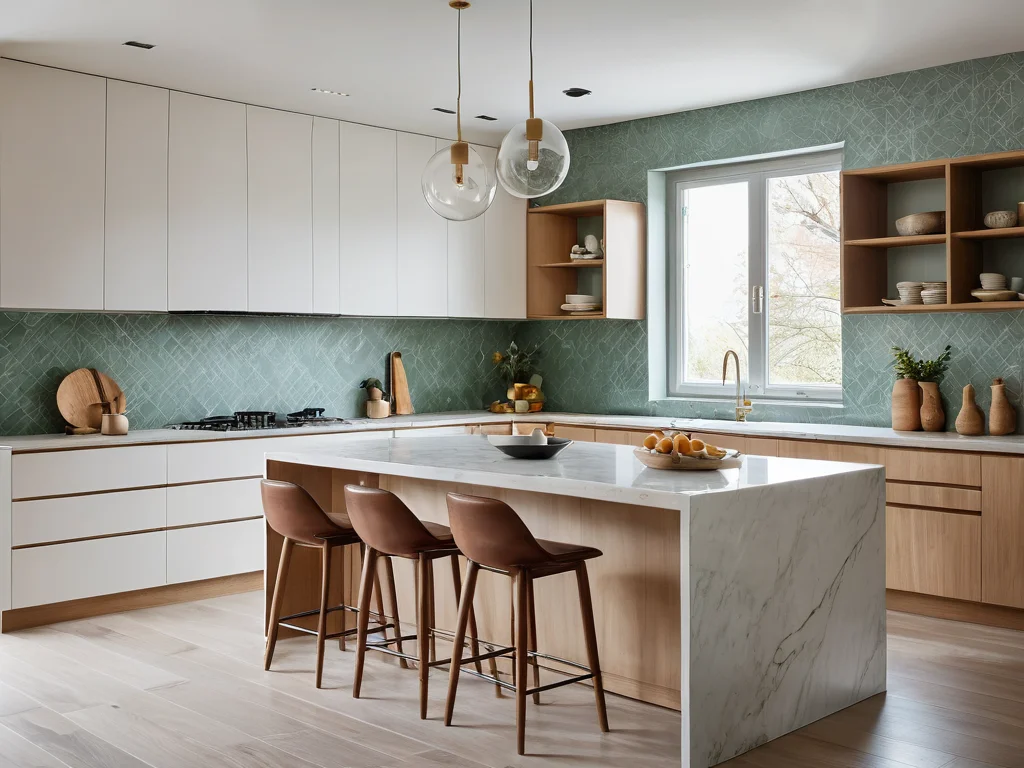
1. Vinyl wallpaper on a non-woven base with a high degree of moisture resistance
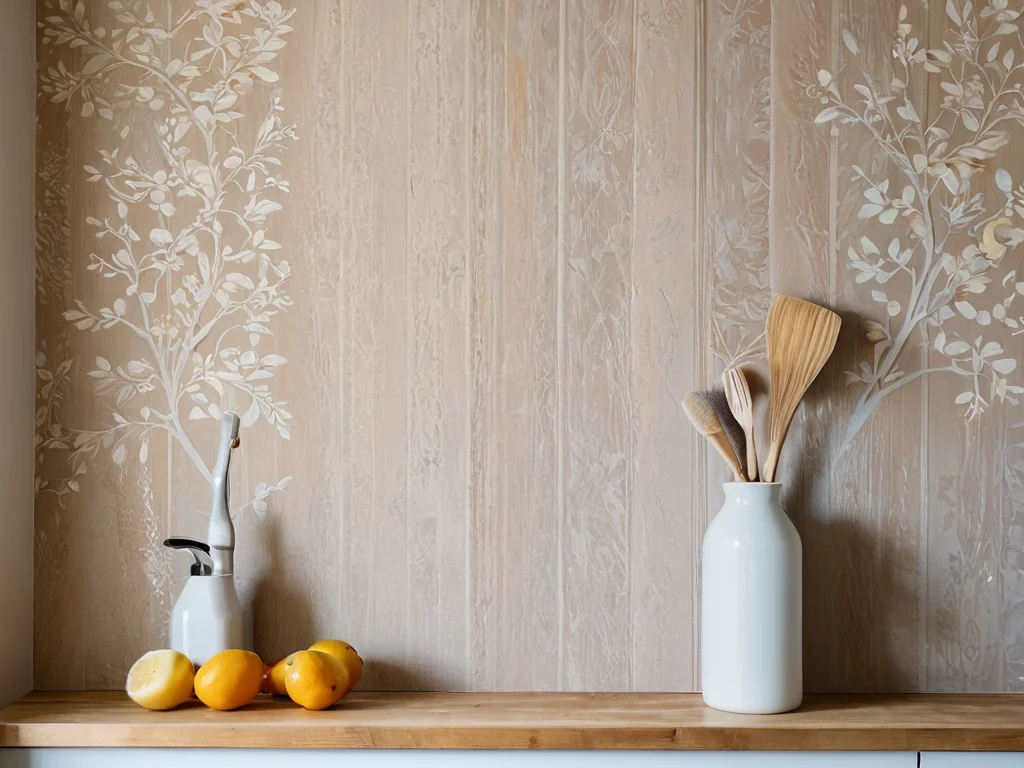
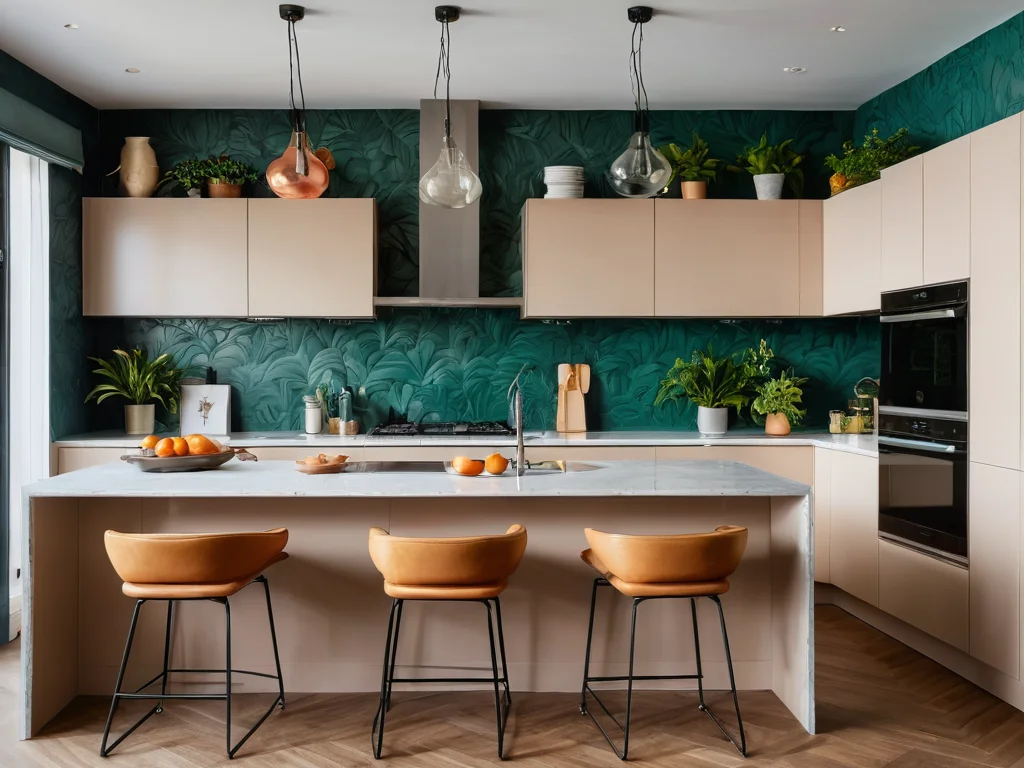
This is the absolute leader for kitchen spaces. The non-woven base provides strength and ease of application, and the dense vinyl layer offers excellent protection against moisture and easy cleaning. Designs can be very diverse: from imitation brickwork and Venetian plaster to modern geometric patterns and delicate floral prints.
Why it’s a hit:
- Versatility: suitable for almost any interior style.
- Practicality: withstands repeated wet cleaning, not afraid of splashes.
- Aesthetics: a huge selection of textures and colors allows you to choose the perfect option.
Example: Imagine a loft-style kitchen where one wall is decorated with vinyl wallpaper imitating old brick. It’s easy to clean, adding both brutality and coziness to the interior at the same time.
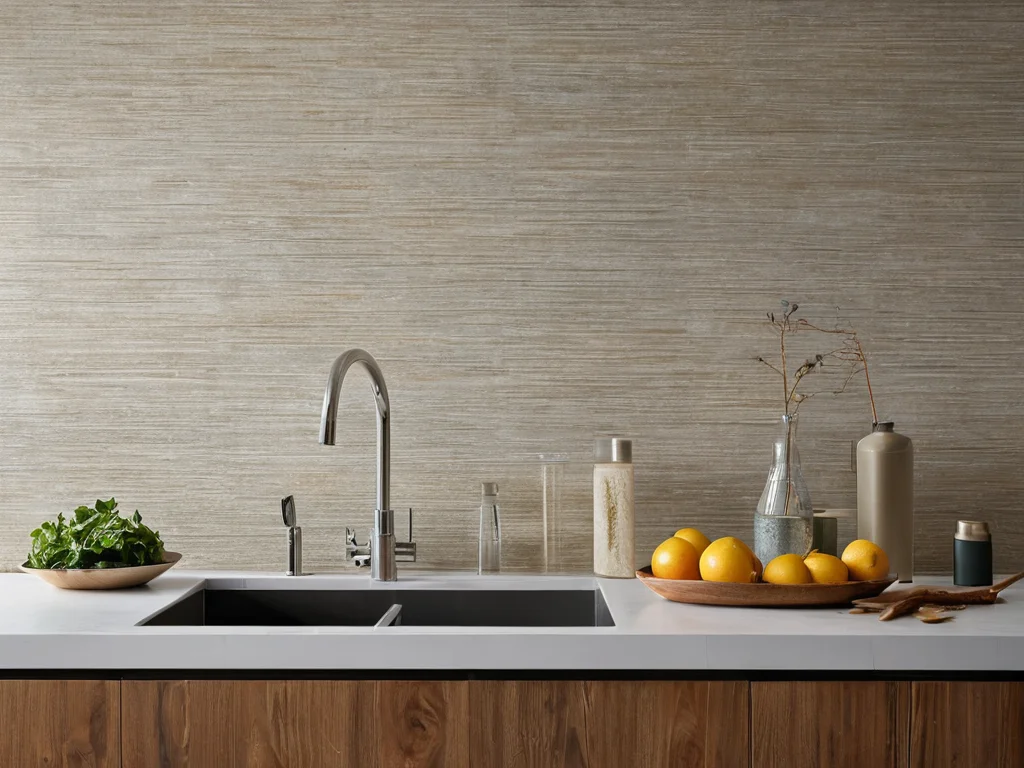
2. Paintable fiberglass wallpaper with a neutral texture
If you want to create perfectly smooth or, conversely, textured walls that can be repainted, fiberglass wallpaper is your choice. They are extremely durable, do not absorb odors, and easily tolerate wet cleaning. By choosing a specific texture (e.g., “herringbone” or “twill”) and painting them in the desired color, you will get a very durable and stylish finish.
Why it’s a hit:
- Indestructibility: withstands intensive use and frequent cleaning.
- Design flexibility: the ability to change wall color even every year.
- Eco-friendliness: do not emit harmful substances, prevent mold growth.
Example: Scandinavian-style kitchen. White smooth paintable fiberglass wallpaper on all walls, complemented by wooden elements and bright textiles. It looks fresh, clean, and very stylish.
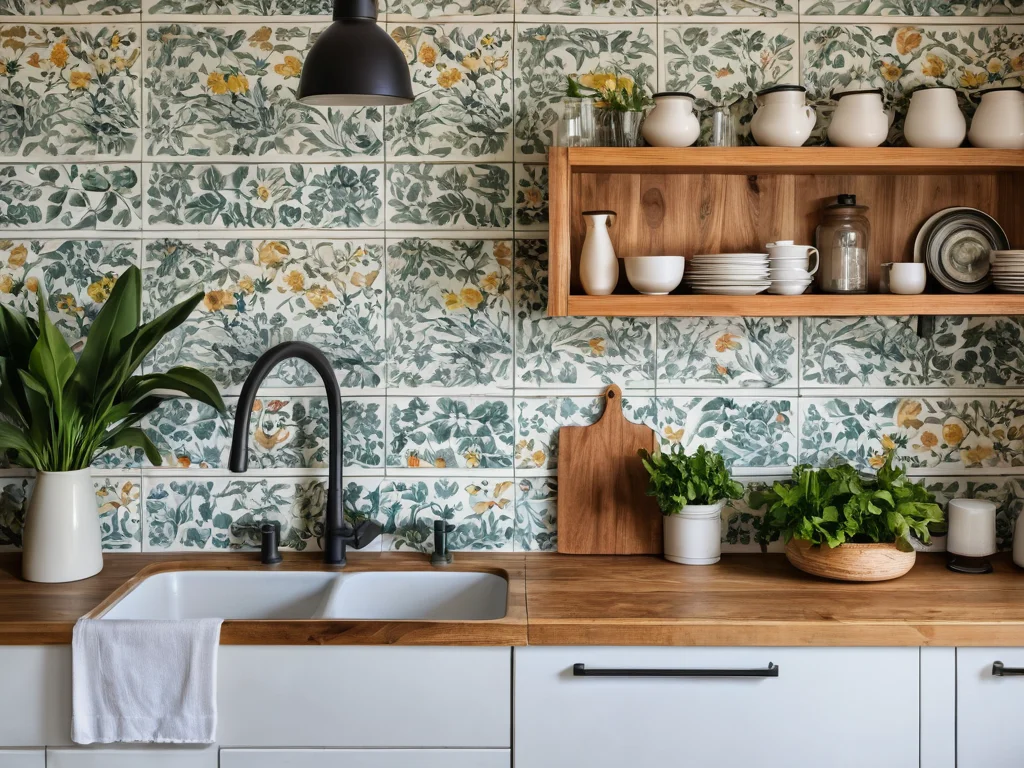
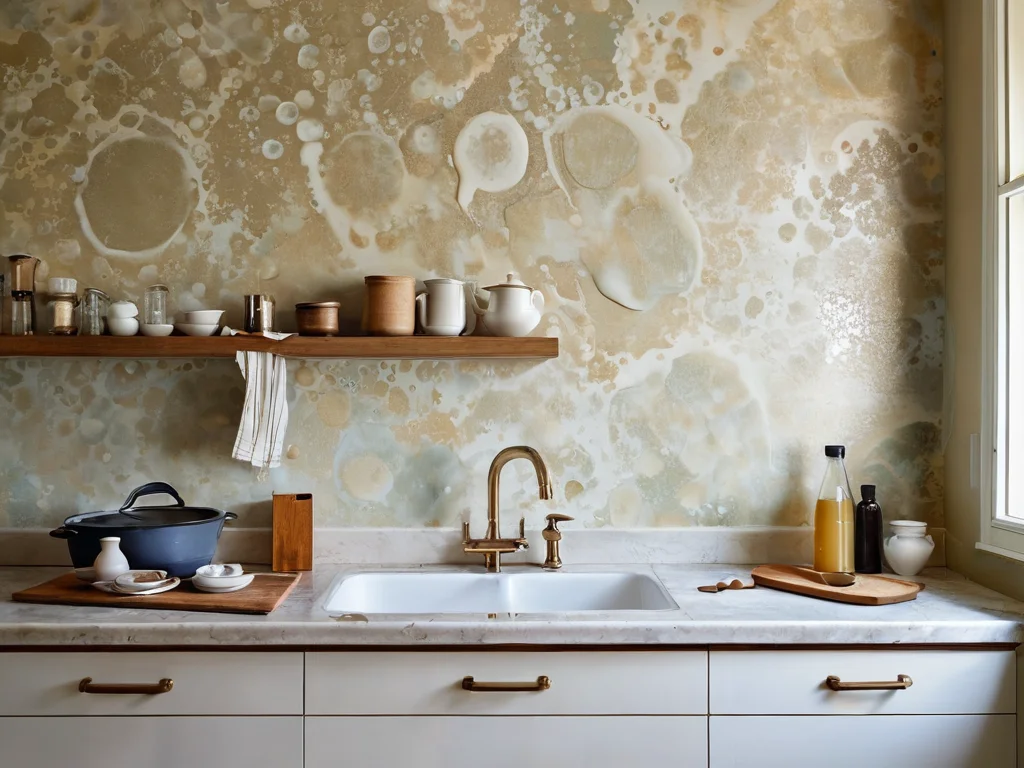
3. Textured vinyl wallpaper with a deep relief
These wallpapers add a special charm and coziness to the interior. The deep relief can imitate plaster, fabric, or even natural materials. It is important to choose options with a dense vinyl coating to ensure good moisture resistance.
Why it’s a hit:
- Decorative: create volume and visual interest.
- Hiding defects: the relief perfectly masks minor wall imperfections.
- Practicality: with careful care and proper cleaning, they last a long time.
Example: Provence-style kitchen. Wallpaper with a delicate floral pattern and a light texture imitating plaster. They give the kitchen a romantic and homey feel.
4. Photo wallpapers with a laminated coating
For creating an accent wall, photo wallpapers are an ideal solution. Modern technologies allow for the creation of photo wallpapers on a dense base with a protective laminated coating, which makes them moisture-resistant and resistant to mechanical damage. You can choose any image – from a picturesque landscape to culinary themes.
Why it’s a hit:
- Impressive look: create a unique and memorable interior.
- Functionality: easy to wash when laminated.
- Effect: can visually expand the space or add depth.
Example: Modern-style kitchen. An accent wall with photo wallpapers depicting a city panorama or a close-up of coffee beans. It looks spectacular and gives the kitchen individuality.
5. Embossed wallpaper (textured vinyl or non-woven)
Hot-embossed wallpaper is also an excellent option for the kitchen. They have a dense vinyl structure that is washable and quite abrasion-resistant. The texture can imitate various materials, from silk to wood.
Why it’s a hit:
- Attractive texture: create a sense of luxury and coziness.
- Durability: quite resistant to moisture and mechanical stress.
- Masking: hide minor wall defects well.
Example: Classic-style kitchen. Wallpaper with a damask pattern or imitation of expensive fabric. They look elegant and noble, while being easy to care for.
Remember that for the kitchen, wallpaper that is easy to wash, but does not emit harmful substances, is especially important. Always pay attention to quality certificates and markings.
How to choose washable wallpaper for the kitchen: a step-by-step guide from an expert
Choosing wallpaper is a responsible step, especially for such a specific area as the kitchen. To avoid mistakes and get a result that will please you for many years, follow this simple but effective guide.
Step 1: Determine the degree of moisture resistance
Carefully study the markings on the roll. Manufacturers use special pictograms:
- One wave: moisture-resistant wallpaper. Can be wiped with a dry or slightly damp cloth.
- Two waves: super-washable wallpaper. Withstands wet cleaning with mild detergents.
- Wave and brush: highly abrasion-resistant. Can be washed with a soft-bristled brush and detergents. This is the ideal option for the kitchen.
Why it’s important: If you make a mistake with the marking, you risk damaging the wallpaper the first time you try to clean it.
Step 2: Choose the material and base
As we have already discussed, the best options for the kitchen are:
- Vinyl on a non-woven base: durable, moisture-resistant, easy to apply.
- Fiberglass wallpaper: maximally durable, eco-friendly, suitable for repainting.
Why it’s important: The base (non-woven fabric) affects the ease of application and durability, and the material of the top layer (vinyl, fiberglass) affects moisture resistance and wear resistance.
Step 3: Assess the purpose of the room and the level of contamination
For the “backsplash” area, where most splashes and grease occur, it is worth choosing the most durable and easily washable wallpaper (e.g., with a “wave and brush” marking). For other walls, less prone to contamination, you can use options with a lower degree of protection.
Why it’s important: This will allow you to optimize your budget and choose the most suitable material for each kitchen zone.
Step 4: Select the design and texture
Consider the overall style of your kitchen:
- Classic, Provence: wallpaper with delicate floral prints, damask patterns, imitation plaster or fabric will be suitable.
- Loft, modern style: choose imitation brick, concrete, wood, geometric patterns.
- Minimalism: plain wallpaper in calm shades or with a delicate texture.
Important: Textured wallpaper can collect dust, so for the kitchen, it’s better to choose a not too deep and complex relief, or be prepared for more frequent cleaning.
Step 5: Check for eco-friendliness and safety
Look for eco-safety signs and certificates of conformity on the packaging. Make sure the wallpaper does not have a strong chemical odor. This is especially important for the kitchen, where food is prepared.
Why it’s important: The health of your family is paramount.
Step 6: Calculate the required quantity
Measure the perimeter of the kitchen and the height of the walls. Find out the pattern repeat (repetition of the pattern) on the roll label. Calculate how many rolls you will need, with a small margin (about 10-15%) for trimming and possible errors.
Why it’s important: By purchasing wallpaper from the same batch, you guarantee that they will be from the same color lot, which will eliminate differences in shade.
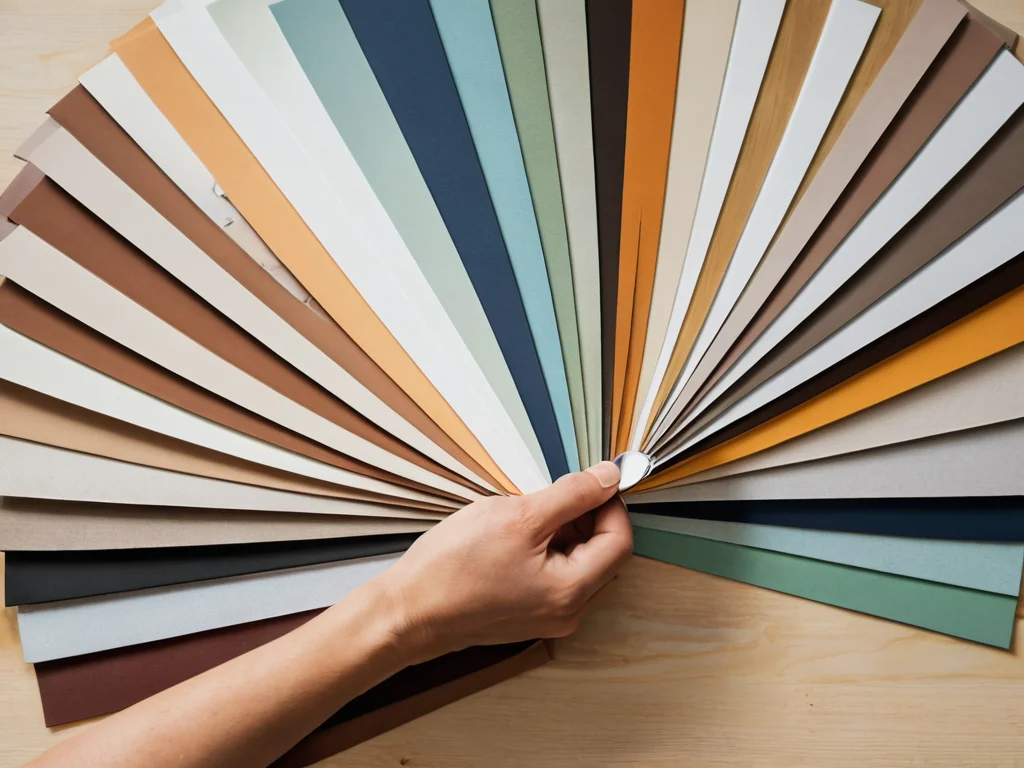
Step 7: Request a sample (if possible)
Some stores offer wallpaper samples. This is a great opportunity to place them against your walls in different lighting conditions, and evaluate the texture and color in person.
Your expert advice: Don’t hesitate to ask sales consultants questions. An experienced specialist will help you navigate the variety of offers and choose exactly what you need for your kitchen.
Glue, tools, preparation: applying washable wallpaper in the kitchen yourself
Wallpapering is a process that, despite its apparent complexity, is quite manageable even for someone without experience, if approached with intelligence and patience. This is especially true for non-woven wallpaper, which is considered one of the easiest to work with. Let’s break it down step by step.
1. Wall preparation
This is the most important stage, on which the final result depends. The walls should be:
- Clean: remove old wallpaper, paint, dust, grease stains, glue residue.
- Dry: make sure the walls are completely dry after washing or leveling.
- Even: putty and sand all cracks, chips, and unevenness.
- Primed: treat the walls with a special wallpaper primer. Primer improves the adhesion of the glue to the surface, reduces glue consumption, and prevents stains.
Why it’s important: Uneven, dirty, or poorly primed walls will lead to wallpaper peeling off, bubbling, or looking untidy.
2. Choosing glue
For washable wallpaper, especially vinyl and non-woven, it is best to use special glue for heavy wallpaper or universal glue marked “for vinyl/non-woven wallpaper.” For fiberglass wallpaper, special glue for fiberglass is needed.
- Modified starch-based glue: suitable for most types of wallpaper, eco-friendly, reliable.
- Specialized glue: for example, for fiberglass wallpaper, where strong bonding is important.
Why it’s important: Incorrectly chosen glue may not provide the necessary adhesion, which will lead to wallpaper peeling off, especially in humid conditions in the kitchen.
3. Necessary tools
- Measuring tape and pencil: for measurements and marking.
- Level or plumb bob: for applying straight strips.
- Sharp knife or utility knife: for trimming wallpaper.
- Rubber roller or plastic spatula: for smoothing wallpaper and removing air bubbles.
- Bucket or container for glue.
- Brush or roller for applying glue.
- Clean damp sponge or cloth: for removing excess glue.
- Ladder or stable stool.
4. Application process (for non-woven wallpaper)
- Apply glue to the wall: evenly distribute glue over the section of the wall that will be covered by one strip of wallpaper.
- Apply the wallpaper strip: apply the dry wallpaper strip to the wall, aligning it with the level.
- Smooth the wallpaper: using a roller or spatula, smooth the strip from the center to the edges, pushing out air and excess glue.
- Seaming: apply the next strip butt-jointed to the previous one, matching the pattern if there is one.
- Trimming: cut off excess wallpaper at the ceiling and baseboard with a sharp knife.
- Removing excess glue: immediately and carefully remove protruding glue with a damp sponge or cloth.
Why it’s important: Careful removal of glue will prevent dirty streaks, and proper smoothing will prevent bubbles.
5. Features of applying vinyl wallpaper on a paper base
In this case, glue is applied directly to the wallpaper strip itself. After applying the glue, the wallpaper should be allowed to “soak” for a few minutes (usually indicated on the packaging) before applying it to the wall. The rest of the process is similar to applying non-woven wallpaper.
6. Ventilation
During and after wallpapering, ensure good ventilation of the room, but avoid drafts until the wallpaper is dry. This will help prevent condensation.
Designer’s tip: If you are wallpapering for the first time, start with the least visible area of the kitchen (e.g., behind the refrigerator or furniture) to get the hang of it. Don’t worry if the first strip isn’t perfect – it will get better with each attempt!
5 common mistakes when choosing and applying washable wallpaper in the kitchen
Even the best material can be ruined by the wrong approach. To ensure your new kitchen wallpaper looks perfect and lasts a long time, it’s important to be aware of typical mistakes to avoid.
1. Incorrect choice of moisture resistance marking
Mistake: Buying wallpaper with a single wave (only moisture-resistant) for the backsplash area or places prone to splashes. Or using wallpaper with a high marking where it’s not critical, overpaying for unnecessary properties.
Why it’s bad: Wallpaper with a low marking will quickly lose its appearance from moisture and cleaning agents, and for areas with high splash traffic, maximally resistant options (wave and brush) are needed.
How to avoid: Always carefully study the markings on the roll and choose material that corresponds to the operating conditions of the specific kitchen area.
2. Insufficient wall preparation
Mistake: Trying to wallpaper uneven, dusty, or unprimed walls.
Why it’s bad: Wallpaper may peel off, bubble, show stains from old paint or dirt. Minor imperfections will be noticeable, spoiling the overall impression.
How to avoid: Thoroughly clean, level, and definitely prime the walls before wallpapering. This is the key to durability and a neat appearance.
3. Using the wrong glue
Mistake: Buying the cheapest or universal glue that is not intended for heavy or moisture-resistant wallpaper.
Why it’s bad: The glue may not provide adequate adhesion. The wallpaper will start to peel at the edges, especially in areas with high humidity, or bubbles will appear.
How to avoid: Always choose glue recommended by the wallpaper manufacturer or suitable for your type of wallpaper (vinyl, non-woven, fiberglass).
4. Incorrect cleaning immediately after application
Mistake: Excessive use of water, harsh cleaning agents, or abrasive sponges to remove excess glue immediately after wallpapering.
Why it’s bad: Wet wallpaper, especially freshly applied, can be easily damaged. The material may become soggy, the pattern may smudge, and excess glue may spread over a large area, leaving unsightly streaks.
How to avoid: Immediately after wallpapering, carefully remove excess glue with a damp (but not wet!) sponge or cloth, moving from the center to the edges. Do not rub hard.
5. Ignoring the pattern repeat (rapport)
Mistake: When applying patterned wallpaper, not aligning the strips at the seams.
Why it’s bad: The integrity of the pattern is disrupted, which looks untidy and spoiled. More material is needed for matching.
How to avoid: Always pay attention to the pattern repeat (usually indicated on the roll label) and carefully match the pattern on adjacent strips. Start applying the first strip strictly according to the level.
Your expert advice: Don’t rush! Wallpapering is a process that requires neatness and attention to detail. It’s better to spend a little more time on preparation and the process itself than to regret the spoiled result later.
Secrets of caring for washable wallpaper: how to preserve their appearance for years
Even the most durable washable wallpaper requires careful care to maintain their attractive appearance for years to come. The kitchen is a special place, and understanding the nuances of care will help you avoid unpleasant surprises and maintain the freshness of your renovation.
1. Regular dry cleaning
What to do: Periodically wipe the wallpaper with a soft dry cloth or vacuum it using a brush attachment with soft bristles.
Why it’s important: Removing dust and small dirt prevents them from embedding into the wallpaper structure and facilitates subsequent wet cleaning.
2. Wet cleaning as needed
What to do: When stains appear, use a clean sponge dipped in warm water. Gently blot or lightly wipe the stained area. If water doesn’t work, you can add a little mild detergent to it (e.g., baby soap or dish soap without abrasives).
Important:
- Use only a soft sponge or microfiber cloth.
- Do not rub hard to avoid damaging the top layer.
- After removing the stain, wipe the area with a clean damp sponge to remove any detergent residue.
- Be sure to dry the treated area with a clean dry cloth.
Why it’s important: Proper wet cleaning will remove dirt without damaging the wallpaper. Detergent residue can leave streaks over time.
3. Dealing with greasy stains
What to do: Greasy stains are the bane of the kitchen. For their removal, you can use a weak soapy solution or a special cleaner for vinyl surfaces. Apply the solution to a sponge, wipe the stain, then rinse with a clean damp sponge and dry.
Life hack: Sometimes applying a small amount of alcohol (isopropyl) to a cotton pad and gently wiping the greasy stain works well, but test it on an inconspicuous area first!
Why it’s important: Grease can penetrate the wallpaper structure, so it’s important to act quickly.
4. Avoid harsh chemicals and abrasives
What to do: Never use the following for cleaning wallpaper:
- Abrasive powders and pastes.
- Stiff brushes, metal scouring pads.
- Solvents, acetone, gasoline (unless otherwise indicated by the manufacturer).
- Concentrated acids or alkalis.
Why it’s important: These agents will irreversibly damage the wallpaper surface, leaving scratches, scuffs, or changing the color.
5. Cleaning hard-to-reach areas
What to do: For cleaning textured wallpaper or corners, you can use an old soft-bristled toothbrush dipped in a soapy solution.
Why it’s important: Maintaining cleanliness even in small details extends the life of your wallpaper.
6. Test for resistance
What to do: Before using a new cleaning agent, test it on a small, inconspicuous area of the wallpaper. Leave it for a few minutes, then gently wipe and let it dry. Make sure the color and texture have not changed.
Why it’s important: This is your insurance against damaging the entire sheet.
Your expert advice: The best way to preserve washable wallpaper is to remove dirt promptly. The faster you react to a stain, the easier and safer its removal will be, and the longer your wallpaper will look like new.
Washable wallpaper in the kitchen: final touches and inspiring ideas
We have reached the end of our grand journey into the world of washable wallpaper for the kitchen. I hope you are now confident in your choice and know how to make your kitchen not only beautiful but also maximally practical. It’s time to add the final touches that will emphasize your taste and create a complete look.
1. Accent wall as the main element
One bright or textured wall can become the focal point of your kitchen. This could be a wall with photo wallpaper, brick-look wallpaper, wood imitation, or wallpaper with a striking geometric pattern. The other walls can be decorated with more neutral, but color- and texture-coordinated wallpaper.
Idea: If you’ve chosen bright wallpaper for the backsplash, make the other walls neutral. If the main wall has a pattern, the backsplash can be plain but with an interesting texture.
2. Combining wallpapers
Don’t be afraid to combine different types of wallpaper! For example, washable vinyl wallpaper imitating tiles in the work area (backsplash) and calmer non-woven wallpaper with a light texture on other walls. Or you can use decorative borders and inserts made of other materials.
Idea: Wallpaper with a pattern can be “framed” with plain wallpaper, creating a kind of “panel” on the walls.
3. Lighting and its role
Properly chosen lighting can transform any kitchen. Soft warm light from sconces or spotlights over the work area will emphasize the beauty of your wallpaper and create a cozy atmosphere. Remember that matte surfaces reflect light better, making the space more airy.
Idea: Use lighting for the work area – it’s not only practical but also favorably emphasizes the texture of the wallpaper in this zone.
4. Decor and textiles
Paintings, posters, decorative plates, live plants, stylish clocks – all of this can be the final touch. Choose decor according to the kitchen style and wallpaper color. Textiles (curtains, tablecloths, towels) should harmonize with the overall color scheme.
Idea: If the wallpaper has a subtle pattern, you can choose textiles with a bolder print, and vice versa.
5. Functional zones
Divide the kitchen into functional zones using different types of wallpaper or decorative elements. For example, in the dining area, you can use brighter and cozier wallpaper, and in the work area, more practical and neutral ones.
Idea: The wall above the dining table can be decorated with photo wallpaper or wallpaper with a cheerful print, while the walls near the stove and sink should be practical and easy to wash.
Conclusion
Washable wallpaper for the kitchen is not just a trend, it’s a smart choice for modern housewives who value beauty, comfort, and practicality. Experiment, get inspired, and create the kitchen of your dreams! Remember that the most important thing is your comfort and coziness in this most “heartfelt” space of the home.
Рекомендуем:
 Wall Cladding with Wood Paneling: A Step-by-Step Guide
 Joint filler for tiles: how to choose the color and apply it correctly
Grout for tiles: how to choose the color and apply it correctly
Joint filler for tiles: how to choose the color and apply it correctly
Grout for tiles: how to choose the color and apply it correctly
 How to Make a Brick Wall in an Interior (Imitation)
 How to Update Old Tiles Without Removing Them: 99 Ways to Transform Your Bathroom and Kitchen
 Internal Wall Insulation: Materials and Technology
 Bathroom: Tile or Paint. What Will Everyone Face?
 DIY Decorative Stone Wall Installation: Your Guide to Home Transformation
 What to do if mold or mildew appears on the walls?
 Papier peint lavable pour la cuisine : pourquoi est-ce la meilleure idée pour votre rénovation ?
 PVC Wall Panels: Cheap and Cheerful. Installation Guide
 How to Tile Walls in a Bathroom: A Detailed Guide
 MDF Panel Wall Finishing: Installation Guide
Revêtement mural en lambris : guide étape par étape
MDF Panel Wall Finishing: Installation Guide
Revêtement mural en lambris : guide étape par étape
 generatepress
Comment rénover du vieux carrelage sans le retirer : 99 façons de transformer votre salle de bain et votre cuisine
Pose de pierre décorative sur le mur par vous-même : votre guide pour transformer votre maison
Panneaux PVC pour murs : bon marché et efficace. Guide d’installation
Comment poser du carrelage mural dans la salle de bain : guide détaillé
Salle de bain : carrelage ou peinture. À quoi chacun sera-t-il confronté ?
generatepress
Comment rénover du vieux carrelage sans le retirer : 99 façons de transformer votre salle de bain et votre cuisine
Pose de pierre décorative sur le mur par vous-même : votre guide pour transformer votre maison
Panneaux PVC pour murs : bon marché et efficace. Guide d’installation
Comment poser du carrelage mural dans la salle de bain : guide détaillé
Salle de bain : carrelage ou peinture. À quoi chacun sera-t-il confronté ?