Greetings, dear friends and connoisseurs of stylish interiors! Today, we’ll dive into the amazing world of decorative stone and explore how you can transform your home with it. If you dream of adding uniqueness, coziness, and natural beauty to your home, then this article is exactly what you need. We will explain in detail how to lay decorative stone on a wall yourself, even if you’ve never done it before. Arm yourself with patience, enthusiasm, and let’s start creating the interior of your dreams!
Why Decorate Walls with Decorative Stone: 5 Undeniable Benefits for Your Interior
Decorative stone is not just a finishing material; it’s a true canvas for your design ideas. It can give any room a unique charm, coziness, and a sense of closeness to nature. Let’s figure out why it’s so popular and what benefits you get when choosing it for your home.
1. Aesthetic Appeal and Variety
Stone is a symbol of strength, reliability, and natural beauty. Decorative stone imitates natural stone but offers a much wider variety of shapes, colors, and textures. You can choose:
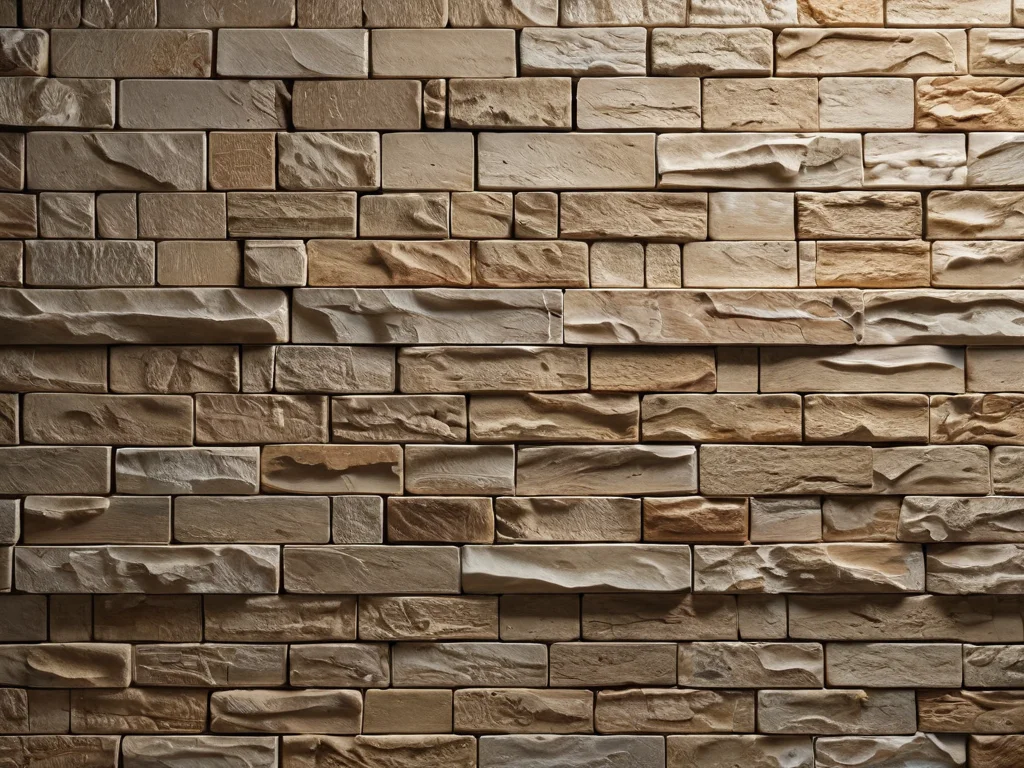
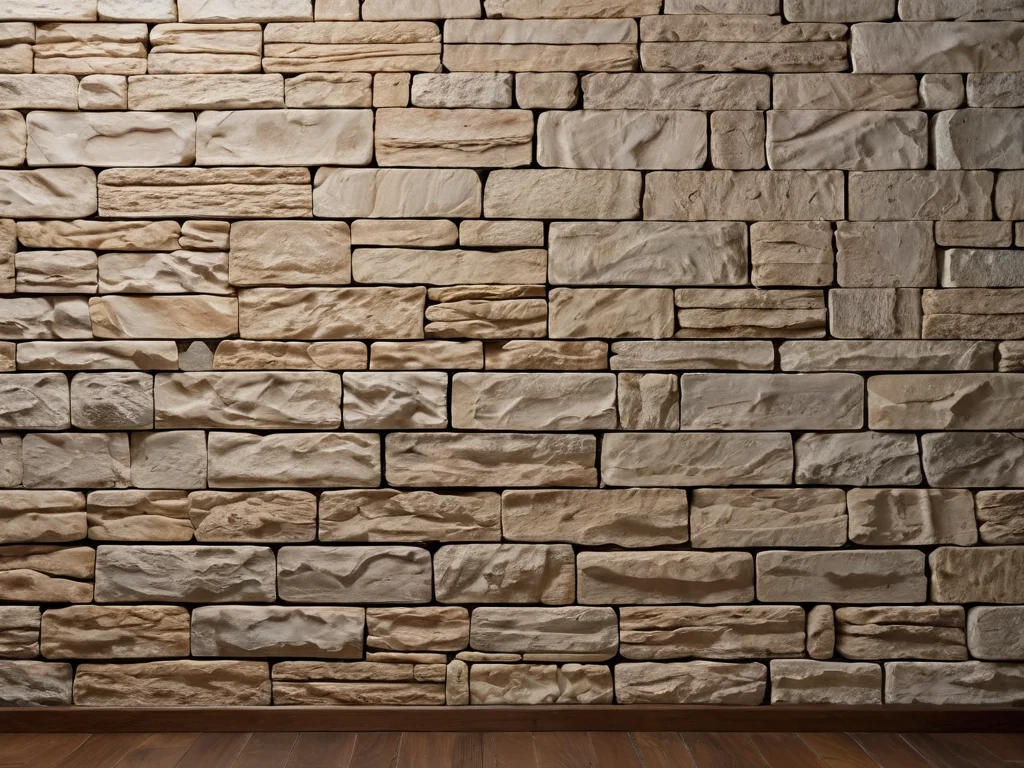
- Imitation of Natural Stone: slate, granite, marble, sandstone, limestone. Each type has its own unique pattern and color transitions.
- Brickwork: aged brick, smooth loft brick, colored brick. Ideal for loft, industrial, and country styles.
- Art Panels: volumetric elements with unusual reliefs imitating tree bark, sea waves, or geometric patterns.
This allows you to select an option that perfectly fits any interior style, from classic to ultra-modern minimalism.
2. Creating a Unique Atmosphere
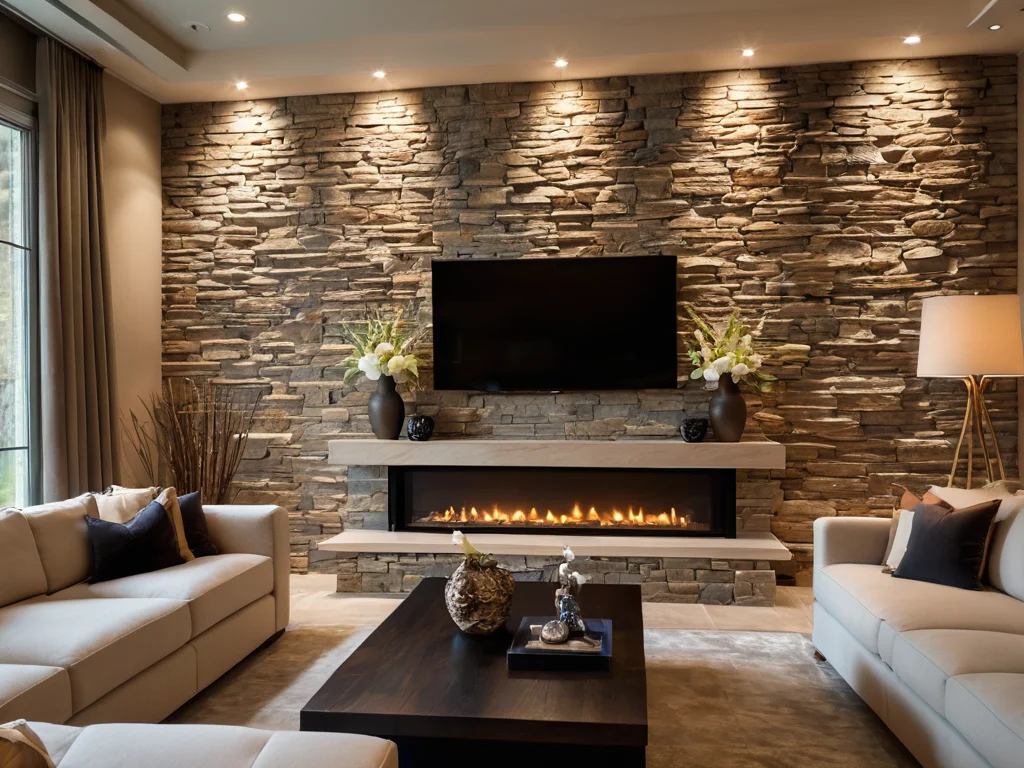
With stone, you can zone space, highlight an accent wall, decorate a fireplace area, or create a niche. The texture of the stone adds depth and tactility to the interior, making it more lively and interesting. Imagine a cozy living room with a fireplace clad in rough stone, or a stylish kitchen with a backsplash made of artificial brick – such details instantly create a special atmosphere.
3. Practicality and Durability
Modern decorative stone, especially based on gypsum or cement, is very strong and durable. It is resistant to abrasion, temperature fluctuations, and humidity (depending on the type of stone and protective coating). Properly laid and treated stone will delight you with its impeccable appearance for decades.
4. Ease of Care
Unlike some other materials, stone does not require complex care. Most types of decorative stone are easily cleaned with a damp sponge and mild detergents. Dust and dirt do not get trapped in the pores as they do with untreated wood or textiles.
5. Eco-friendliness
Many types of decorative stone are made from natural, environmentally friendly components. Gypsum stone, for example, is completely safe for health and does not release harmful substances. This is especially important for bedrooms, children’s rooms, and spaces where people spend a lot of time.
Decorative Stone for Walls: Which Type to Choose for Your Living Room, Bedroom, or Bathroom?

Choosing decorative stone is the first and perhaps the most crucial step. The overall look and atmosphere of your interior will depend on the specific stone you choose. Let’s figure out which stone is suitable for different rooms.
Gypsum-Based Artificial Stone
Gypsum stone is one of the most popular options for interior finishing. It is lightweight, which reduces the load on the walls and simplifies installation. Gypsum is an environmentally friendly material, pleasant to the touch, and easy to color.
- Pros: Lightweight, eco-friendly, pleasant texture, good thermal and sound insulation, affordable price.
- Cons: Sensitive to moisture, so for wet rooms (bathroom, kitchen) it requires mandatory treatment with a water-repellent compound. Can be fragile under strong mechanical impact.
- Where to use: Ideal for living rooms, bedrooms, hallways, fireplace areas, decorative niches.
Cement-Based Artificial Stone
Cement stone is more durable and moisture-resistant than gypsum stone. It is heavier, which requires more reliable base preparation, but it is better suited for rooms with high humidity and more intensive use.
- Pros: High strength, frost resistance, moisture resistance, durability.
- Cons: Heavier weight, can be more expensive, texture may be less varied compared to gypsum.
- Where to use: Excellent for kitchen backsplashes, bathrooms, hallways, exterior wall cladding (if designed for it).
Quartz Agglomerate (Artificial Stone)
This is a composite material consisting of quartz sand, resins, and pigments. It is extremely durable, resistant to scratches, impacts, and aggressive chemicals.
- Pros: Incredible strength and wear resistance, zero water absorption, hygienic (does not absorb odors or dirt), a wide range of colors and textures, including imitation of rare stone types.
- Cons: High price, heavy weight, complex installation (usually requires professionals).
- Where to use: Perfectly suited for kitchen countertops, backsplashes, bathroom countertops, but can also be used for wall finishing in high-traffic areas.
Marble or Granite Based Agglomerates
Composed of natural stone chips, binding resins, and pigments. They combine the beauty of natural stone with improved performance characteristics.
- Pros: Beauty of natural stone, high strength, abrasion resistance.
- Cons: Price can be high, weight is also significant, can absorb some liquids (especially marble agglomerates) if not protected.
- Where to use: Wall finishing in living rooms, halls, bathrooms, creating accent elements.
Choosing Color and Texture
- For the living room: Here you can let your imagination run wild. Warm beige, gray, terracotta shades will create coziness. White or light stone will visually expand the space. An accent wall behind the sofa or TV, clad in stone with a pronounced texture, will become the central element of the interior.
- For the bedroom: It’s better to choose calm, muted tones – cream, light gray, sand, soft beige. Stone with a smoother texture will look elegant. You can decorate the headboard or one of the walls.
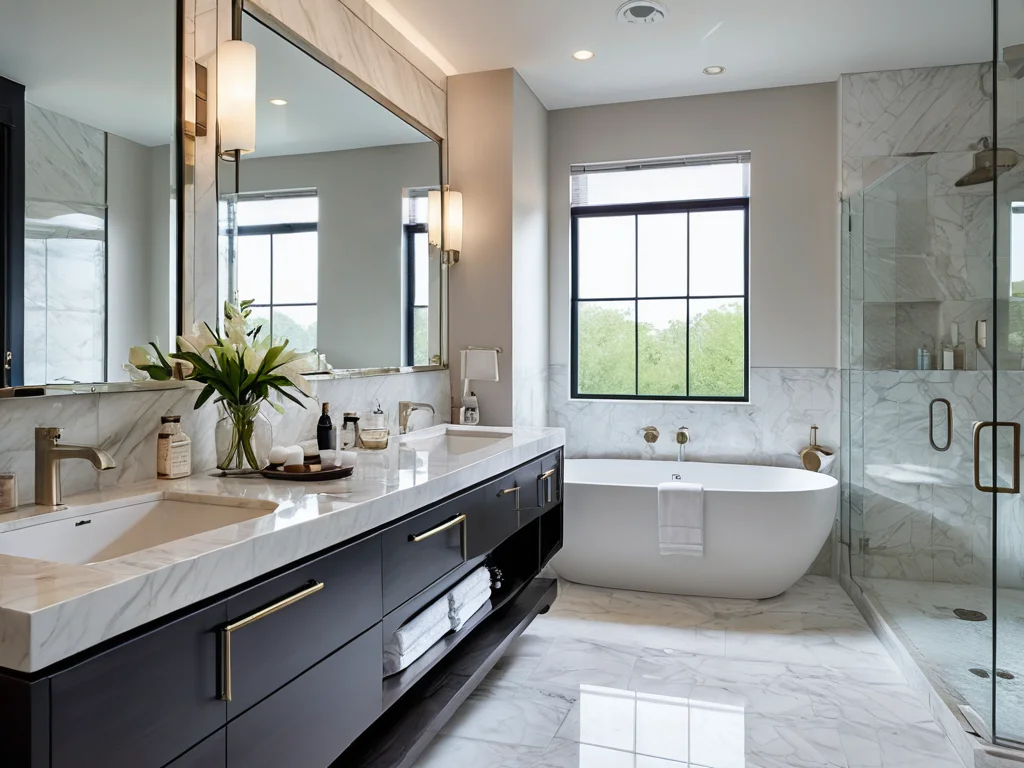
- For the bathroom: It is important to choose moisture-resistant stone (cement, quartz agglomerate) or carefully treat gypsum stone with a water repellent. Light shades, imitation of natural stone (slate, travertine) will perfectly fit into a marine or Mediterranean theme.
- For the kitchen: Practicality comes first. A stone kitchen backsplash is an excellent solution. It is easy to clean and resistant to grease and moisture. Choose light or neutral shades.
- For the hallway: Darker and more textured stones, imitating natural stone or aged brick, are appropriate here. They will help hide minor dirt and create an atmosphere of reliability and hospitality.
Designer’s Tip: Don’t be afraid to experiment with combinations. For example, combining a smooth painted wall with an area clad in textured stone always looks interesting.
Preparing Walls for Decorative Stone Installation: A Step-by-Step Master Guide
The quality and durability of the final finish directly depend on how thoroughly you prepare the base. This stage cannot be skipped, even if the wall seems perfectly smooth!
Step 1: Surface Cleaning
- Remove old wallpaper, paint, dust, dirt, and grease stains.
- If there are any remnants of glue or plaster on the wall, they must also be removed.
- Pay special attention to grease stains – they can interfere with glue adhesion. Use special degreasers.
Step 2: Wall Leveling
- Gypsum Plaster: If the wall has significant irregularities (deviations of more than 3-5 mm per 2 meters), it needs to be leveled. Gypsum plaster is best for this. Apply it in layers, allowing each layer to dry.
- Putty: Small defects (cracks, holes) can be filled with putty. After drying, sand the puttied areas with fine-grit sandpaper.
- Level: Do not strive for perfect smoothness as for painting. A slight roughness is even welcome, as it will improve the adhesion of the glue to the surface. The main thing is the absence of obvious bumps and hollows.
Step 3: Priming
- Why is this necessary? Primer penetrates the pores of the material, strengthens it, improves adhesion (grip) of the glue to the surface, and also reduces the wall’s absorbency. This is especially important for gypsum bases, which can be too hygroscopic.
- Which primer to choose? Use a deep-penetrating acrylic primer. It is suitable for most bases and compatible with most adhesive compounds.
- How to apply? Apply the primer with a roller or brush in one or two coats. Allow each coat to dry thoroughly according to the manufacturer’s instructions (usually 2-6 hours).
Step 4: Waterproofing (for wet rooms)
- If you plan to install stone in a bathroom, kitchen, or other high-humidity areas, be sure to apply a waterproofing compound.
- How to apply? Use special trowel-on waterproofing mixtures. Apply them in 2-3 coats crosswise, allowing each coat to dry.
- Important: Pay special attention to corners and joints – you can additionally seal them with waterproofing tape.
Step 5: Marking
- Horizontal Lines: Using a level and pencil, draw horizontal lines on the wall that will serve as guides for laying rows of stone. The spacing between lines depends on the height of the stone tile.
- Vertical Lines: Similarly, draw vertical lines if you plan to lay with even joints.
- Test Area: Before starting the main work, try laying a few stone tiles on the floor or a small section of the wall to see how the pattern will look and determine the optimal spacing for the joints.
Master’s Tip: Don’t rush the preparation stage. A well-prepared wall is the key to successful installation and the longevity of your finish.
Tools and Materials for Installing Decorative Stone: A Complete Beginner’s List
To ensure the decorative stone installation process goes smoothly and without hassle, you’ll need a correctly selected set of tools and materials. Don’t worry, you’ll likely find most of them at home or can easily purchase them.
Main Materials:
- Decorative Stone: Choose the desired type, color, and texture. Buy with a small margin (5-10%) in case of breakage or cutting.
- Tile Adhesive: For gypsum stone, regular cement-based tile adhesive or special gypsum adhesive will work. For cement stone, only cement tile adhesive, preferably frost-resistant and moisture-resistant. Pay attention to the adhesive class (e.g., C1, C2) – the higher the class, the better the adhesion.
- Primer: Acrylic deep-penetrating primer.
- Waterproofing (if necessary): Trowel-on waterproofing for wet rooms.
- Grout: Choose grout that matches the color of your stone. There are cement and epoxy options. For most cases, cement grout is suitable and easier for beginners to use.
- Protective Varnish (optional): Acrylic or polyurethane varnish to protect the stone from moisture, dirt, and abrasion, especially for gypsum stone.
Necessary Tools:
- Container for mixing adhesive and grout: Plastic bucket or basin.
- Construction mixer or drill attachment: For uniform mixing of adhesive without lumps.
- Notched trowel: For applying adhesive to the wall and tiles. The tooth size depends on the tile size, usually 7-10 mm.
- Flat trowel: For applying adhesive in hard-to-reach places and removing excess.
- Trowel or spatula: For applying adhesive to large surfaces, especially if the stone has a complex relief.
- Level: For checking the horizontality and verticality of the masonry.
- Tape measure: For accurate measurements.
- Pencil: For marking on the wall.
- Utility knife or hacksaw: For cutting stone (gypsum).
- Angle grinder (Sander) with a stone/concrete disc: For cutting more durable types of stone (cement, clinker). Be sure to use protective gear!
- Sander or sandpaper: For finishing the edges of cut tiles.
- Brush: For applying primer, varnish, and adhesive in hard-to-reach places.
- Roller: For applying primer and varnish.
- Sponge: For removing excess adhesive and grout from the stone surface.
- Rags, cloths: For wiping tools and surfaces.
- Personal protective equipment: Respirator (when working with dusty materials and cutting), safety glasses (especially when cutting), gloves.
- Tile spacers or leveling shims (optional): If you want perfectly even joints.
- Caulking gun (if using joint sealant):
Important: Before starting work, make sure all tools are clean. Prepare everything you need in advance so you don’t get distracted later.
DIY Decorative Stone Installation: A Detailed Master Class from A to Z
So, the walls are prepared, the tools are gathered, and the mood is set! It’s time to get to the most exciting part – installing decorative stone. Follow this step-by-step guide, and you’ll succeed!
Step 1: Mixing the Adhesive
- Pour water into a clean container (the amount is indicated on the adhesive packaging).
- Gradually add the dry mix, constantly stirring with a construction mixer at low speed.
- Achieve a consistency like thick sour cream, without lumps.
- Let the adhesive rest for 5-10 minutes, then stir again.
- Important: Prepare adhesive in small batches, as it has a limited pot life (usually 30-60 minutes).
Step 2: Applying the Adhesive
- To the wall: Using a notched trowel, evenly apply adhesive to the section of the wall you plan to cover in the next 10-15 minutes. Movements should be in one direction to create “grooves.”
- To the tile: For better adhesion, it is recommended to apply adhesive to the tile as well (especially if it is large or heavy). Use a flat trowel to apply adhesive to the back of the tile, then go over it with the notched trowel.
- Layer thickness: The adhesive layer should be sufficient to ensure full coverage of the back of the tile, but not so thick that adhesive squeezes out of the joints.
Step 3: Laying the First Tile
- Start laying from the bottom row, using the pre-drawn horizontal lines as a guide.
- Apply the tile to the wall, press gently, and tap it with a rubber mallet or the handle of a trowel to ensure it sits firmly in the adhesive.
- Check for horizontality with a level.
- Tip: Start from the corners or the most visible areas. If you have tiles with straight edges, start with them to create a clear border.
Step 4: Laying Subsequent Tiles
- Place the next tiles against the previous ones, leaving a gap for the joint. The joint width depends on the type of stone and your design, usually 5-15 mm.
- Use tile spacers or simply maintain an equal distance to control the joint width.
- Regularly check the horizontality and verticality of the rows with a level.
- Sorting: Inspect each tile before laying. Use tiles with the most attractive pattern and color in visible areas. Tiles with defects or less desirable shades can be used for cutting or in inconspicuous corners.
Step 5: Cutting and Fitting
- For cutting gypsum stone, a utility knife or hacksaw is sufficient.
- For cement stone, an angle grinder (sander) with a diamond disc will be needed. Work carefully, wearing safety glasses and a respirator.
- After cutting, sand the edges with sandpaper or a sanding machine to make them smooth and even.
- Test the cut pieces before final adhesion.
Step 6: Removing Excess Adhesive
- Immediately after laying each tile, carefully remove excess adhesive squeezed into the joint with a flat trowel or a damp sponge.
- Do not let the adhesive dry on the stone surface – this will make subsequent cleaning more difficult.
Step 7: Complete Drying
- Allow the adhesive to dry completely. Drying time is indicated on the packaging, usually 24-48 hours.
- During this time, avoid mechanical impact on the finished surface.
Designer’s Tip: Don’t be afraid to improvise! You can lay the stone with offsets, randomly, or combine different types or colors. The main thing is that you like the result.
How to Properly Grout Between Stones: Secrets to a Perfect Result
Grouting is the finishing touch that gives the cladding a complete look and protects the joints from dust and moisture. Properly done grouting emphasizes the beauty of the stone and makes the masonry neat.
Step 1: Preparation for Grouting
- Ensure the adhesive is completely dry (usually 24-48 hours).
- Remove any adhesive residue, dust, and debris from the joints. You can use a construction vacuum cleaner or a brush.
- If you want perfectly even joints, you can carefully run a trowel or knife along the edges of the joints.
Step 2: Mixing the Grout
- The mixing process is similar to preparing the adhesive. Use a clean container and follow the instructions on the packaging.
- The grout should have the consistency of thick sour cream or paste.
- Prepare grout in small batches so that it can be used before it starts to set.
Step 3: Applying the Grout
- With a Trowel: For tiles with deep or wide joints, it is convenient to use a small rubber trowel or spatula. Tightly fill the joints with grout, trying not to leave any voids.
- With a Brush: If the joints are small or you want a more delicate filling, you can use a stiff brush.
- With a Syringe (for thin joints): For very thin joints or to create neat lines, you can use a construction syringe or a pastry bag with a tip.
- Tip: Don’t try to perfectly level the grout immediately. The main thing is to tightly fill the joint.
Step 4: Leveling and Removing Excess
- Wait for the grout to start setting slightly (usually 15-30 minutes, depending on the type of grout and conditions).
- Using a damp (but not wet!) sponge or a soft cloth, carefully remove excess grout from the stone surface and from the joints. Movements should be light to avoid washing out the grout from the joint itself.
- Wipe the sponge after each movement to avoid smearing dirt.
- To make the joints smooth and even, you can use a damp brush or a special grout finishing tool.
- Important: Do not use too much water when grouting, as this can weaken the joint.
Step 5: Final Cleaning
- After the grout has completely dried (time indicated on the packaging), a light haze may remain on the stone surface.
- Remove it with a dry soft cloth or brush.
- If the haze is difficult to remove, you can slightly dampen the cloth with water or use special grout cleaners.
Step 6: Applying Protective Varnish (if planned)
- When the grout and stone are completely dry, you can apply a protective varnish.
- Apply the varnish in a thin, even layer with a brush or roller.
- The varnish will give the stone a slight sheen (or leave a matte surface, depending on the type of varnish) and further protect it from moisture and dirt.
Designer’s Tip: The color of the grout plays a huge role! Contrasting grout (e.g., dark stone and light grout) will emphasize the texture and add brutality to the interior. Light grout on light stone will create a softer and calmer effect.
Most Common Mistakes When Installing Decorative Stone and How to Avoid Them
Even the most experienced craftsmen sometimes make mistakes, let alone beginners. But don’t despair! By knowing about typical “pitfalls,” you can avoid them and guarantee yourself an excellent result.
Mistake 1: Insufficient Surface Preparation
- Manifestation: Stone peels off, adhesive doesn’t hold well.
- Cause: The wall was dirty, greasy, unprimed, or had significant irregularities.
- How to avoid: Carefully follow the wall preparation instructions – cleaning, leveling, and priming are mandatory!
Mistake 2: Incorrect Adhesive Choice
- Manifestation: Stone falls off, especially in wet areas.
- Cause: Adhesive not suitable for the type of stone or operating conditions was used (e.g., interior adhesive in a wet area).
- How to avoid: Always read the adhesive instructions and choose the one recommended by the manufacturer for your type of stone and installation location.
Mistake 3: Applying Adhesive Too Thickly
- Manifestation: Adhesive squeezes out of the joints excessively, it’s difficult to remove, the joint becomes too wide.
- Cause: Inexperience, desire to “surely” make a reliable fastening.
- How to avoid: Use a notched trowel with the appropriate tooth size. Apply adhesive evenly, without excess. Remove excess adhesive immediately.
Mistake 4: Laying “Tight” Without Joints
- Manifestation: Stone cracks due to thermal expansion, joints fill with dust, the overall look becomes “flat.”
- Cause: Desire for a monolithic surface, lack of knowledge of the technology.
- How to avoid: Always leave expansion gaps (joints) between tiles. Their width depends on the type of stone, but is usually 5-15 mm. Use spacers or leveling shims for control.
Mistake 5: Incorrect Grouting of Joints
- Manifestation: Grout crumbles, looks messy, doesn’t hold well.
- Cause: Unsuitable compound used, grout applied to un-dried adhesive, too much water used.
- How to avoid: Wait for the adhesive to dry completely. Mix grout correctly. Carefully fill the joints and remove excess in a timely manner.
Mistake 6: Insufficient Ventilation During Work
- Manifestation: Headache, respiratory irritation when cutting or working with adhesive/grout.
- Cause: Working in a closed room without ventilation.
- How to avoid: Ensure good room ventilation. When cutting stone and working with dusty mixtures, use a respirator and goggles.
Mistake 7: Ignoring Manufacturer’s Instructions
- Manifestation: The result may differ significantly from expectations, the material may behave unpredictably.
- Cause: Overconfidence, inattention.
- How to avoid: Always carefully read and follow the instructions of the manufacturers of adhesive, grout, primer, and the stone itself.
Designer’s Tip: It’s better to spend a little more time studying the technology and preparing than to redo the work later. Observe the process, pay attention to details – and success is guaranteed!
Caring for Walls with Decorative Stone: Extending Beauty for Years

You’ve done a lot of work, and now your decorative stone wall is pleasing to the eye. To maintain this effect for as long as possible, it’s important to properly care for the surface. It’s not difficult at all if you know a few secrets.
Regular Dry Cleaning
- The simplest and safest way to care for it is regular dry cleaning.
- Use a soft brush with long bristles, a vacuum cleaner with a soft attachment, or just a dry microfiber cloth.
- This will help remove dust that settles on the textured surface of the stone over time.
Damp Cleaning
- If dry cleaning is not enough, you can resort to damp cleaning.
- Use a soft sponge or cloth dipped in clean water.
- Wring out the cloth well so it is only slightly damp, not wet.
- Gently wipe the stone surface, trying not to rub too hard.
- After damp cleaning, dry the stone with a clean dry cloth.
Using Detergents
- To remove more stubborn stains (e.g., grease stains in the kitchen), you can use mild detergents.
- What is suitable? Neutral detergents are ideal, such as dish soap diluted in water or special tile and stone cleaners.
- What not to use? Absolutely avoid abrasive cleaning agents (powders, stiff brushes), acidic or alkaline solutions, and solvents. They can damage the stone surface or grout.
- How to apply? Apply a small amount of detergent to a damp sponge, lather, and gently treat the stained area. Then thoroughly rinse off the detergent residue with a clean damp sponge and dry.
Protection from Moisture and Stains
- As we’ve already mentioned, especially for gypsum stone, protection from moisture is important.
- If you haven’t applied a protective varnish after installation, you can do it at any time.
- Periodically (every 1-3 years, depending on operating conditions), it is recommended to renew the protective coating.
- Varnish not only protects against moisture but also facilitates subsequent cleaning, as dirt does not penetrate the surface.
Caring for Joints
- The joints between stones also require attention.
- If the grout becomes dirty, it can be carefully cleaned with a soft brush and soapy water.
- If necessary, you can refresh the grout layer in particularly problematic areas.
What to do if cracks or chips appear?
- Small cracks or chips can be masked with repair compounds or specially colored paints.
- If you have a restoration kit from the stone manufacturer, use it according to the instructions.
- Severe damage may require tile replacement.
Designer’s Tip: Regular, but gentle care will allow your decorative stone to retain its original appearance for many years. Don’t forget that preventive measures (protective varnish, careful use) are much more effective than dealing with the consequences.
Рекомендуем:
 Grout for tiles: how to choose the color and apply it correctly
Joint filler for tiles: how to choose the color and apply it correctly
Grout for tiles: how to choose the color and apply it correctly
Joint filler for tiles: how to choose the color and apply it correctly
 How to Tile Walls in a Bathroom: A Detailed Guide
 How to Update Old Tiles Without Removing Them: 99 Ways to Transform Your Bathroom and Kitchen
 Bathroom: Tile or Paint. What Will Everyone Face?
 How to Make a Brick Wall in an Interior (Imitation)
 Washable wallpaper for the kitchen: why it’s the best idea for your renovation?
 Wall Cladding with Wood Paneling: A Step-by-Step Guide
 PVC Wall Panels: Cheap and Cheerful. Installation Guide
 Internal Wall Insulation: Materials and Technology
 MDF Panel Wall Finishing: Installation Guide
 What to do if mold or mildew appears on the walls?
 Pose de pierre décorative sur le mur par vous-même : votre guide pour transformer votre maison
Comment poser du carrelage mural dans la salle de bain : guide détaillé
Comment rénover du vieux carrelage sans le retirer : 99 façons de transformer votre salle de bain et votre cuisine
Revêtement mural en panneaux MDF : guide d’installation
Revêtement mural en lambris : guide étape par étape
Salle de bain : carrelage ou peinture. À quoi chacun sera-t-il confronté ?
Panneaux PVC pour murs : bon marché et efficace. Guide d’installation
Isolation des murs par l’intérieur : matériaux et technologie
Pose de pierre décorative sur le mur par vous-même : votre guide pour transformer votre maison
Comment poser du carrelage mural dans la salle de bain : guide détaillé
Comment rénover du vieux carrelage sans le retirer : 99 façons de transformer votre salle de bain et votre cuisine
Revêtement mural en panneaux MDF : guide d’installation
Revêtement mural en lambris : guide étape par étape
Salle de bain : carrelage ou peinture. À quoi chacun sera-t-il confronté ?
Panneaux PVC pour murs : bon marché et efficace. Guide d’installation
Isolation des murs par l’intérieur : matériaux et technologie